Container Gardens
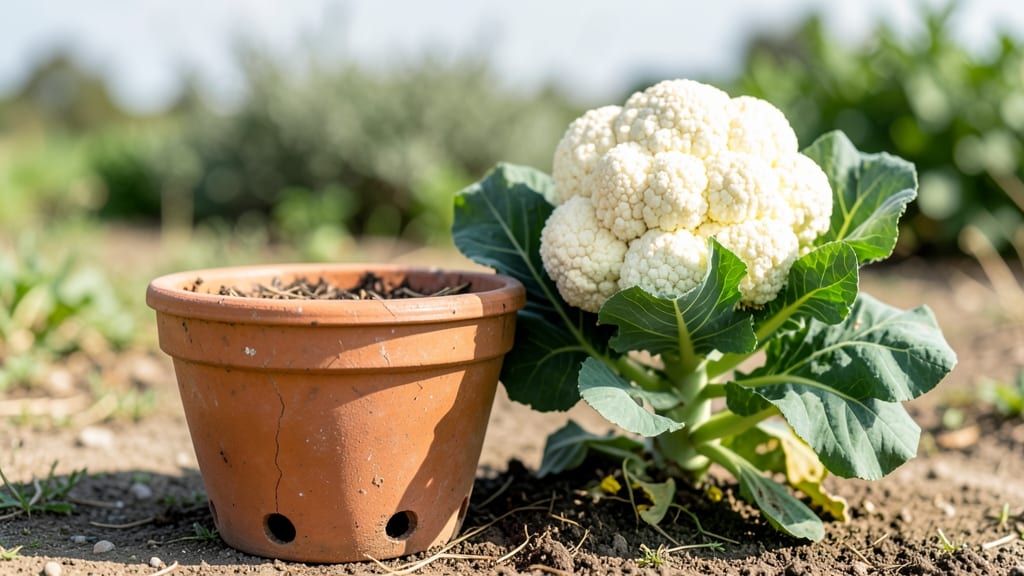
Growing cauliflower in pots proves you don’t need a backyard for bold, snow-white heads—just the right container and a sunny spot. I learned this the hard way when my first attempt in a tiny pot produced a sad, stunted plant.
The secret lies in matching pot size to the plant’s ambition: 15-gallon containers give mature plants enough room to develop those dense, curd-like heads without crowding.
Cauliflower thrives in well-draining, nutrient-rich soil mixed with compost, and it’s a sun-worshipper—6+ hours of direct light daily is non-negotiable. Water consistently to keep soil moist but not soggy, and feed every 2-3 weeks with a balanced fertilizer.
The payoff? Harvest-ready heads in 70-90 days, perfect for small spaces where every inch counts.
Here’s the game-changer: Companion planting with herbs like dill or thyme deters pests naturally, while taller plants like sunflowers shield cauliflower from harsh afternoon sun. Even in urban balconies, this method delivers restaurant-quality results—no garden center required.
Bolting from heat stress or poor soil is the biggest rookie mistake, but with the right setup, your potted cauliflower will outperform half the plants at the farmers’ market. Ready to grow heads (literally) in small spaces?
📚 In This Guide
- What you need
- Instructions
- Tips and common mistakes
- Wrapping up and next steps
What you need
- ● Containers: At least 2–3 large pots (12–18 inches in diameter) with drainage holes. Fabric grow bags or self-watering containers work too!
- ● Potting Mix: A high-quality, well-draining organic mix (avoid garden soil—it compacts!). Look for blends labeled for vegetables or container gardening.
- ● Cauliflower Seeds: Choose compact or dwarf varieties like ‘Purple of Sicily,’ ‘Snowball Y Improved,’ or ‘Romanesco’ for pots. Start with 3–5 seeds per pot (thin to 1–2 strongest seedlings).
- ● Fertilizer: Balanced starter fertilizer (e.g., 10-10-10) for seedlings.
- ● Low-nitrogen, high-phosphorus fertilizer (e.g., 5-10-10) once heads start forming.
- ● Watering Can or Hose: With a gentle spray nozzle to avoid disturbing seedlings.
- ○ Gloves & Pruners: For handling plants and trimming (optional but handy!).
- ● Grow Lights: If starting indoors or in low-light areas (12–16 hours/day).
- ● Mulch: Straw or shredded leaves to retain moisture and regulate soil temp.
- ● Plant Support: Small stakes or cages if your variety gets top-heavy.
- ● Soil pH Test Kit: Cauliflower loves pH 6.0–7.0; adjust with lime if needed.
- ● Compost or Worm Castings: For extra nutrients (mix 10–20% into potting soil).
Step-by-step guide for growing cauliflower in containers
Here’s how to coax those snowy-white heads into tight spaces without sacrificing yield.
🌱 Step 1: Select the Right Containers and Soil Mix
Cauliflower needs room to stretch its roots, so choose pots at least 12 inches deep and 18 inches wide—this gives each plant enough space to develop a sturdy root system. I prefer fabric grow bags because they allow excess moisture to evaporate while still providing structure. If using traditional pots, ensure they have multiple drainage holes to prevent waterlogging, which can rot the roots.
Fill the bottom third of the pot with coarse perlite or pumice for drainage, then add a high-quality seed-starting mix mixed with 20% compost for nutrients. Cauliflower thrives in soil that’s rich but well-draining—too much clay or compacted soil will stunt growth. Moisten the mix until it’s damp but not soggy, then let it settle for a day before planting. This pre-settling step prevents the soil from compacting further when you add the plant.
☀️ Step 2: Plant at the Correct Depth and Provide Warmth
Sow seeds ¼ inch deep, spacing them 18 inches apart in the pot—this ensures each plant has enough room to grow without competing for nutrients. If you’re starting with transplants, bury them slightly deeper than their original soil line to encourage a sturdy stem. Cauliflower seeds germinate best in soil temperatures between 60-70°F, so use a seedling heat mat if your space runs cooler. Place the pot in a warm, bright location (like a sunny windowsill or under grow lights) and keep the soil consistently moist until sprouts appear in 7-14 days.
Once seedlings emerge, remove any weak or leggy ones, leaving only the strongest 2-3 per pot. Thin carefully with scissors to avoid disturbing the roots of remaining plants. Here’s the thing—cauliflower seedlings are sensitive to temperature swings, so avoid placing them in drafty areas or near cold windows. If the soil feels cool to the touch, germination may slow or stall entirely.
💧 Step 3: Maintain Consistent Moisture and Fertility
Cauliflower is a heavy feeder, so feed every 2 weeks with a balanced liquid fertilizer (like 10-10-10) once the plants are 4-6 inches tall. I like to mix the fertilizer into the watering can to ensure even distribution. Water deeply 2-3 times per week, keeping the soil evenly moist but never waterlogged. You’ll know it’s time to water when the top inch of soil feels dry—cauliflower hates drought stress, which can cause heads to split or become bitter.
To encourage compact heads, blanch the curds when they’re about 2 inches in diameter. This means tying the outer leaves together loosely with a rubber band or twist tie to shield the head from direct sunlight. Blanch for 1-2 weeks until the head turns a uniform white. If you skip this step, the head may turn yellow or develop a tough texture. Also, watch for cabbage worms—cover plants with floating row fabric if pests appear, as cauliflower is particularly vulnerable to them.
⏰ Step 4: Harvest at Peak Maturity
Cauliflower is ready to harvest when the head is firm, compact, and reaches 6-8 inches in diameter. Use a sharp knife to cut the stem 1-2 inches below the head, leaving the base intact for any side shoots that may form. Harvest in the morning when temperatures are cooler—this preserves the head’s crispness. If the head starts to yellow or the surrounding leaves wilt, it’s past its prime and should be harvested immediately to avoid bitterness.
After harvesting, don’t toss the plant! Cauliflower often produces smaller side shoots from the base. Keep the soil moist and fertilize lightly to encourage regrowth. In cooler climates, you might get one or two more harvests before the plant peters out. If your pot is still in good condition, you can replant it with another crop like kale or broccoli, which thrive in similar conditions.
Tips & tricks for growing compact cauliflower heads in pots
Mastering container gardening for cauliflower means paying attention to details that make all the difference between a scraggly plant and a perfect head. These insights will help you maximize your small-space harvest.
Pot Selection Matters: While the instructions specify 12-inch-deep pots, I've found that adding a 5-gallon fabric grow bag gives even more root room without taking up extra space. The fabric allows excess moisture to escape while providing excellent aeration—critical for preventing root rot in containers. If using traditional pots, place them on casters so you can rotate them toward the sun as it moves throughout the day.
Soil Temperature is Non-Negotiable: The ideal soil temperature range of 60-70°F is crucial for germination, but maintaining this warmth can be tricky in cooler climates. I've had success using a seedling heat mat under pots placed on a thermostat-controlled heat pad set to 75°F. This creates a stable environment where seeds germinate reliably in 7-10 days rather than the full 14 days. Once sprouts appear, you can remove the heat mat and transition to regular care.
Thinning Technique That Preserves Plants: When thinning seedlings to 2-3 per pot, I recommend using clean, sharp scissors to snip at the base rather than pulling. This minimizes root disturbance to the remaining plants. After thinning, I like to add a light dusting of compost over the soil to prevent crusting and maintain moisture. The key is to thin early—once seedlings reach 2 inches tall—to avoid overcrowding that can lead to leggy, weak plants.
Blanching for Perfect Heads: The blanching step when curds reach 2 inches is where the magic happens for those snow-white heads. I've found that using soft garden twine instead of rubber bands allows for better airflow while still shielding the head. For extra insurance against yellowing, I'll also gently fold the largest outer leaves inward to create a natural shade. This method works particularly well in containers where airflow can be more restricted than in garden beds.
Pro Tips for Growing Cauliflower In Pots
- Mastering container gardening for cauliflower means paying attention to details that make all the difference between ...
- Pot Selection Matters: While the instructions specify 12-inch-deep pots, I've found that adding a 5-gallon fabric gro...
- Soil Temperature is Non-Negotiable: The ideal soil temperature range of 60-70°F is crucial for germination, but maint...
Frequently asked questions
Got questions about growing cauliflower in pots? You’re not alone—this veggie has its quirks! Here are answers to the most common concerns to help you grow perfect heads in small spaces.
What’s the best pot size for cauliflower?
Cauliflower needs space to spread, so aim for a pot at least 12–18 inches wide and deep. Smaller pots (under 10 inches) may stunt growth or produce tiny heads. If you’re growing multiple plants, use a larger container (20+ inches) with 12+ inches between plants for better airflow and root development.
How long does it take to grow cauliflower in pots?
From seed to harvest, cauliflower takes 70–100 days, depending on the variety. Early varieties (like ‘Snowball Y Improved’) mature in ~60 days, while larger heads (like ‘Romanesco’) can take up to 120 days. Start seeds indoors 6–8 weeks before your last frost for a head start!
Why isn’t my cauliflower forming a head?
Missing heads? Check these fixes:
- Not enough light: Cauliflower needs 6+ hours of sun daily. Move pots to a sunnier spot or use grow lights.
- Temperature stress: Heads form best in 60–70°F. If temps drop below 50°F or rise above 80°F, growth slows or stops.
- Nutrient deficiency: Feed with high-nitrogen fertilizer (like 10-10-10) every 3–4 weeks. Lack of nutrients can prevent heading.
- Overcrowding: Too many plants in one pot compete for resources. Thin seedlings to 1 plant per 12–18 inches of space.
Can I regrow cauliflower from store-bought heads?
Yes, but it’s hit or miss! Cut the head off, leaving the stem and leaves. Place the base in 1 inch of water and keep it in bright light. Roots may sprout in 1–2 weeks, but the new plant is unlikely to produce another head—it’s more of a fun experiment than a reliable method.
What’s the best way to harvest cauliflower from pots?
Harvest when the head is firm, compact, and before buds open (usually 10–14 days after the head forms). Cut the stem 1–2 inches below the head with a sharp knife or scissors. Leave the outer leaves to protect the plant—you might get a second, smaller head in 4–6 weeks!
Can I grow cauliflower in pots year-round?
Not in most climates! Cauliflower is a cool-season crop and struggles in extreme heat or frost. In warm areas, grow it in fall/winter or spring (avoid summer). In colder zones, use row covers or move pots indoors if temps drop below 30°F. Container-grown cauliflower is more flexible than in-ground plants—just monitor temps!
Wrapping up and next steps
Growing cauliflower in pots is totally doable—even for beginners! With the right container, soil, and care, you can enjoy homegrown heads in small spaces. 🌱 The key is patience, consistency, and a little extra attention to temperature and sunlight.
Now that you’re armed with tips and troubleshooting advice, why not start your first pot today?
Ready to take the next step? Pick your favorite variety, grab a pot, and dive in—your garden (and taste buds) will thank you!