Flowers
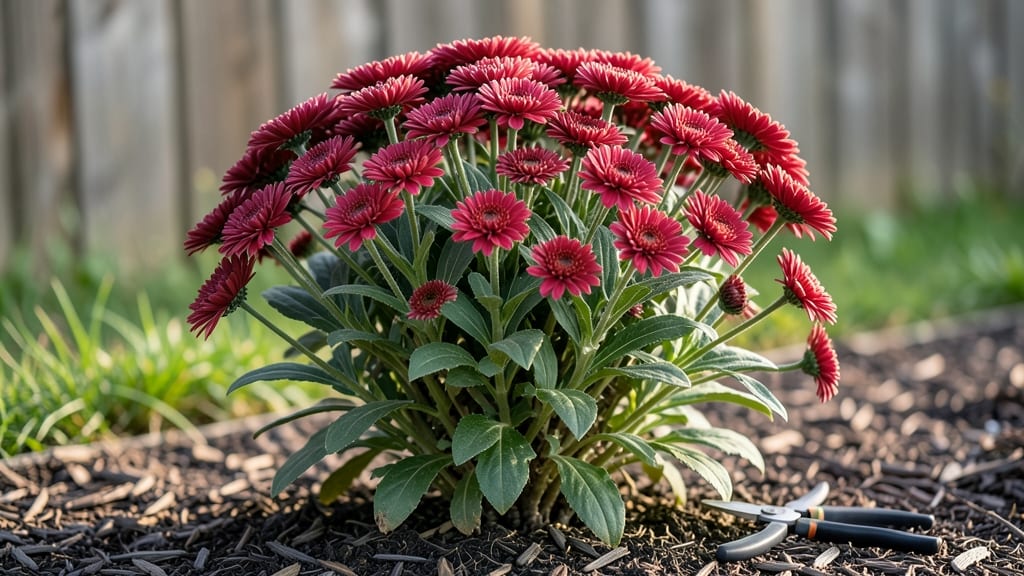
Growing big mum flowers in the Pacific Northwest means defying frost with bold, late-season color. 🌟 These chrysanthemums thrive where others falter, blooming right up until the first hard freeze—giving your garden a second chance at showstopping beauty.
The secret lies in their resilience and the right timing: plant in early spring or late summer, and watch them reward you with clusters of daisy-like blooms in shades of pink, yellow, and deep burgundy.
You’ll need well-draining soil rich in organic matter, full sun to partial shade, and consistent moisture without soggy roots. Most varieties top out at 18-36 inches tall, making them perfect for borders, containers, or cutting gardens.
The key is spacing them 12-24 inches apart—crowding leads to weak stems and fewer blooms. Prune back leggy growth in early summer to encourage bushier plants, and deadhead spent flowers to prolong the season.
By late August, your garden will burst with frost-resistant blooms that outshine summer annuals. These flowers not only survive our damp, cool climate but also attract pollinators right up to winter. The best part?
Big mums multiply easily—dig up and divide clumps every 3-4 years to keep them vigorous. With minimal effort, you’ll have a garden that stays vibrant long after other plants have faded.
Whether you’re a seasoned gardener or a PNW newbie, these varieties adapt effortlessly to our unique climate. Try ‘Pacific Giant’ for towering stems or ‘Jeana’ for compact, long-lasting blooms. The only mistake you’ll make is waiting to plant them—your garden’s late-season drama starts now.
📚 In This Guide
- What you need
- Instructions
- Tips and common mistakes
- Wrapping up and next steps
What you need
- ● Big Mums® flower plants: Choose 3–6 plants (depending on desired display size). Opt for varieties like ‘Purple Pizzazz’, ‘Berry Bliss’, or ‘Sunny Delight’ for PNW resilience.
- ● Well-draining potting soil: 1–2 cubic yards (for in-ground planting) or 10–15-gallon bags (for containers). Mix in compost (1 part compost to 3 parts soil) for nutrients.
- ○ Containers (optional but recommended for flexibility): 5–15 gallon pots with drainage holes (1 pot per plant).
- ● Pro tip: 💡 Use fabric grow bags for better root aeration in wet PNW climates.
- ● Slow-release fertilizer: 10–20 lb bag of balanced 10-10-10 or 12-12-17 (follow label for application rates).
- ● Mulch: 2–3 inches of wood chips or straw to retain moisture and protect roots from frost.
- ● Watering can or hose with adjustable nozzle: For gentle, deep watering (1–2 gallons per plant, 2–3 times per week).
- ● Garden trowel or hand shovel: For transplanting or digging holes (12–18 inches deep).
- ● Pruning shears: Sharp, sterilized shears for deadheading (spent blooms) and shaping.
- ● Gloves: Heavy-duty gardening gloves to protect against thorns (some varieties may have them!).
- ○ Sunlight meter (optional): To confirm your garden gets 6+ hours of sunlight daily—Big Mums® thrive in full sun!
- ○ Frost cloth (optional but helpful for PNW winters): Lightweight frost protection for young plants or late-season blooms.
- ● Drainage: Avoid soggy soil! Amend heavy clay soil with perlite or sand (1 part amendment to 2 parts soil).
- ● Windbreaks: Use bamboo stakes or trellises to support tall varieties (e.g., ‘Titan’ series) in breezy areas.
- ● Rainwater: Big Mums® are drought-tolerant once established, but consistent moisture is key during first 2–3 weeks after planting.
Step-by-step guide for planting frost-resilient Big Mums in the Pacific Northwest
Here's how to grow bold, long-lasting chrysanthemums that thrive in cooler climates.
🌱 Step 1: Choose the Right Varieties for Cold Climates
Select hardy chrysanthemum varieties rated for USDA Zones 5-8, like 'Pacific Giant' or 'Jeana'. These varieties resist late-spring frosts and fall temperatures down to 25°F without damage. Avoid tender tropical types—they'll bolt or rot in PNW conditions. I always check the bloom time too: early varieties (late summer) handle heat better than late ones (fall).
Look for disease-resistant labels on seed packets or plant tags. Powdery mildew thrives in PNW humidity, so skip varieties without this protection. Your local nursery will stock the best performers for your microclimate—ask for recommendations based on your elevation.
🪴 Step 2: Prepare Well-Draining Soil and Planting Sites
Big mums need fertile, well-draining soil with a pH of 6.0-7.0. Amend heavy clay soil with 2-3 inches of compost and 1 part perlite to prevent root rot. I test my soil first—PNW clay can suffocate roots if not improved. Work the amendments into the top 12 inches of soil for best results.
Choose a sunny location with at least 6 hours of direct sunlight daily. Morning sun with afternoon shade works well in hot inland PNW areas, while coastal spots can handle full sun. Space plants 18-24 inches apart—crowding invites fungal diseases. If planting in containers, use 1-gallon pots with drainage holes and a soil mix designed for perennials.
☀️ Step 3: Plant at the Right Time for Seasonal Success
For spring planting, wait until after the last frost date (usually mid-May in most of the PNW) and soil temperatures reach 60°F. Plant bare-root plants in early spring or container-grown ones in late spring. I always soak roots in lukewarm water for 10 minutes before planting to reduce transplant shock.
For fall planting, aim for 6-8 weeks before your first frost (typically mid-August in the PNW). This gives roots time to establish before winter. Water deeply once a week after planting to encourage root growth. Mulch with 2-3 inches of straw to protect roots from temperature swings—this is critical in our rainy, unpredictable climate.
💧 Step 4: Water and Fertilize for Long-Lasting Blooms
Water deeply 1-2 times per week, aiming for 1 inch of water total. Let the top 2 inches of soil dry between waterings to prevent root rot. I use a soaker hose in the morning to avoid wetting foliage, which reduces fungal risks. Big mums are drought-tolerant once established, but consistent moisture during bud formation ensures vibrant blooms.
Fertilize every 4-6 weeks with a balanced, slow-release fertilizer (10-10-10 or similar). Stop fertilizing 6-8 weeks before the first frost to harden off plants for winter. I also add 1 tablespoon of bone meal at planting time for phosphorus, which boosts root and flower development. Avoid high-nitrogen fertilizers—they produce leafy growth at the expense of blooms.
✂️ Step 5: Prune and Prepare for Winter Survival
Deadhead spent blooms weekly to encourage more flowers. Cut back stems by half after the first flush of blooms to promote bushier growth. I always sterilize my pruners with rubbing alcohol between cuts to prevent spreading disease. In late fall, cut back stems to 2-3 inches above ground level and apply 3-4 inches of mulch to insulate roots.
Big mums are perennial in Zones 5-8, but young plants may need winter protection. Wrap tender varieties with burlap or use frost blankets during hard freezes. In Zone 4, treat them as annuals or dig up and store tubers indoors. Here's the thing—healthy roots are the key to spring regrowth, so don't skimp on mulch or fall care.
Tips & tricks for perfect frost-resilient Big Mums
Growing big mums in the Pacific Northwest takes a few strategic tweaks to our climate's quirks. These insights will help you avoid common pitfalls and maximize those bold blooms.
Variety Selection Matters: When choosing your hardy varieties like 'Pacific Giant' or 'Jeana', pay special attention to the bloom time labels. Early bloomers (late summer) handle our summer heat better than fall varieties, which often struggle with the transition from warm days to chilly nights. I've learned this the hard way—once planted late-blooming varieties that petered out before our first frost. Also, check for disease resistance specifically labeled for powdery mildew, which thrives in our humidity. This one detail saved my entire garden last season.
Soil Preparation is Non-Negotiable: That 6.0-7.0 pH range and 2-3 inches of compost aren't just suggestions—they're essential for preventing root rot in our heavy clay soils. I test my soil every year and always work the amendments into the top 12 inches, not just surface level. For container growers, use a specialized perennial mix with drainage holes—big mums hate soggy feet. The difference between thriving plants and struggling ones often comes down to this soil prep step.
Timing is Everything: Those 6 hours of sunlight are critical, but location matters too. Coastal areas can handle full sun, while inland spots benefit from morning sun with afternoon shade. I've found that spacing plants 18-24 inches apart makes all the difference in preventing fungal diseases. And remember, the 10-minute lukewarm water soak before planting reduces transplant shock dramatically—don't skip this step, even with container-grown plants.
Winter Protection Secrets: That 3-4 inches of mulch in late fall isn't just for insulation—it's a moisture barrier too. I've seen plants survive -10°F with proper mulching, but without it, even hardy varieties can suffer. For Zone 4 growers, consider digging up tubers and storing them in dry peat moss over winter. The key is protecting those roots, which are the foundation for next year's blooms.
Pro Tips for Big Mums Flowers
- Growing big mums in the Pacific Northwest takes a few strategic tweaks to our climate's quirks.
- Variety Selection Matters: When choosing your hardy varieties like 'Pacific Giant' or 'Jeana', pay special attention to the bloom time labels.
- Soil Preparation is Non-Negotiable: That 6.0-7.0 pH range and 2-3 inches of compost aren't just suggestions—they're essential for preventing root rot in our heavy clay soils.
Frequently asked questions
Got questions about growing Big Mums flowers in the Pacific Northwest? You’re not alone! Here are some of the most common queries—plus quick, practical answers to help you thrive.
What’s the best time to plant Big Mums in the PNW?
For frost-resistant varieties like Big Mums, plant after the last frost (typically mid-to-late May in the PNW). Start seeds indoors 6–8 weeks earlier if you’re impatient! Harden off seedlings before transplanting to avoid shock. Pro tip: Use row covers for early starts if night temps dip below 50°F.
Can Big Mums survive PNW winters?
Yes! Big Mums (Gerbera jamesonii) are hardy to USDA Zone 7–10, but PNW winters can be tricky. Cut back foliage to 2–3 inches in fall, mulch heavily, and protect with burlap wraps if temps drop below 20°F. Bonus: Some varieties (like ‘Terracotta’) tolerate light frost better than others.
How much sun do Big Mums need in cloudy PNW summers?
Big Mums crave full sun (6+ hours/day), but in the PNW’s partial shade, aim for at least 4–5 hours of direct light. Place them in the sunniest spot (e.g., near a south-facing window or patio). If flowers fade, supplement with a grow light or relocate. Warning: Too little sun = leggy stems and fewer blooms.
What pests should I watch for in PNW gardens?
Common culprits include aphids, spider mites, and slugs. Spray leaves with neem oil for soft-bodied pests, and set out beer traps for slugs. Prevention tip: Space plants 12–18 inches apart for airflow, and remove spent blooms to deter infestations.
Why aren’t my Big Mums blooming?
Check these fixes:
- Light: Move to sunnier spot (PNW shade can stunt blooms).
- Water: Keep soil consistently moist (not soggy).
- Fertilizer: Use a balanced 10-10-10 formula every 4–6 weeks.
- Deadheading: Snip spent blooms to encourage new flowers.
Are there PNW-friendly alternatives to Big Mums?
If Big Mums struggle in your microclimate, try these frost-tolerant PNW favorites:
- Black-Eyed Susans (Rudbeckia) – Drought-resistant, Zone 3–9.
- Daylilies (Hemerocallis) – Tough, reblooming, Zone 3–10.
- Pacific Coast Iris – Thrives in coastal climates, Zone 5–9.
Wrapping up and next steps
Growing Big Mums flowers in the Pacific Northwest is not only rewarding but also a fantastic way to add vibrant color and resilience to your garden.
These hardy, frost-tolerant blooms thrive with the right care, and soon, your outdoor space will be bursting with cheerful faces—just like the flowers themselves! 🌸
Now that you’re armed with all the tips and tricks, roll up your sleeves and get planting! Start by choosing your favorite varieties, prepping your soil, and giving these beauties the love they deserve.
Before you know it, your garden will be the talk of the neighborhood—and you’ll be the proud gardener behind it all.
💡 Pro tip: Snap a photo of your first bloom and share it with fellow gardeners for extra inspiration!