Lawn
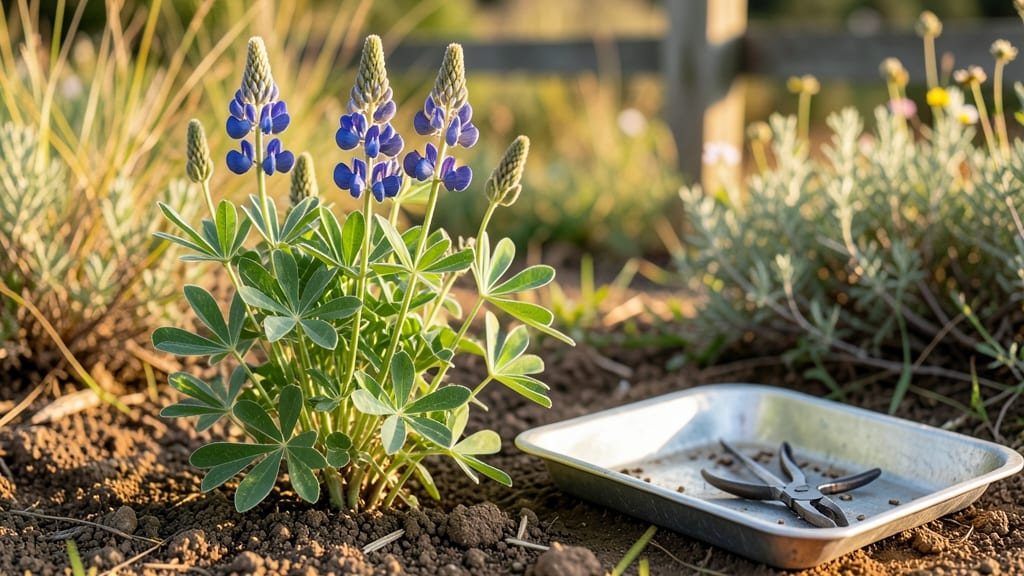
Flower seed pods hold the secret to multiplying your garden’s beauty without spending a dime. 🌻 I’ve learned that the right timing and handling can turn those dried husks into next year’s showstopper blooms—whether it’s sunflowers, marigolds, or nasturtiums.
The trick is knowing exactly when to harvest, how to dry them properly, and which pods even contain viable seeds.
You’ll need just a few simple tools: sharp scissors, paper bags for drying, and a cool, dark spot for storage. Most seed pods mature when they turn brown and papery, but some—like poppies—release seeds at the slightest touch.
Harvesting at the right stage ensures high germination rates and saves you from wasted effort.
Once dried, these seeds can last for years if stored correctly in airtight containers. Imagine planting a few sunflower seeds this fall and watching them burst into 6-foot-tall giems next summer—all from pods you collected yourself.
The best part? Many of these flowers, like nasturtiums, even produce edible seeds or pods for culinary use.
This method works for both ornamental and edible flowers, adapting to any garden size or climate. Whether you’re saving heirloom varieties or just want free plants, seed pods are your ticket to a self-sustaining garden. Let’s get those blooms multiplying!
📚 In This Guide
- What you need
- Instructions
- Tips and common mistakes
- Wrapping up and next steps
What you need
- ● Flower seed pods – Choose 1–2 varieties (e.g., Lupine, Milkweed, or Poppy). Buy from a trusted supplier or harvest from mature plants (ensure they’re fully dry and brown).
- ● Seed-starting mix – 1–2 gallons of sterilized, well-draining potting soil (avoid garden soil—it’s too dense!). Look for a mix labeled "seed-starting" or "organic potting soil."
- ● Containers – Small pots (4–6 inches deep) – 1–2 per seed pod type, or
- ● A seed tray with individual cells (for organized germination).
- ● Watering can or spray bottle – A gentle spray nozzle prevents disturbing seeds.
- ● Clear plastic wrap or humidity dome – A 12"x12" sheet or a store-bought dome to retain moisture.
- ● Plant labels – Wooden or biodegradable labels (write seed type + date planted).
- ○ Heat mat – A small seedling heat mat (optional for cold climates; keeps soil at 70–75°F).
- ● Grow lights – A full-spectrum LED bulb (12–16 hours/day) if natural light is limited.
- ● Tweezers – For delicate seed pods (e.g., Delphinium or Foxglove).
- ● Fertilizer – A balanced, water-soluble fertilizer (5-10-5 ratio) for after germination.
- ● 📅 Timing: Start seeds indoors 6–8 weeks before your last frost date (find yours here).
- ● 🌡️ Temperature: Ideal soil temp for most seed pods: 65–75°F (use a thermometer if unsure).
- ● 💧 Water: Keep soil consistently moist but not soggy (overwatering = mold!).
- ● 🌿 Light: Place containers in a bright, indirect light spot (south-facing window or grow lights).
Step-by-Step guide to maximizing flower seed pod germination
Here’s how to break the germination speed barrier for those stubborn seed pods.
🌱 Step 1: Prep Seed Pods for Faster Sprouting
Flower seed pods often have tough outer shells that slow germination. I like to soak them in lukewarm water for 12-24 hours before planting. This softens the pod’s protective layer, letting moisture reach the seed inside. Place them in a bowl of water and leave them undisturbed—you’ll see the pods begin to swell slightly after a few hours.
Here’s the thing—don’t skip this step. Seed pods from plants like cosmos, cleome, or snapdragons can take two weeks or longer to germinate if you plant them dry. The soak mimics natural rainfall and tricks the seed into thinking spring has arrived. After soaking, gently rub the pods between your fingers to loosen the outer shell, but don’t crush the seed inside.
💧 Step 2: Plant in Warm, Moist Conditions
Fill your seed-starting trays with sterile seed-starting mix (never garden soil—it’s too dense and may harbor fungi). Press the mix down lightly so it’s firm but still airy. The goal is to create a cozy, damp environment where seeds can germinate without drying out. Moisten the mix until it feels like a wrung-out sponge—damp but not soggy.
Plant the prepped seed pods ¼ inch deep, spacing them 1-2 inches apart in the tray. I tap the seed packet gently to release one pod at a time—planting too many in one hole leads to weak, crowded seedlings. Cover the tray with a clear plastic dome or plastic wrap to trap warmth and humidity. Place it in a spot where the soil stays at 70-75°F—a seedling heat mat helps if your home runs cooler.
☀️ Step 3: Monitor Moisture and Light Without Overdoing It
Check the tray daily, but resist the urge to water. The dome traps enough moisture that the soil should stay evenly damp without intervention. You’ll know it’s right when the surface looks slightly dark but not glistening. If condensation forms inside the dome, lift it for 10-15 minutes to let excess moisture escape—trapped humidity invites damping-off disease, which collapses seedlings overnight.
Once the first green shoots appear (usually in 5-14 days, depending on the pod), remove the dome immediately. Seedlings need bright, indirect light right away to prevent them from stretching leggily toward any window. A grow light positioned 2-4 inches above the tray ensures even growth. Watch for the first true leaves (the second set after the initial cotyledons)—that’s your signal to start fertilizing lightly with a diluted balanced liquid fertilizer.
⏰ Step 4: Thin and Transplant for Stronger Blooms
When seedlings have 2-3 sets of true leaves, thin the strongest ones to 6 inches apart in the tray or transplant them into individual pots. This prevents competition for nutrients and air circulation, which reduces disease risk. Handle seedlings by their leaves, not the stems—you’ll avoid damaging the delicate roots. If transplanting, bury them up to their first set of leaves to encourage stronger root growth.
Real talk: Seed pods often produce finicky seedlings. If you notice any yellowing leaves or stunted growth, it’s usually a sign of overwatering or poor light. Adjust your routine—water only when the top inch of soil feels dry, and move the tray closer to the light if stems look stretched. With patience, you’ll have robust seedlings ready to bloom in 8-12 weeks, depending on the variety.
Tips & tricks for perfect flower seed pod germination
These insider strategies will help you break through the germination speed barrier with your flower seed pods.
Soaking Strategy: For the 12-24 hour soaking period in Step 1, I recommend using a bowl with just enough lukewarm water to fully submerge the pods. Add a drop of liquid dish soap to reduce surface tension—this helps water penetrate even the toughest seed pod shells more effectively. After soaking, test one pod by gently squeezing it; if it feels slightly pliable but still holds its shape, it's ready for planting. Over-soaking beyond 24 hours can cause the pods to become mushy, which may damage the seed inside.
Temperature Matters: The 70-75°F soil temperature in Step 2 is crucial for consistent germination. If your home runs cooler, place your seed-starting tray directly on top of a seedling heat mat set to maintain that ideal range. For warmer climates, you might need to move the tray to a shaded area during peak afternoon heat—extreme temperatures can shock the pods and delay sprouting. A simple thermometer placed in the soil will help you monitor conditions without guesswork.
Lighting Hack: When you're ready to position that grow light in Step 3, I've found that seedlings actually thrive better with 14-16 hours of light per day rather than the standard 12-hour cycle. Set a timer for your grow light to automatically turn on at dawn and off at dusk—this mimics natural daylight patterns and prevents leggy growth. The 2-4 inch distance recommendation is perfect for most LED grow lights, but always adjust based on your specific bulb's intensity.
Transplanting Timing: In Step 4, when thinning to 6 inches apart, I've learned that the absolute best time to transplant is in the early morning on a cloudy day. This gives seedlings time to recover from transplant shock before the heat of the day. Water thoroughly before and after transplanting to reduce stress—this helps the roots establish more quickly in their new environment. The 2-3 sets of true leaves guideline is perfect, but don't hesitate to transplant slightly earlier if you're dealing with crowded conditions.
Pro Tips for Flower Seed Pods
- These insider strategies will help you break through the germination speed barrier with your flower seed pods.
- Soaking Strategy: For the 12-24 hour soaking period in Step 1, I recommend using a bowl with just enough lukewarm water to fully submerge the pods.
- Temperature Matters: The 70-75°F soil temperature in Step 2 is crucial for consistent germination.
Frequently asked questions
Got questions about flower seed pods?
You’re not alone! Here are answers to the most common queries to help you grow confidently—no guesswork required.
How long do flower seed pods take to germinate?
Germination time varies by plant type, but most flower seed pods sprout within 7–21 days under ideal conditions (warm soil, consistent moisture, and sunlight). Check the seed packet for specifics—some delicate blooms (like snapdragons) may take longer. Pro tip: Use a heat mat if your space is chilly!
Why aren’t my flower seed pods sprouting?
Common culprits include old seeds (test viability by soaking in water), incorrect moisture (too dry or soggy), or temperature issues (too cold). Ensure pods are planted at the right depth (usually 2x their width) and keep soil consistently damp (not waterlogged). If nothing emerges after 30 days, try fresh seeds!
Can I speed up germination for flower seed pods?
Yes! Pre-soak pods in lukewarm water for 4–12 hours to kickstart hydration. For stubborn seeds, try stratification (mimicking winter cold) or a seedling heat mat (70–85°F). Avoid overcrowding—thin seedlings early to prevent competition. Pro tip: A clear plastic dome traps humidity and warmth!
What’s the best way to store leftover flower seed pods?
Store pods in a cool, dry, dark place (like a sealed envelope or airtight container with silica gel). Label with the plant type and date! Avoid refrigeration unless specified—some pods (like poppies) need dry, room-temperature storage. Check viability yearly by testing a few seeds.
Are there easy flower seed pods for beginners?
Start with self-seeding annuals like cosmos, zinnias, or marigolds—they’re hardy and sprout reliably. Perennials like black-eyed Susans or coneflowers are also beginner-friendly. Avoid finicky varieties (e.g., orchids) until you’ve mastered basics like moisture control!
Can I reuse flower seed pods from last year’s plants?
It depends! Many annuals (e.g., sunflowers, nasturtiums) produce viable seeds, but perennials may not. Test a few pods—if they’re dry, hard, and intact, they’re likely good. Discard soft, shriveled, or moldy pods. Pro tip: Harvest seeds when pods are fully brown but before they split open!
Wrapping up and next steps
From understanding the unique needs of flower seed pods to mastering the perfect germination environment, you now hold the keys to nurturing fast, flawless blooms right from your backyard! 🌱 Whether you’re reviving dried pods or sowing fresh seeds, patience and consistency are your best allies. Don’t let small setbacks discourage you—every gardener starts somewhere!
Ready to watch your garden transform? Start small—pick one or two seed pods to experiment with this week, and soon, you’ll be sharing your bountiful blooms with neighbors (or even selling cuttings!). Happy planting! 🌸