Flowers
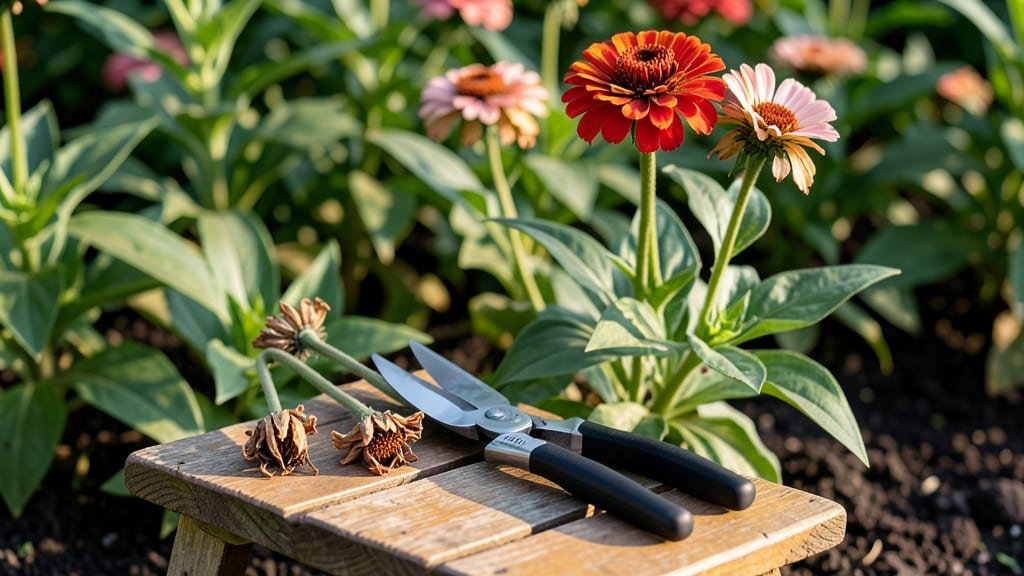
Drying zinnia flowers captures their vibrant colors and delicate petals long after summer fades. 🌻 I learned the hard way that wilting doesn’t mean goodbye—when dried properly, zinnias become stunning winter decor that rivals fresh blooms.
The secret lies in harvesting at peak freshness and choosing the right method for your space and time.
You’ll need zinnias in full bloom, scissors, and either a dry, dark spot or silica gel, depending on your preferred technique. Air-drying takes patience but preserves the most natural look, while silica gel speeds things up for instant results.
My first batch took 2-3 weeks to fully dry, but the wait was worth every papery petal.
What you end up with are flowers that hold their shape and color for months, perfect for wreaths, bouquets, or framed arrangements. The deep reds, sunny yellows, and soft pinks stay rich and vibrant, like a summer memory frozen in time.
Once dry, they’ll last through holidays and beyond—no wilting, no fading.
This method works for any zinnia variety, from dinnerplate-sized blooms to tiny pom-poms. Whether you’re crafting or simply preserving garden beauty, dried zinnias bring joy long after the growing season ends. Let’s get started with the step-by-step process that keeps them stunning.
📚 In This Guide
- What you need
- Instructions
- Tips and common mistakes
- Wrapping up and next steps
What you need
- ● Fresh zinnia flowers: Choose fully bloomed, healthy zinnias (avoid wilting or damaged petals). Quantity: 10–20 stems (or more, depending on your drying method).
- ● Sharp pruning shears or scissors: Clean, sterilized tools to cut stems at a 45° angle for better water absorption.
- ● Drying method of choice: Air-drying: Brown paper bags, newspaper, or a well-ventilated drying screen.
- ● Silica gel: Food-grade silica gel (like Dry & Keep or Instant Drying Crystals). Quantity: Enough to fully submerge small flowers or layer around larger blooms.
- ● Microwave or oven: For quick-drying (low heat, 170–200°F/77–93°C).
- ○ Rubbing alcohol (70% or higher): Optional but helpful for removing sap or pests from stems.
- ● Wire or floral tape: For reinforcing stems when arranging.
- ● Spray adhesive or glue dots: To secure petals in place for wreaths or crafts.
- ● Preservative spray: Like Krylon Preservation Spray to extend color vibrancy.
- ● Drying tray or egg carton: For organizing small flowers during air-drying.
Step-by-step instructions for preserving zinnia blooms
Here's how to transform your garden's brightest blooms into lasting winter decorations.
🌿 Step 1: Harvest at Peak Freshness
Pick zinnias in the early morning when petals are fully unfurled and dew has evaporated. Use clean, sharp pruners to snip stems at a 45-degree angle about 2 inches below the bloom. This creates a larger surface area for water uptake and prevents rot.
Choose fully open flowers with vibrant petals—buds won't dry properly. I like to harvest zinnias when they're about 70-80% open for the best texture and color retention. Avoid flowers with brown edges or wilting petals, as they won't dry well.
☀️ Step 2: Prepare for Drying
Remove any leaves attached to the stems since they can harbor moisture and promote mold during drying. Bundle 5-7 stems together with a rubber band or twist tie, leaving 2-3 inches of stem exposed at the top. This creates airflow around the blooms while keeping stems intact.
Here's the thing—you have two drying methods: air-drying or silica gel. For air-drying, hang bundles upside down in a dark, dry, well-ventilated space like a closet or attic with 50-60% humidity. For faster results (about 2 weeks), use the silica gel method by placing stems in a container with 2-3 inches of silica gel, leaving only the blooms exposed.
⏰ Step 3: Monitor and Complete Drying
Check your drying zinnias every 3-4 days. For air-drying, they're ready when petals are completely dry and crisp to the touch (usually 3-4 weeks). For silica gel, they'll be dry in 7-10 days. Gently remove flowers from bundles or silica gel—petals should crumble slightly when touched but not fall apart.
If you notice any mold or discoloration during drying, remove those stems immediately. The key is patience—rushing the process can leave flowers brittle or faded. Once fully dry, store blooms in paper envelopes or breathable fabric bags away from direct sunlight to preserve their color.
🪴 Step 4: Display Your Preserved Blooms
Arrange dried zinnias in low-light areas like mantels, shelves, or wreaths. Their papery texture makes them perfect for craft projects, potpourri, or framed arrangements. I like to mix them with other dried flowers like baby's breath or statice for added dimension.
Real talk: Dried zinnias will lose some vibrancy over time, but their rustic charm adds a unique touch to winter decor. For longer-lasting color, consider spraying them lightly with hairspray before arranging—this locks in their hue and adds a subtle sheen.
Tips & tricks for perfectly preserved zinnia blooms
Transforming zinnias into lasting winter decorations takes patience—but these little tricks make all the difference.
Harvest Timing: The early morning is your best friend for harvesting zinnias. This is when dew has evaporated but the flowers haven't yet faced the day's heat. I've learned the hard way that harvesting after midday can lead to wilting before you even start the drying process. Aim for that sweet spot between 6-8 AM for the freshest, most vibrant blooms that'll dry beautifully.
Bundle Size Matters: When you're bundling those 5-7 stems together, don't be tempted to pack them too tightly. You want just enough pressure to hold them together while still allowing that crucial airflow around each bloom. I've seen too many batches where crowded bundles led to uneven drying and mold spots. Think of it like giving each flower its own personal space to breathe during the drying process.
Drying Environment Secrets: For air-drying, your closet or attic needs to be both dark and dry—but here's what nobody tells you: add a small packet of silica gel or even uncooked rice to the space to help maintain that 50-60% humidity range. I keep a moisture meter handy to check levels, especially during humid seasons. This simple addition can cut your drying time by up to 30% without compromising quality.
Silica Gel Safety: If you're using the silica gel method, here's what I wish I knew sooner—always wear gloves when handling the gel. The tiny particles can irritate skin and eyes, and trust me, you don't want to discover that while trying to remove your perfectly dried zinnias. Also, use a container with drainage holes if possible to prevent moisture buildup at the bottom that could encourage mold growth.
Pro Tips for Drying Zinnia Flowers
- Transforming zinnias into lasting winter decorations takes patience—but these little tricks make all the difference.
- Harvest Timing: The early morning is your best friend for harvesting zinnias.
- Bundle Size Matters: When you're bundling those 5-7 stems together, don't be tempted to pack them too tightly.
Frequently asked questions
Got questions about preserving your zinnias? Here are some of the most common ones—and their answers—to help you dry flowers like a pro!
How long does it take to dry zinnia flowers?
Drying time depends on the method: air-drying takes 2–4 weeks (hanging upside down in a dark, dry spot), while oven-drying (160°F/71°C for 1–3 hours) speeds it up. Microwave drying (1–2 minutes on low) is fastest but requires caution. Test petals for crispness—they’re ready when they crumble easily!
Can I dry zinnias too fast?
Yes! Rushing the process (like high heat or microwaving too long) can cause petals to turn brown or brittle. For oven/microwave methods, monitor closely and use low heat. Air-drying is the safest bet for beginners—patience ensures vibrant, long-lasting blooms!
What if my zinnias mold or smell bad?
Mold or funky odors mean moisture is still trapped. If this happens, start over with fresh flowers and ensure your drying area is well-ventilated and dry. Avoid humid spaces (like bathrooms) and check for pests like spider mites before drying.
Can I dry zinnias without stems?
For flat drying, lay petals between parchment paper or in a flower press for 1–2 weeks. This works great for crafts or pressed frames. Just skip the stems—focus on flat, even petals for the best results.
What’s the best way to store dried zinnias?
Keep them in a cool, dark place (like a paper bag or airtight container) with a silica gel packet to absorb moisture. Avoid plastic alone—it traps humidity! Dried zinnias last 1–2 years if stored properly, perfect for winter bouquets or potpourri.
Wrapping up and next steps
Drying zinnia flowers is a rewarding way to preserve their vibrant beauty and extend their life beyond the growing season.
Whether you choose air-drying, silica gel, or microwave methods, the process is simple and allows you to enjoy your flowers year-round. Now that you’re equipped with the know-how, why not gather your zinnias and start preserving them today? 🌸✨
Ready to create your own floral keepsakes? Pick a method that suits your style and get creative with arranging your dried zinnias in wreaths, bouquets, or framed art!