Flowers
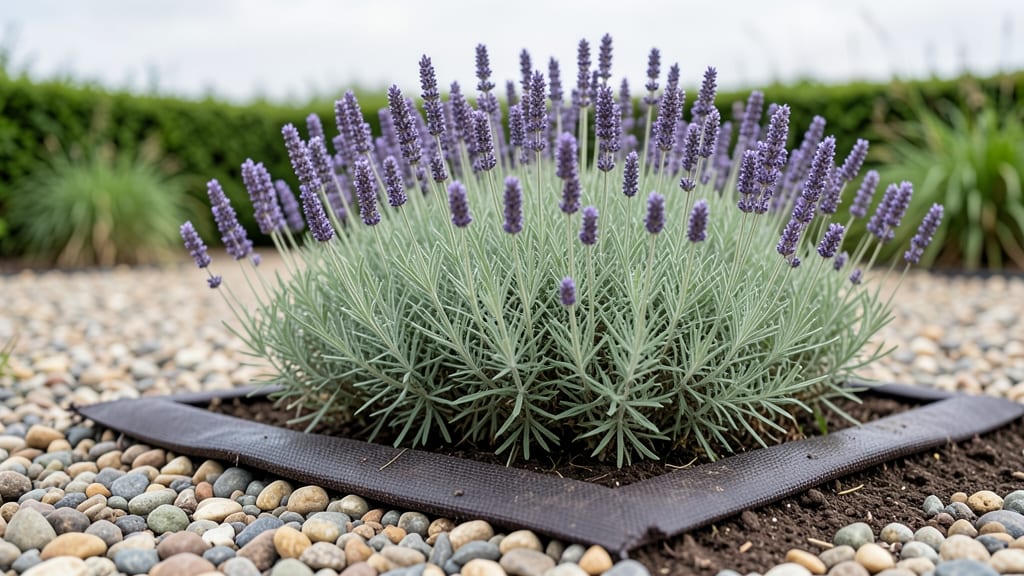
My flower beds with gravel transformed from muddy messes to dreamy, low-maintenance displays that stay lush year-round. The secret? Gravel isn’t just for drainage—it’s a game-changer for weed control, soil health, and even winter interest.
I swapped heavy mulch for pebbles after my first soggy spring, and the difference was immediate: no more compacted soil, fewer weeds, and plants that thrive in well-draining conditions.
You’ll need crushed gravel (3/4-inch size), a landscape fabric layer, and plants that love good drainage—think lavender, sedum, or ornamental grasses. The installation takes about 2 hours for a 4x8-foot bed, and the results last for seasons.
Gravel beds also stay cooler in summer, reducing stress on heat-sensitive plants like salvias or yarrow.
What you end up with is a clean, modern look that requires minimal weeding and watering. The gravel’s texture contrasts beautifully with soft perennials, and in winter, it adds structure when foliage fades.
Plus, the stones stay in place year after year—no replenishing like mulch. Ready to see how easy this can be?
Works for sunny borders, container spills, or even small urban gardens. The key is choosing the right gravel color and plant palette to tie it all together. Let’s get started with the basics!
📚 In This Guide
- What you need
- Instructions
- Tips and common mistakes
- Wrapping up and next steps
What you need
- ● Gravel: 3–4 inches of pebbles (¾"–1½") or decorative gravel (e.g., river rock, lava rock, or crushed stone). Quantity: ~1 cubic yard per 100 sq. ft. of bed.
- ● Landscape fabric: Heavy-duty, weed-blocking fabric (30–45 lb. test weight). Size: Slightly larger than your bed to extend edges.
- ○ Soil or mulch: 2–3 inches of topsoil or organic mulch (optional, for plant roots).
- ● Plants: Drought-tolerant perennials, succulents, or ornamental grasses (e.g., lavender, sedum, or yucca). Quantity: Varies by spacing (check plant tags!).
- ● Shovel or spade
- ● Garden rake (for leveling)
- ● Wheelbarrow (for hauling gravel)
- ● Measuring tape & string (to mark bed edges)
- ● Gloves & knee pads (for comfort!)
- ○ Optional: Edging tool, landscape staples (to secure fabric), and a tamper (for compacting gravel).
- ● Clear the area of weeds, grass, or debris.
- ● Check for underground utilities (call 811 if unsure!).
- ● Choose a sunny or partially shaded spot (most gravel beds thrive in full sun).
- ● Pro tip: Sketch a simple design first—gravelfy a winding path or frame a focal point like a tree! 🎯
How to create stunning gravel flower beds for effortless drainage
This approach transforms waterlogged spots into vibrant, low-maintenance displays that thrive year-round.
Select and Prepare the Perfect Location
Choose a site with natural drainage or one where you can easily amend the soil. Gravel beds perform best in areas where water pools after rain, as the stones create instant drainage channels. Test your spot by digging a 6-inch deep hole—if water lingers for more than an hour, this is your ideal location.
Clear the area of grass, weeds, and debris using a garden fork or shovel. I like to work in 4-foot by 4-foot sections for manageable control. Remove any large rocks or roots that might interfere with the gravel layer. A weed barrier fabric isn’t strictly necessary, but if you’re dealing with aggressive weeds, lay down a landscape fabric before adding gravel to suppress regrowth.
Build the Base for Optimal Drainage
Start by creating a 4-inch layer of coarse gravel at the bottom of your prepared bed. This layer acts as the primary drainage foundation, preventing water from pooling around plant roots. I use ¾-inch to 1-inch washed river rock for this base—it’s large enough to allow water to flow freely but small enough to stay in place.
Spread the gravel evenly across the entire area, using a rake to create a smooth, level surface. Tap the edges lightly with a board to settle the stones and eliminate gaps. This step is critical: uneven bases lead to water pooling in low spots, which defeats the purpose of a gravel bed. For larger beds, consider renting a plate compactor to ensure maximum stability.
Layer Soil and Plants for a Natural Look
Next, add a 2-inch layer of high-quality topsoil mixed with compost (about 20% compost by volume) to create a nutrient-rich growing medium. This layer sits directly on top of the gravel, providing a stable base for your plants while still allowing excess water to drain away. I like to blend in a handful of slow-release fertilizer to give new plants a strong start.
Plant your flowers directly into this soil layer, spacing them according to their mature size. For a natural, low-maintenance look, I recommend drought-tolerant perennials like lavender, sedum, or Russian sage. These plants thrive in well-drained conditions and require minimal watering once established. Water deeply after planting to help the soil settle around the roots.
Add Decorative Gravel for Aesthetic Appeal
Choose a decorative gravel that complements your garden’s color scheme. Smaller stones, like pebbles or crushed granite, work well for filling the spaces between plants while maintaining drainage. Spread the gravel evenly, using a ¼-inch to ½-inch layer, and rake it gently to create a uniform surface. Avoid compacting this top layer—it should remain loose to allow water to penetrate.
For a polished finish, consider adding a border of larger stones or bricks to contain the gravel and define the bed. This step isn’t just about looks; it also helps prevent gravel from spreading into surrounding areas. Mulch isn’t necessary in gravel beds, but you can add a thin layer of orchid bark around individual plants to retain a bit more moisture for their roots.
Maintain with Minimal Effort
Gravel beds require far less upkeep than traditional flower beds. Water deeply once a week during the first growing season to help roots establish, then reduce to every 2-3 weeks once plants are mature. The gravel helps regulate soil temperature, reducing the need for frequent watering even during heatwaves.
Weed control is effortless—simply pull any weeds that emerge by hand, as they won’t have the deep root systems to compete with established plants. Top off the gravel layer annually if it shifts or settles, and replenish mulch around plants as needed. With proper planning, these beds will remain vibrant and low-maintenance for years with minimal intervention.
Tips & tricks for perfect gravel flower beds
Creating stunning gravel flower beds isn't just about drainage—it's about crafting a foundation that lasts. Here are the details that make all the difference between a good bed and one that truly thrives.
Location Intelligence: The 6-inch deep test hole reveals more than just drainage—it shows soil composition. Sandy soil drains faster, while clay holds moisture longer. If your test hole drains within 30 minutes, you've got perfect conditions. For slower-draining areas, consider adding a deeper gravel base layer (up to 6 inches) to create even more effective drainage channels.
Gravel Layer Precision: When building that critical 4-inch base layer of coarse gravel, use a level to ensure perfect flatness. I've found that even a slight slope (1/4 inch per foot) can prevent water pooling in low spots. For larger beds, renting a vibrating plate compactor for 15-20 minutes will eliminate air pockets and create a more stable foundation that won't settle over time.
Soil Mix Mastery: That 2-inch layer of topsoil-compost mix (20% compost) is your plant's lifeline. For optimal results, sift the compost through a 1/4-inch mesh screen to remove large chunks that could create air pockets. Adding a handful of slow-release fertilizer per square foot gives plants a 3-4 month nutrient boost without risking over-fertilization.
Plant Selection Strategy: While drought-tolerant perennials are ideal, you can incorporate 20-30% annuals for seasonal color bursts. Just be prepared to replace these every year. For a textural contrast, intersperse succulents like sedum with ornamental grasses—their different heights create visual interest while maintaining the gravel bed's low-maintenance nature.
Pro Tips for Flower Beds With Gravel
- Creating stunning gravel flower beds isn't just about drainage—it's about crafting a foundation that lasts. Here are ...
- Location Intelligence: The 6-inch deep test hole reveals more than just drainage—it shows soil composition. Sandy soi...
- Gravel Layer Precision: When building that critical 4-inch base layer of coarse gravel, use a level to ensure perfect...
Frequently asked questions
Got questions about creating or maintaining flower beds with gravel? You’re not alone! Here are some of the most common concerns—plus straightforward answers to keep your garden looking sharp with minimal fuss.
What’s the best gravel size for flower beds?
For drainage and aesthetics, opt for pebbles (3/8" to 1") or small crushed stone (3/16" to 1/2"). Larger gravel (1"–2") works for deep beds but can look harsh near delicate flowers. Avoid fine gravel—it compacts and clogs drainage.
Do I need to add soil over the gravel?
Yes! Gravel alone won’t support plants—cover it with 4–6 inches of high-quality potting mix or native soil. This creates a root-friendly zone while letting excess water drain. Skip the soil, and your flowers will struggle to thrive.
How often should I water flower beds with gravel?
Water deeply 2–3 times per week in dry climates (less in rain-prone areas). Gravel drains fast, so check soil moisture 2" down—if it’s dry, it’s time to water. Drip irrigation or soaker hoses work best to avoid runoff.
Can I use mulch with gravel flower beds?
Apply 2–3 inches of organic mulch (like bark or straw) around plants to retain moisture and suppress weeds. Just avoid piling mulch directly against stems to prevent rot. Inorganic mulch (like rubber chips) can look sleek but lacks soil benefits.
How do I keep weeds out of gravel flower beds?
Weed barriers (landscape fabric) under gravel help, but consistent maintenance is key. Pull weeds early, hand-water to discourage seed germination, and consider pre-emergent herbicides in spring. Gravel alone won’t stop weeds—stay proactive!
Will gravel protect plants in winter?
Gravel itself doesn’t insulate roots, but a 4–6" layer of mulch over the soil (after the first frost) shields plants from freeze-thaw cycles. Choose hardy perennials or annuals suited to your zone—gravelfree beds won’t magically survive harsh winters.
Wrapping up and next steps
Creating flower beds with gravel isn’t just a smart choice—it’s a game-changer for low-maintenance, year-round beauty in your garden. 🌿 Whether you’re drawn to the sleek elegance of pebbles or the practicality of improved drainage, this approach saves time while keeping your space vibrant and resilient.
Now that you’re armed with the right materials, tips, and answers to common questions, it’s time to roll up your sleeves and transform that patch of earth into a stunning, hassle-free oasis.
Ready to take the next step? Start small—pick a corner of your yard, gather your supplies, and let your creativity bloom! 🌸 For even more inspiration, explore garden design trends or connect with local gardening communities to share your progress. Happy planting!