Flowers
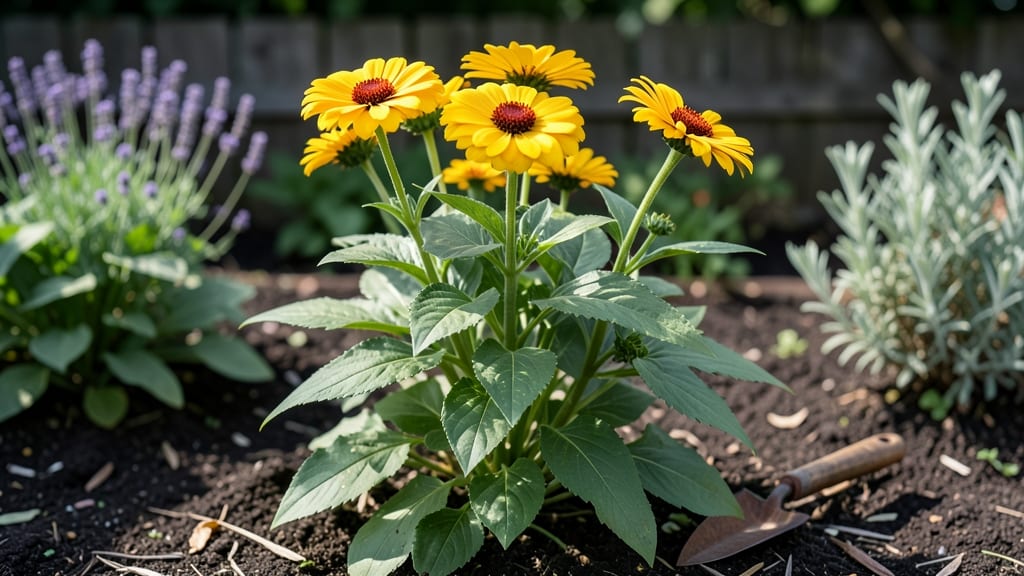
The yellow zinnia flower burst through summer like sunbeams in a vase—bright, fearless, and impossible to ignore. 🌻 I planted my first batch after seeing how they transformed a dull corner of my garden into a hummingbird hotspot, and I’ve been hooked. ever since.
Their cheerful faces don’t just lift spirits; they invite bees, butterflies, and hummingbirds to linger all season long.
Pair them with deep purples like salvia or dusty blues like bachelor’s buttons for a cottage garden feel, or let them stand alone in modern containers where their bold hue demands attention.
In pollinator gardens, they’re the star attraction—plant them near milkweed or coneflowers for a nonstop parade of winged visitors. The secret? Deadheading spent blooms keeps them flowering until frost, and their drought tolerance means they thrive even when you forget to water.
📚 In This Guide
- What you need
- Instructions
- Tips and common mistakes
- Wrapping up and next steps
What you need
- ● Yellow zinnia seeds: Choose heirloom or hybrid varieties like 'Benary’s Giant' or 'Crystal' for bold blooms. Buy 1–2 seed packets (each contains ~200–300 seeds).
- ● Well-draining potting mix: A 10–15 lb bag of organic mix (e.g., Miracle-Gro or FoxFarm) for containers or in-ground planting.
- ● Containers or garden bed: Containers: 5–6" deep pots (1–2 per plant) with drainage holes.
- ● Garden bed: Full sun (6+ hours/day) and loose, fertile soil (amend with compost if needed).
- ● Watering can or hose: With a gentle spray nozzle for seedlings.
- ○ Gloves (optional): To protect hands while handling soil or seeds.
- ● Trowel or small shovel: For transplanting seedlings or loosening soil.
- ○ Plant labels (optional): Wooden or metal stakes to track varieties.
- ○ Fertilizer (optional): Balanced 10-10-10 or slow-release granules (follow package rates).
- ○ Mulch (optional): Straw or shredded leaves to retain moisture.
- ○ Pruning shears (optional): For deadheading spent blooms.
Step-by-step guide to growing vibrant yellow zinnia flowers
Here’s how to coax those cheerful sunburst blooms from seed to pollinator magnet.
🌱 Step 1: Start Seeds Indoors for Early Blooms
Fill biodegradable seedling pots with sterile seed-starting mix and moisten it until damp but not soggy. Press the mix down lightly—you want it firm enough to hold seeds in place but loose enough for roots to push through. Plant 2-3 seeds per pot at a depth of ¼ inch, then cover them with a thin layer of additional mix.
Place the pots in a warm spot (70-75°F) with bright, indirect light. A seedling heat mat speeds germination, but a sunny windowsill works too. Keep the soil consistently moist by watering from the bottom—never let it dry out completely. You’ll see tiny sprouts in 7-14 days, depending on your indoor warmth.
Here’s the thing—don’t overcrowd the pots. If you plant too many seeds, you’ll end up thinning seedlings later, which stresses the plants. I like to label each pot with the date to track growth progress.
☀️ Step 2: Harden Off and Transplant Outdoors
Once seedlings have 2-3 true leaves (not just the initial seed leaves), it’s time to prepare them for outdoor life. Start by moving them to a sheltered spot outside for 1-2 hours the first day, gradually increasing their time outdoors over 7-10 days. This process, called hardening off, helps them adjust to wind, sun, and temperature swings.
Choose a sunny location with at least 6-8 hours of direct sunlight daily—zinnia flowers thrive in full sun and reward you with bold, cheerful blooms. Plant seedlings 12-18 inches apart in rows spaced 18-24 inches apart to allow for airflow and prevent disease. The soil should be well-draining; if it’s heavy clay, mix in compost to improve texture.
After transplanting, water deeply at the base of each plant to encourage root growth. Avoid wetting the leaves, as this can lead to fungal issues. Mulch around the base with straw or shredded leaves to retain moisture and suppress weeds.
💧 Step 3: Water and Fertilize for Continuous Blooms
Zinnias are drought-tolerant once established, but consistent moisture is key during their early growth. Water deeply once a week, aiming for 1 inch of water per week, and more during dry spells. The best time to water is in the early morning—this reduces evaporation and gives leaves time to dry before nightfall, lowering the risk of mildew.
Feed your zinnias with a balanced, water-soluble fertilizer every 4-6 weeks during the growing season. I use a 10-10-10 or 20-20-20 formula diluted to half-strength to avoid burning the plants. Stop fertilizing once flowers start to form—too much nitrogen can lead to lush foliage but fewer blooms.
Watch for signs of stress, like wilting or yellowing leaves. If you see these, it’s usually a sign of either underwatering or overwatering. Zinnias prefer even moisture, so adjust your watering based on rainfall and soil dryness.
✂️ Step 4: Deadhead and Prune for Long-Lasting Blooms
Deadheading—removing spent blooms—is the secret to keeping zinnias flowering all season. Use clean pruners or your fingers to pinch off faded flowers at the base of the stem. This encourages the plant to produce more blooms instead of going to seed. I like to do this in the early morning when the flowers are still cool and crisp.
For taller varieties, pinch back the tips of young plants to encourage bushier growth. This step isn’t just about looks—it also helps prevent the stems from becoming too weak to support the heavy flower heads. If you notice any leggy growth, cut back the stems by one-third to promote stronger, more compact plants.
Real talk: Don’t skip deadheading. If you let the flowers go to seed, the plant will shift its energy from producing new blooms to seed development, and your vibrant display will fade faster. A little effort here means weeks of continuous color.
🪴 Step 5: Extend the Season with Care
Zinnias are annuals, but with a little effort, you can coax them into blooming well into fall—or even winter in mild climates. Once temperatures start to dip below 50°F at night, protect your plants with row covers or move potted zinnias to a sheltered spot. This extends their blooming season by 2-4 weeks, giving you more time to enjoy their sunny faces.
If you’re growing zinnias in containers, bring them indoors before the first frost and place them in a bright, cool spot (around 55-60°F). Reduce watering slightly, as the plants will grow more slowly in cooler conditions. With proper care, they can keep blooming indoors for weeks.
Save seeds from your healthiest zinnias for next year. Let a few flowers go to seed at the end of the season, then collect the dried seed heads. Store them in a cool, dry place until you’re ready to plant again. This is how you build a self-sustaining garden!
Tips & tricks for perfect yellow zinnia growth
A few simple tricks can transform your zinnias from modest sprouts to a vibrant pollinator haven. Here's what I've learned after growing these cheerful blooms for years.
Seedling Success: When planting your 2-3 seeds per pot at ¼-inch depth, use a toothpick to make individual holes—this prevents seeds from clumping together. After germination, keep the pots in a 70-75°F spot with bright light, but avoid direct sun until seedlings have their first true leaves. I've found that placing pots on a seedling heat mat speeds germination by 2-3 days compared to just a sunny windowsill.
Hardening Off: The 7-10 day hardening off process is where many gardeners go wrong. Start with just 1-2 hours on day one, but protect seedlings from wind by placing them in a sheltered spot like under a patio cover. Gradually increase time outside, but if temperatures drop below 50°F, bring them back in immediately. I've seen seedlings shocked by sudden cold snaps even when the forecast looked mild.
Sunlight Strategy: Zinnias need at least 6-8 hours of direct sunlight daily, but too much intense afternoon sun can scorch young plants. If you're in a hot climate, provide afternoon shade during the first week after transplanting. I plant mine in the late afternoon to give them a head start before the harshest sun hits. This small adjustment makes a noticeable difference in plant vigor.
Deadheading Timing: The early morning is the best time to deadhead your zinnias—flowers are cool and crisp, making them easier to handle. I use clean pruners for larger blooms and my fingers for smaller ones. Don't remove the entire stem if you want bushier plants; instead, cut just above a set of leaves. This encourages more branching and ultimately more flowers. I've seen plants produce 30% more blooms when deadheaded consistently this way.
Pro Tips for Yellow Zinnia Flower
- A few simple tricks can transform your zinnias from modest sprouts to a vibrant pollinator haven. Here's what I've le...
- Seedling Success: When planting your 2-3 seeds per pot at ¼-inch depth, use a toothpick to make individual holes—this...
- Hardening Off: The 7-10 day hardening off process is where many gardeners go wrong. Start with just 1-2 hours on day ...
Frequently asked questions
When is the best time to plant yellow zinnias for continuous blooms?
For nonstop color, sow seeds directly in the ground 2–3 weeks after your last frost date (spring) and again in mid-summer for fall blooms. Zinnias thrive in warm soil—wait until temperatures consistently stay above 50°F (10°C). Pro tip: Start indoors 4–6 weeks early if your climate has a short growing season!
Why aren’t my yellow zinnias attracting pollinators like bees and butterflies?
Zinnias are naturally pollinator magnets, but a few tweaks can help: Ensure flowers are fully open (they release nectar then), avoid pesticides, and plant near other pollinator-friendly blooms like marigolds or cosmos. Deadhead spent blooms to encourage new flowers—more flowers = more visitors!
How often should I water yellow zinnias, and do they need special care?
Water deeply 1–2 times per week (more in extreme heat) to encourage strong roots, but avoid soggy soil—zinnias hate "wet feet." Mulch around plants to retain moisture and deter weeds. Bonus: Yellow zinnias are drought-tolerant once established, so let them remind you to water wisely!
Can I grow yellow zinnias in containers, and what’s the ideal pot size?
Choose containers at least 6–8 inches deep with drainage holes, and use a well-draining potting mix. Plant 1–2 seeds per pot (they’re compact but need space to breathe). Container tip: Place pots in full sun and fertilize lightly every 3–4 weeks for bigger blooms.
How do I keep my yellow zinnias blooming all season long?
Deadheading (snipping off spent blooms) is key—it redirects energy to new flowers. Pinch back leggy stems early to encourage bushier growth. For a second flush of blooms, cut plants back by half after the first frost (in mild climates). Fun fact: Zinnias self-seed easily, so you’ll likely get surprise blooms next year!
Are yellow zinnias cold-hardy, or do I need to protect them in winter?
Zinnias are annuals and won’t survive frost. In cold climates, dig up healthy plants before the first freeze, trim them back, and replant in spring. Alternatively, let them self-seed for next year’s garden—nature’s free replanting service!
Wrapping up and next steps
The yellow zinnia flower isn’t just a burst of sunshine in your garden—it’s a pollinator’s paradise, a low-maintenance superstar, and a vibrant addition that keeps blooming from summer to frost.
Whether you’re a seasoned gardener or just starting, these cheerful flowers prove that beauty and ease go hand in hand. 🌻
Ready to bring more color and life to your outdoor space? Grab your seeds or cuttings, pick a sunny spot, and let these resilient blooms do the rest. Start small, experiment, and watch your garden transform!