Flowers
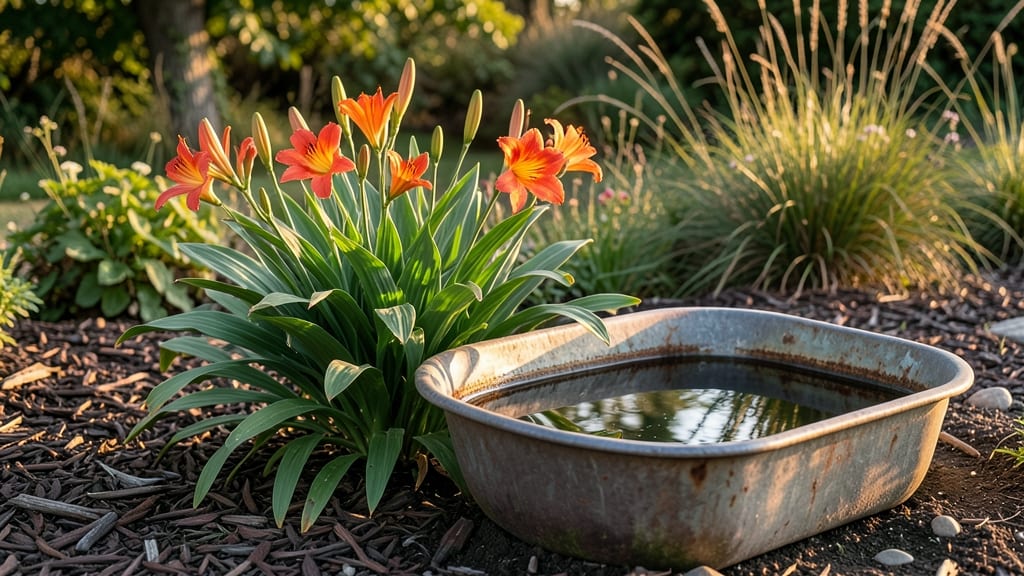
Transforming an old horse trough into a flower bed turns rustic charm into vibrant garden life. 🌸 I’ve repurposed three galvanized troughs in my backyard, and each one now overflows with seasonal blooms that attract bees and butterflies all year.
The key is matching the trough’s shape to the right plants—tall grasses for vertical drama, trailing vines for soft edges, and perennials that thrive in shallow but well-drained soil.
You’ll need a trough (new or vintage), drainage holes if repurposing, potting soil mixed with compost, and plants suited for shallow roots. Succulents, ornamental grasses, and creeping thyme handle the unique growing space beautifully.
My favorite setup uses a mix of sedum for drought tolerance and heuchera for bold foliage contrast. The best part? No heavy lifting—just fill, plant, and let nature take over.
By summer, your trough will be a riot of color, and in winter, evergreens like boxwood or hellebores keep the charm alive. Place it along a fence for vertical interest, or group multiple troughs at different heights for a cascading effect.
The rustic metal or wood adds texture that no traditional planter can match, while the low-maintenance plants make it perfect for busy gardeners.
Pro tip: Line the bottom with landscape fabric to prevent soil loss through drainage holes, and add a layer of pebbles underneath for extra stability. This project costs less than $50 for materials and transforms an old object into a garden centerpiece that’s as functional as it is beautiful.
Ready to give it a try?
📚 In This Guide
- What you need
- Instructions
- Tips and common mistakes
- Wrapping up and next steps
What you need
- ● Horse trough: 1 (preferably galvanized steel, concrete, or stone; 4–6 ft long, 1–2 ft wide, and 1–2 ft deep)
- ● Potting soil: 2–3 cubic feet (well-draining, moisture-retentive mix for containers)
- ● Drainage material: 1–2 inches of gravel or small rocks (for the trough’s base)
- ○ Waterproof liner (optional but recommended): 1 (plastic or landscape fabric to protect the trough from soil)
- ● Slow-release fertilizer: 1–2 cups (for nutrient-rich planting)
- ● Hand trowel or garden spade: 1 (for planting and soil adjustments)
- ● Gloves: 1 pair (to keep hands clean and protected)
- ● Watering can or hose with a gentle spray nozzle: 1 (for post-planting hydration)
- ● Mulch: 1–2 bags (pine straw, bark chips, or shredded leaves to retain moisture and suppress weeds)
- ● Decorative stones or pebbles: 1–2 bags (for a polished, finished look around the trough)
- ● Solar-powered lights or LED string lights: 1 set (to highlight your trough at night)
- ● Waterproof paint or stain: 1 can (if you want to add a rustic or colorful touch to the trough)
- ● Succulents, ferns, or trailing plants: 3–5 (for added texture and year-round interest)
Step-by-Step guide to creating a horse trough flower bed
Transform an old horse trough into a stunning, low-maintenance garden feature that blooms season after season.
🪴 Step 1: Prepare the Trough for Planting
Start by thoroughly cleaning the trough with a 50/50 vinegar-water solution to remove dirt and kill any existing pathogens. Scrub with a stiff brush, focusing on crevices where roots will grow. Rinse completely and let it dry in the sun for 24 hours—this prevents mold and ensures a clean base for your plants.
Next, drill ¼-inch drainage holes along the bottom if your trough doesn’t have them. Place a wire mesh screen over the holes to keep soil from washing out while allowing excess water to escape. Line the trough with landscape fabric to prevent soil from leaking through the drainage holes and clogging them over time.
🌱 Step 2: Layer Soil and Add Drainage Material
Fill the bottom 2 inches deep with coarse gravel or perlite—this creates a drainage layer that prevents root rot. The gravel should cover the landscape fabric completely, ensuring water flows freely. Tap the trough gently on the ground to settle the gravel evenly before adding soil.
Now, add a 3-inch layer of high-quality potting mix mixed with compost for nutrients. I like to use a 50/50 blend of potting mix and compost to give plants a nutrient-rich start while ensuring good drainage. Moisten the soil lightly with water until it’s damp but not soggy—this helps roots establish quickly.
☀️ Step 3: Select and Plant Drought-Tolerant Flowers
Choose plants that thrive in shallow containers and tolerate drought, such as sedum, lavender, oregano, or thyme. These varieties love the trough’s unique shape and require minimal watering once established. Place 3-4 plants in the trough, spacing them 4-6 inches apart to allow room for growth without overcrowding.
Dig small holes just deep enough to accommodate the root balls, then gently press the soil around each plant to secure it. Water deeply after planting to help the roots settle into the soil. Avoid compacting the soil too firmly—you want it loose enough for roots to spread easily.
💧 Step 4: Water and Position for Optimal Growth
Water the trough deeply every 2-3 days until the soil feels dry to the touch 1 inch below the surface. This ensures roots grow deep and strong. Place the trough in a spot with at least 6 hours of sunlight daily, as most drought-tolerant flowers need full sun to thrive. If your trough sits in partial shade, opt for shade-loving varieties like heuchera or ferns instead.
After the first week, reduce watering slightly—overwatering is the fastest way to kill plants in a trough. Instead, let the soil dry out between waterings. You’ll notice new growth within 2-3 weeks, signaling that your plants are happy and adapting to their new home.
Tips & tricks for perfect horse trough flower beds
Transforming a horse trough into a vibrant garden feature is all about the details—here's how to avoid common pitfalls and create a thriving display that lasts seasons.
Drainage is Everything: The 24-hour drying time in Step 1 isn't just about cleanliness—it's your first line of defense against mold. If you're working in humid conditions, extend this to 48 hours to be safe. For extra insurance, consider adding a second layer of landscape fabric between the gravel and soil to prevent any potential clogging of those critical ¼-inch drainage holes over time.
Soil Science Matters: That 50/50 blend of potting mix and compost in Step 2 is non-negotiable for drought-tolerant plants. I've learned the hard way that adding too much compost can create a soggy mess—stick to the ratio and gently tap the trough after adding gravel to eliminate air pockets that could disrupt drainage. For containers, fluffy soil is your friend!
Plant Placement Strategy: When arranging your 3-4 plants in Step 3, think about their mature size. Place taller varieties like lavender at the back (closest to the trough's edges) and shorter ones like thyme toward the front. This creates a natural tiered effect that makes your trough look intentionally designed, not randomly planted. The 4-6 inch spacing gives roots room to breathe without competing for nutrients.
Watering Wisdom: The "dry to the touch 1 inch below the surface" test in Step 4 is your golden rule. For the first 2-3 weeks, check moisture every morning—new roots are fragile and need consistent hydration. After that, you can extend to every 3-4 days, but always adjust based on your local climate. In summer heat, I've found adding a 1-inch layer of mulch helps retain moisture between waterings.
Pro Tips for Horse Trough Flower Bed
- Transforming a horse trough into a vibrant garden feature is all about the details—here's how to avoid common pitfalls and create a thriving display that lasts seasons.
- Drainage is Everything: The 24-hour drying time in Step 1 isn't just about cleanliness—it's your first line of defense against mold.
- Soil Science Matters: That 50/50 blend of potting mix and compost in Step 2 is non-negotiable for drought-tolerant plants.
Frequently asked questions
Got questions about transforming a horse trough into a stunning flower bed? You’re not alone! Here are answers to the most common queries to help you create a thriving, rustic garden centerpiece.
What’s the best time of year to plant a horse trough flower bed?
The ideal time is early spring (after the last frost) or early fall (6-8 weeks before your first frost). This gives roots time to establish before extreme temperatures. For annuals, spring planting ensures vibrant blooms all season, while perennials benefit from fall’s cooler weather. Pro tip: If planting in summer, water deeply daily for the first 2 weeks to reduce transplant shock!
How often should I water a horse trough flower bed?
Watering depends on your climate, but a general rule is daily in hot, dry weather and every 2-3 days in milder conditions. Since troughs retain moisture well, check the soil—if the top inch feels dry, it’s time to water. Morning watering (before 10 AM) minimizes evaporation and fungal risks. For drought-resistant plants like sedum or lavender, you may only need watering every 3-4 days!
Can I use a horse trough for flowers if it’s already rusty or weathered?
Rust and patina actually add character to your trough. For safety, sand down sharp edges, then seal the interior with a non-toxic metal primer and paint (like AFM Safecoat) to prevent leaching. If the trough is severely corroded, consider lining it with a plastic pond liner for extra protection. Bonus: Rustic charm = zero pressure to “perfect” it!
What are the easiest flowers for a horse trough flower bed?
Opt for compact, trailing, or shallow-rooted varieties that thrive in tight spaces. Top picks:
- Annuals: Petunias, Begonias, Lobelia (trailing), Impatiens
- Perennials: Creeping thyme, Heuchera (coral bells), Ajuga (bugleweed)
- Succulents/Sedum: Sedum ‘Dragon’s Blood’, Echeveria (low-water)
How do I protect my trough flower bed in winter?
Drain excess water, trim dead foliage, and add a layer of mulch (straw or shredded leaves) to insulate roots. For tender perennials, wrap the trough in burlap or use a frost blanket. If your trough is metal, avoid ice buildup by tilting it slightly or placing it on a wooden stand. In freezing climates, move potted troughs to a garage or shed and store them upside down. Spring tip: Refresh soil with compost before replanting!
Wrapping up and next steps
A horse trough flower bed isn’t just a creative garden hack—it’s a stunning, low-maintenance way to add rustic charm and year-round color to your outdoor space.
Whether you’re repurposing an old trough or starting fresh, this project blends functionality with beauty, proving that sustainability and style go hand in hand. 🌸
Ready to transform your garden? Grab your tools, pick your plants, and let your creativity flow—your future flower bed is waiting! For extra inspiration, browse local nurseries or DIY gardening forums to refine your design. Happy planting! 🌱