Propagation
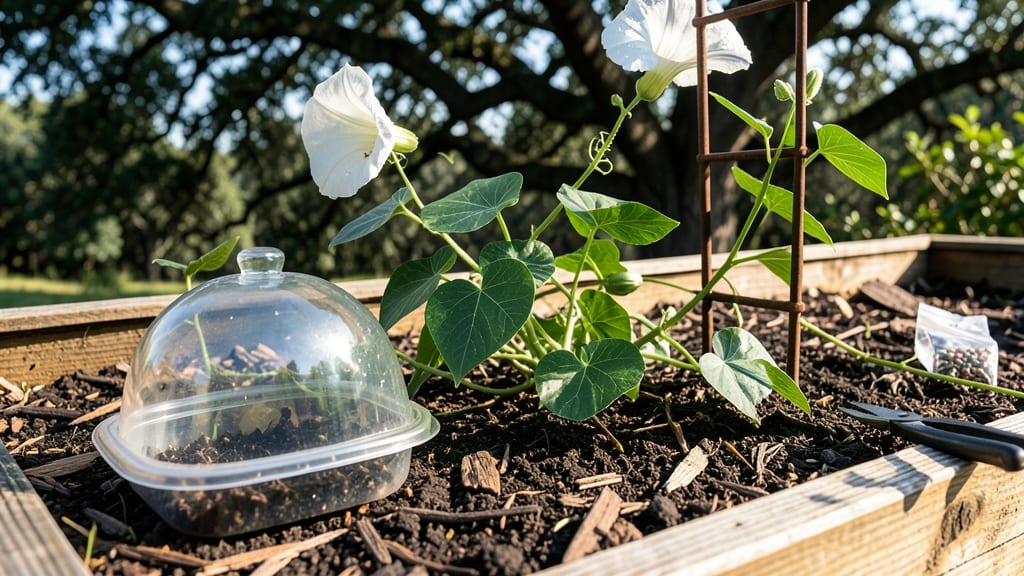
Starting moonflower seeds indoors gives you a head start on those dreamy night-blooming vines—just 3-4 weeks before your last frost. 🌱 I’ve learned the hard way that these tropical beauties won’t tolerate cold soil, so timing matters.
The secret to fast germination? Warmth, patience, and knowing exactly when to pop those seedlings outside.
You’ll need a sunny windowsill or grow light, a shallow tray with well-draining soil, and a spray bottle for gentle watering. Moonflowers sprout quickly—often within 7-14 days—but they’re fussy about moisture.
Too much water means rot; too little means stalled growth. I’ve perfected a routine that keeps them thriving until transplant time.
By the time you’re ready to move them outdoors, you’ll have sturdy seedlings with 3-4 true leaves, ready to climb trellises or fences. The first blooms arrive in 60-70 days, and nothing beats watching those silvery-white flowers unfurl after dark.
Just don’t let them get too crowded—they’ll outgrow their pots fast.
Whether you’re in a warm climate or a cooler zone, these tips work. The key is starting early and keeping them cozy until they’re tough enough for the garden. Let’s get those seeds sprouting!
📚 In This Guide
- What you need
- Instructions
- Tips and common mistakes
- Wrapping up and next steps
What you need
- ● Moonflower seeds: 5–10 seeds (choose Ipomoea alba or Ipomoea nil for best results).
- ● Seed-starting mix: 1–2 quarts of sterile, well-draining potting soil (look for a mix labeled for seeds or seedlings).
- ● Containers: Small pots (3–4 inches deep) or
- ● A seed tray with individual cells (for better organization).
- ● Watering can or spray bottle: With a fine mist nozzle (to avoid disturbing seeds).
- ● Clear plastic wrap or humidity dome: To retain moisture while seeds germinate.
- ● Grow lights or sunny windowsill: Moonflowers need 6–8 hours of light daily (south-facing window or LED grow lights work best).
- ○ Heating mat (optional): Speeds up germination (70–75°F is ideal).
- ● Fertilizer (after sprouting): A balanced, water-soluble fertilizer (5-5-5 or 10-10-10) diluted to half-strength.
- ● Twine or trellis: For supporting vines once they’re 6+ inches tall (bamboo stakes or a DIY wire frame work great!).
Step-by-step instructions for growing moonflowers from seed
Moonflowers reward patience with dramatic nighttime blooms—here’s how to get them sprouting quickly.
🌱 Step 1: Prep Seeds for Fast Germination
Moonflower seeds (Ipomoea alba) germinate best after a quick soak. Place them in a bowl of lukewarm water for 12-24 hours—this softens the hard outer shell and speeds up sprouting. I like to use a mesh bag so seeds stay contained and don’t sink to the bottom. After soaking, drain well but keep them damp with a damp paper towel until ready to plant.
Here’s the thing—moonflowers thrive in warmth, so if your home runs cool, consider using a seedling heat mat set to 75-80°F. Without it, germination can take 10-14 days instead of 5-7 days. The faster they sprout, the sooner you’ll see those signature trumpet-shaped blooms unfurling at dusk.
🪴 Step 2: Plant in Well-Draining, Warm Soil
Fill 4-inch pots with a light, sterile seed-starting mix—moonflowers hate soggy roots. Press the mix down gently to remove air pockets, then make a ¼-inch-deep hole with your finger. Drop 1-2 seeds per pot (they’re large and easy to handle) and cover lightly with more mix. A sprinkle from a spray bottle ensures moisture without disturbing the seeds.
Place the pots in a humidity dome or seal them in a plastic bag to trap warmth and moisture. Keep them in a spot where the soil stays consistently warm—a sunny windowsill or under a grow light works, but a heat mat is ideal. You’ll know germination is near when the soil surface feels slightly cooler to the touch, signaling root activity below.
☀️ Step 3: Provide Bright, Indirect Light
Once sprouts appear (usually 5-7 days after planting), remove the humidity dome immediately to prevent fungal issues. Moonflowers need bright, indirect light for strong stems—direct sun now will scorch delicate seedlings. A south-facing window or grow light 6-8 inches above the plants works best. If seedlings stretch toward the light (leggy growth), they’re not getting enough intensity.
Rotate the pots a quarter turn daily so they grow straight. You’ll see the first true leaves (not the initial seed leaves) emerge within 7-10 days. This is your cue to start fertilizing lightly with a balanced liquid fertilizer (half-strength) to encourage robust growth. Over-fertilizing now will burn tender roots.
🌿 Step 4: Transplant When Strong Enough
Moonflowers grow fast—wait until they have 3-4 sets of true leaves and 4-6 inches of stem before transplanting. Harden them off by placing them outside in partial shade for 1-2 hours daily, gradually increasing time over 5-7 days. This toughens the stems so they don’t snap when exposed to wind or rain.
Choose a sunny, sheltered spot in your garden with well-draining soil. Dig a hole twice as wide as the root ball but no deeper—moonflowers resent being buried too deep. Water deeply after planting to settle the soil around the roots. You’ll know they’re thriving when new leaves appear within 7-10 days of transplanting.
⏰ Step 5: Encourage Vigorous Vines and Blooms
Moonflowers climb, so install trellises or stakes at planting time. Gently tie the main stem to the support as it grows—this prevents breakage when vines get heavy with blooms. Water deeply 1-2 times weekly, letting the soil dry slightly between waterings. Overwatering leads to weak stems and fewer flowers.
Once vines reach the trellis (usually 6-8 weeks after transplanting), they’ll start producing buds. Here’s the magic: moonflowers bloom only at night, so check for open flowers in the evening. Deadhead spent blooms in the morning to encourage more flowers. With proper care, you’ll have continuous blooms from summer through fall—a stunning display for any garden.
Tips & tricks for perfect moonflower seed germination
Moonflowers might seem finicky, but these simple tricks will help you skip the common pitfalls and get those ethereal blooms unfurling right on schedule.
Soaking Strategy: The 12-24 hour soak is your secret weapon for breaking through those tough seed coats. I've found that using lukewarm water (not hot) prevents shocking the seeds while still softening the shell effectively. For extra efficiency, add a pinch of seaweed extract to the soaking water—it contains natural growth hormones that can boost germination rates by 20%. Just make sure to rinse the seeds thoroughly before planting to avoid any residue buildup.
Warmth Hack: That 75-80°F temperature range isn't just a suggestion—it's the sweet spot for moonflower seeds. If you don't have a heat mat, try placing your seed trays on top of your refrigerator (not inside) for consistent warmth. The key is maintaining that temperature during the entire 5-7 day germination window. I've seen germination times stretch to 10-14 days when kept at room temperature (around 68°F), which is why I always keep my seed-starting station near a sunny window with a heat mat underneath.
Lighting Insight: When your seedlings first emerge, that bright, indirect light requirement is crucial for preventing leggy growth. If you're using grow lights, position them 6-8 inches above the seedlings and use cool white or full-spectrum bulbs—they provide the right light spectrum without generating excess heat. I've noticed that seedlings grown under blue spectrum lights develop stronger stems and more compact growth, which is perfect for moonflowers that need sturdy vines to support their heavy blooms.
Transplant Timing: Waiting for 3-4 sets of true leaves and 4-6 inches of stem before transplanting gives your moonflowers the best chance of surviving the move. The 5-7 day hardening off process is where many beginners cut corners, but this gradual exposure to outdoor conditions is what builds resilience. I like to start with just 30 minutes in partial shade on the first day, then increase by 30 minutes each subsequent day. This slow adaptation prevents shock and helps the plants develop thicker cell walls.
Pro Tips for Start Moonflower Seeds
- Moonflowers might seem finicky, but these simple tricks will help you skip the common pitfalls and get those ethereal blooms unfurling right on schedule.
- Soaking Strategy: The 12-24 hour soak is your secret weapon for breaking through those tough seed coats.
- Warmth Hack: That 75-80°F temperature range isn't just a suggestion—it's the sweet spot for moonflower seeds.
Frequently asked questions
Got questions about moonflower seeds? You’re not alone! Here are answers to the most common queries—so you can grow these enchanting nighttime bloomers with confidence.
How long does it take for moonflower seeds to germinate?
Moonflower seeds typically sprout in 7–14 days after planting, especially in warm soil (70–85°F). Keep the soil consistently moist but not soggy—patience pays off! If germination takes longer, check for proper warmth and moisture. Pro tip: Soak seeds overnight before planting to speed up the process.
Can I plant moonflower seeds directly in the ground, or should I start them indoors?
Moonflower seeds are hardy and fast-growing, so you can plant them directly outdoors after the last frost when soil temperatures are warm (60°F+). Starting them indoors isn’t necessary unless you’re in a short-growing season—just pop them in the ground once nighttime temps stay above 50°F. Timing tip: Late spring or early summer is ideal for most climates.
Why aren’t my moonflower seeds sprouting? Troubleshooting tips?
If your seeds aren’t germinating, check these common issues:
- Cold soil: Moonflowers need warmth—wait until soil is at least 60°F.
- Too much water: Overwatering can drown seeds; keep soil damp, not waterlogged.
- Low light: Place trays or beds in a sunny spot (6+ hours of sun daily).
- Old seeds: Fresh seeds germinate better; store-bought seeds are usually fine if planted within 1–2 years.
Do moonflowers grow back every year, or are they annuals?
Moonflowers (Ipomoea alba) are annuals, meaning they complete their life cycle in one season and don’t return the next year. However, they self-seed eagerly—you’ll often find volunteers popping up where they’ve bloomed before! Save seeds from your plants for next year’s garden. Bonus: Deadhead spent blooms to encourage more flowers.
What’s the best alternative if moonflowers don’t thrive in my climate?
If your area is too cool or short on growing days, try these similar night-blooming vines:
- Morning Glory (Ipomoea purpurea): Fast-growing, colorful, and cold-tolerant.
- Sweet Potato Vine (Ipomoea batatas): Hardy, drought-resistant, and great for ground cover.
- Moon Vine (Calonyction aculeatum): A close cousin with fragrant white blooms.
Wrapping up and next steps
Starting moonflower seeds is a rewarding journey that brings enchanting nighttime blooms to your garden. With the right conditions—warmth, patience, and a little care—you’ll soon enjoy their stunning, fragrant flowers. Remember, these fast-germinating seeds thrive with consistency, so don’t hesitate to experiment and refine your approach!
Now that you’re equipped with the know-how, why not share your moonflower magic? Snap photos of your progress, tag fellow gardeners, or even gift a few seeds to a friend. Happy growing—your garden’s next masterpiece is just sprouting! 🌙✨