
Tools
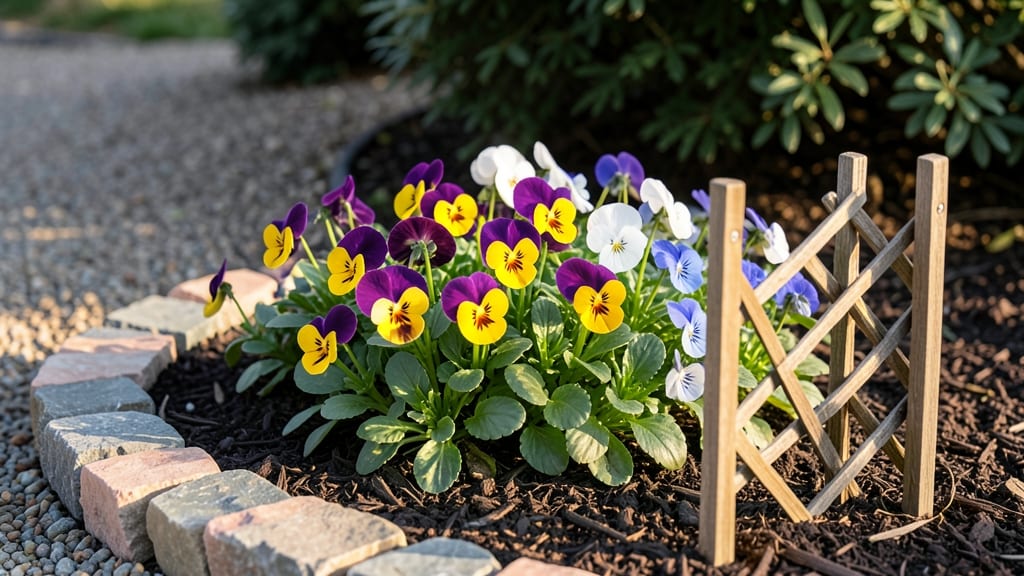
A mini flower garden can transform even the tiniest balcony into a vibrant oasis. 🌸 I learned this the hard way after struggling with a crowded patio—until I swapped sprawling plants for vertical charm.
The right dwarf varieties and smart containers make all the difference, turning wasted corners into lush displays that neighbors will envy.
Start with trailing petunias, compact geraniums, or airy ferns to maximize vertical space. A simple 5-gallon container or wall-mounted planter can hold a whole garden’s worth of blooms, while self-watering pots cut down on maintenance.
My setup uses a mix of hanging baskets and a 3-tiered shelf—perfect for small patios or urban windowsills.
By summer’s end, you’ll have a garden that’s bursting with color without taking up square footage. The best part? These designs attract pollinators, mask noise, and create a cozy retreat—all while requiring less water and care than traditional beds. Let’s bring that magic to your space.
Whether you’re working with a 6-inch-wide ledge or a sunny corner, the key is layering textures and heights. Mix in some fragrant herbs or succulents for extra impact, and you’ve got a low-maintenance masterpiece that grows with you—no yard required.
📚 In This Guide
- What you need
- Instructions
- Tips and common mistakes
- Wrapping up and next steps
What you need
- ● Container: A vertical planter (e.g., wall-mounted pockets, hanging pockets, or a tiered shelf). Choose one with drainage holes—size depends on your space (e.g., 6–12 pockets for a small wall garden).
- ● Potting soil: Lightweight, well-draining mix for containers (avoid heavy garden soil). Aim for 2–3 gallons per container.
- ● Flowers: Select compact, trailing, or bushy varieties suited for small spaces. Examples: Petunias (spiller)
- ● Begonias (trailing)
- ● Pansies (bushy)
- ● Succulents (drought-tolerant)
- ● Fertilizer: Slow-release granular fertilizer or liquid feed (follow package instructions for dosage).
- ● Watering can: With a narrow spout for precision (or a spray bottle for misting).
- ● Gloves (to protect your hands from soil and thorns).
- ● Trowel or small shovel (for transplanting or mixing soil).
- ● Measuring cup (to portion soil or fertilizer accurately).
- ● Mulch or pebbles (to retain moisture and add aesthetics).
- ● Decorative stakes or trellis (if supporting climbing flowers like sweet peas).
- ● Access to 4–6 hours of sunlight daily (adjust flower choices for shade if needed).
- ● A stable mounting spot (secure brackets for wall planters, sturdy shelves for tiered gardens).
- ● Basic knowledge of your hardiness zone (check local climate guidelines for best blooms).
Step-by-Step instructions for creating a vertical flower garden
Here’s how to transform tight spaces into vibrant floral displays using smart vertical design.
🪴 Step 1: Select and Prepare Your Vertical Structure
Choose a sturdy frame—wall-mounted planters, trellises, or tiered shelves work best. I prefer galvanized metal grids or wooden crates because they’re lightweight yet durable. Secure your structure to a wall or fence using L-brackets or heavy-duty screws, ensuring it can support the weight of saturated soil and blooms.
If using a pre-made planter, skip to Step 2. For DIY setups, line the back with landscape fabric to prevent soil from escaping through gaps. This is especially critical for lightweight materials like burlap or wire mesh. Test stability by gently shaking the structure—if it wobbles, reinforce it before planting.
🌱 Step 2: Choose Compact, Thriving Flower Varieties
Opt for dwarf or trailing annuals like petunias, lobelia, or nasturtiums—they burst with color while staying manageable. Perennials like creeping thyme or ajuga also work well for low-maintenance verticals. I always check plant tags for mature size; anything over 12 inches tall needs pruning to stay tidy.
Group plants by sunlight needs. Sun-lovers like geraniums belong in south-facing spots, while shade-tolerant impatiens thrive in east or north exposures. Mixing types creates a lush, layered look, but avoid overcrowding—3-4 inches between plants gives roots room to breathe.
💧 Step 3: Fill Planters with Lightweight, Drainage-Focused Soil
Use a soilless potting mix blended with 20% perlite or vermiculite to prevent compaction. Heavy garden soil collapses in containers, suffocating roots. Fill each pocket or shelf to 1 inch below the rim, leaving space for watering. Tap the container gently to settle the mix without packing it down.
Add a slow-release fertilizer (like osmocote) to the top inch of soil—this feeds roots steadily without burning them. Water thoroughly until it drains from the bottom, then let excess moisture escape. Overwatering is the #1 killer of vertical gardens; always check for dampness before adding more.
✂️ Step 4: Plant and Train for Maximum Impact
Dig holes twice as wide as the root ball but only as deep as the container’s base. Tease out tangled roots gently to encourage outward growth. Place each plant, firm the soil around it, and water again to eliminate air pockets. Trailing varieties like sweet potato vine need extra support—weave them through lattice or let them spill over edges.
Prune leggy stems immediately after planting to encourage bushier growth. Pinch back the tips of young flowers to redirect energy into foliage. This step is non-negotiable—skipping it leads to sparse, weak blooms. Watch for new leaves forming within 2 weeks—that’s your cue the plants are settling in.
☀️ Step 5: Maintain with Precision Watering and Light
Vertical gardens dry out faster than ground-level ones. Water early in the morning to reduce evaporation, aiming for 1 inch per week during peak bloom. Use a drip irrigation system or soaker hose to deliver moisture evenly—hand-watering misses pockets in deep planters.
Rotate your structure quarter-turn weekly so all sides get even sunlight. Leggy growth toward one direction means you’re missing light. If flowers fade quickly, they’re thirsty—adjust your watering to every other day in hot weather. Deadhead spent blooms regularly to keep production strong.
Tips & tricks for perfect vertical flower gardens
Transforming small spaces into lush vertical gardens is easier than you think—here are the game-changing details that make all the difference.
Structure Stability: Real talk: I’ve seen too many vertical gardens collapse under the weight of saturated soil. When securing your structure in Step 1, use at least two L-brackets per corner for metal grids and four screws for wooden crates. If you’re using lightweight materials like burlap or wire mesh, add a horizontal support beam halfway up to prevent sagging. Test stability by gently shaking the structure before planting—if it wobbles, reinforce it immediately. This one step prevents heartbreak later when your hard work comes crashing down.
Plant Selection Strategy: In Step 2, resist the urge to go big with mature plants. Instead, opt for smaller, younger plants (around 3-4 inches tall) that have already established root systems. These will adapt faster to vertical conditions and give you that instant burst of color. Pro tip: Look for plants labeled "compact" or "trailing"—these are specifically bred for container gardening. And remember, the 3-4 inch spacing between plants isn't just about aesthetics; it's about giving roots room to breathe and preventing competition for nutrients.
Soil Science: The soilless potting mix with 20% perlite or vermiculite in Step 3 is non-negotiable for vertical gardens. I learned this the hard way after my first attempt with regular garden soil—it compacted so badly that roots suffocated. When filling your planters, leave that 1 inch gap below the rim for watering, but don't overfill. Tap the container gently to settle the mix, but avoid packing it down like you would for ground planting. This creates the perfect balance of aeration and moisture retention that vertical gardens desperately need.
Maintenance Mindset: The quarter-turn weekly rotation in Step 5 might seem like overkill, but it's absolutely critical. I've seen gardens where one side becomes a sunbaked desert while the other stays perpetually damp. Set a reminder on your phone for this simple task—it ensures even growth and prevents lopsided, leggy plants. And when deadheading in Step 5, don't just pluck off the spent blooms. Snip just above the first set of healthy leaves to encourage more branching and bushier growth. This technique alone can double your flower production!
Pro Tips for Mini Flower Garden
- Transforming small spaces into lush vertical gardens is easier than you think—here are the game-changing details that make all the difference.
- Structure Stability: Real talk: I’ve seen too many vertical gardens collapse under the weight of saturated soil.
- Plant Selection Strategy: In Step 2, resist the urge to go big with mature plants.
Frequently asked questions
Got questions about creating your own mini flower garden? You’re not alone! Here are some of the most common queries—and their practical solutions—to help you grow with confidence.
How much sunlight does a mini flower garden need?
Most mini flower gardens thrive with 4–6 hours of direct sunlight daily. If your space is shady, opt for shade-tolerant blooms like fuchsias, impatiens, or calatheas. For sunnier spots, petunias, geraniums, or succulents are perfect. Adjust based on your plants’ labels!
When is the best time to plant a mini flower garden?
For outdoor mini gardens, plant after the last frost in spring or late summer for fall blooms. Indoor gardens (like windowsill setups) can start anytime—just ensure your plants get enough light. Pro tip: If starting from seeds, follow the packet’s germination time to avoid delays!
Can I reuse containers from last year’s garden?
Yes! Clean and disinfect containers with a 10% bleach solution (1 part bleach to 9 parts water) to kill pests and fungi. Rinse well before replanting. Avoid reused soil—it may harbor diseases. Bonus: Drill drainage holes if missing to prevent root rot!
What if my flowers aren’t blooming?
Lack of blooms often means too much shade, over-fertilizing (with nitrogen), or not enough sunlight. Try moving your garden to a sunnier spot, deadhead spent blooms, and switch to a low-nitrogen, high-phosphorus fertilizer. Patience helps—some flowers take weeks to adjust!
Are there low-maintenance alternatives to traditional flowers?
Try succulents, air plants, or herbs like thyme or mint—they need less water and care. For color without fuss, sedum or echeveria are drought-resistant and thrive in small spaces. Quick win: Self-watering planters reduce upkeep even further!
Wrapping up and next steps
Creating a mini flower garden is a delightful way to bring nature’s beauty into your space—no matter how small! With just a few tools, a little creativity, and these space-saving blooms, you’ve got the perfect project to refresh your home or balcony. 🌸
Ready to see your tiny garden thrive? Start by planting your first seeds or arranging your containers, then watch as your vertical oasis grows into a vibrant, cheerful corner. Happy gardening!