Landscaping
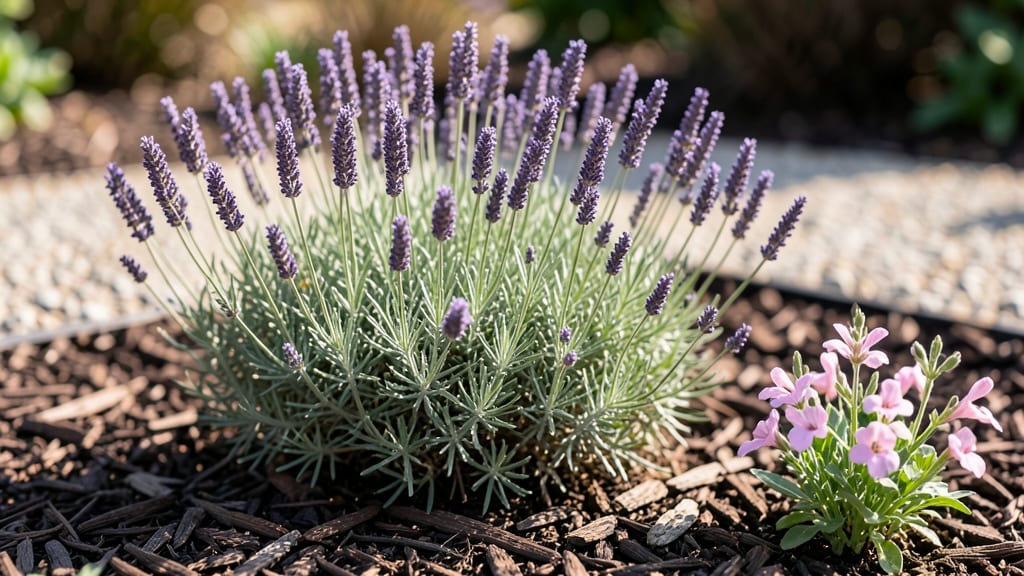
Mulching flower beds isn’t just about hiding bare soil—it’s the secret to lush, low-maintenance gardens that stay vibrant through every season. 🌿 I learned this the hard way when my spring bulbs wilted under summer sun because I skipped mulch.
Now, I use it to regulate soil temperature, lock in moisture, and create a polished look that makes my garden feel intentional from the first frost to the last bloom.
The right mulch makes all the difference: wood chips for perennial borders, straw for spring bulbs, or gravel for drought-tolerant succulents. Each type serves a purpose—suppressing weeds, preventing soil erosion, or even adding color contrast.
My go-to combo? Dark wood chips around hostas (they hold moisture perfectly) and a thin layer of pine straw over daylilies to keep roots cool. It’s simple, but the results are shockingly lush.
With the right approach, you’ll end up with flower beds that require half the watering and zero weeding, while looking like a designer did it. The key is timing: apply 2–4 inches of mulch in early spring and top it off in fall.
Watch as your garden transforms from a high-maintenance chore into a thriving, self-sustaining showcase. Ready to see how easy this can be?
Works for everything from cottage-style gardens to modern minimalist beds. The same principles apply whether you’re working with annuals, perennials, or even container plantings. Let’s get started—your soil (and your back) will thank you.
📚 In This Guide
- What you need
- Instructions
- Tips and common mistakes
- Wrapping up and next steps
What you need
- ● Mulch: 3–4 inches of organic mulch (e.g., shredded bark, wood chips, or pine straw) per garden bed. Pro tip: 💡 Use 3–4 cubic feet per 100 sq. ft. of bed for ideal coverage.
- ○ Inorganic mulch (optional but great for weed suppression): Landscape fabric or gravel (if using in high-traffic areas).
- ● Flowers: Perennials (e.g., daylilies, coneflowers, black-eyed Susans) for year-round color and low maintenance.
- ● Annuals (e.g., marigolds, impatiens, or petunias) for seasonal bursts of color (1–2 plants per square foot).
- ● Bulbs (e.g., daffodils, tulips, or alliums) for early spring blooms (plant in fall, 6–8 inches deep).
- ● Soil Amendments: Compost (1–2 inches mixed into the top 6 inches of soil) to improve drainage and nutrient retention.
- ● Slow-release fertilizer (e.g., 10-10-10 or organic options like bone meal for bulbs).
- ● A garden fork or tiller to loosen soil (rent one if needed!).
- ● A garden rake for leveling and spreading mulch evenly.
- ● Pruning shears for trimming dead foliage and shaping plants.
- ● Gloves (heavy-duty for mulch and gardening gloves for flowers).
- ● Watering can or hose with a spray nozzle for gentle hydration.
- ● Measuring tape or string to mark garden bed dimensions.
- ● Edging tools (plastic, metal, or flexible) to define garden beds neatly.
- ● Mulch spreader for large areas (saves time and ensures even coverage!).
- ● Drip irrigation system for hands-off watering (especially useful in hot climates).
- ● Mulch dye (if you prefer a uniform color for aesthetic appeal).
- ● Plant markers to label flowers and track varieties.
How to create a year-round flower bed with mulch for long-lasting beauty
Here's my foolproof approach to designing flower beds that stay vibrant through every season.
🪴 Step 1: Prepare the Soil Foundation
Start by removing all existing weeds and debris from your flower bed area. Use a garden fork to loosen the top 6 inches of soil—this helps roots establish deeper and prevents compaction. I like to work in 4-foot sections at a time to keep the process manageable.
Amend the soil with 2-3 inches of compost or aged manure mixed into the top layer. This boosts organic matter and improves drainage. You'll notice the soil becomes darker and crumbles easily when worked—this is your signal it's ready for planting.
☀️ Step 2: Choose and Plant Seasonal Flowers
Select flowers that bloom at different times for continuous color. For spring, consider tulips or daffodils; summer thrives with coneflowers or black-eyed Susans; and fall/winter offers pansies or ornamental kale. Plant in clusters of 3-5 plants per variety to create natural-looking groupings.
Dig holes twice as wide as the root ball but only as deep as the container's base. Gently remove plants from their containers, loosen any circling roots, and place them in the hole. The top of the root ball should sit 1 inch below soil level—this prevents stem rot while encouraging strong root growth.
🌱 Step 3: Apply the Perfect Mulch Layer
Spread 2-3 inches of organic mulch (like shredded bark or wood chips) over the soil surface, keeping it 2-3 inches away from plant stems to prevent rot. I use a rake to create an even layer—uneven mulch can lead to moisture pockets that invite pests.
For year-round benefits, top with 1 inch of coarse sand or gravel over the organic mulch in winter. This creates an insulating barrier that protects roots from extreme cold while allowing water to penetrate. You'll see healthier plants with fewer winter die-back issues.
💧 Step 4: Maintain with Smart Watering and Seasonal Care
Water deeply 2-3 times per week during the first growing season, aiming for 1 inch of water per week. Use a rain gauge or tuna can to measure—this prevents overwatering while ensuring roots establish properly. Mulch helps retain moisture, so you'll notice less frequent watering needed after the first season.
In early spring and fall, refresh the mulch layer by adding 1 inch of new material. This replenishes nutrients and maintains the insulating properties. Watch for signs of decomposition—when mulch breaks down into fine particles, it's time to refresh.
✂️ Step 5: Prune and Refresh for Continuous Bloom
Deadhead spent blooms regularly to encourage new flowers and prevent self-seeding. I use clean, sharp pruners to cut back to the first set of healthy leaves—this promotes bushier growth. For perennials, cut back 1/3 of the plant in early spring before new growth appears.
Every 2-3 years, divide overcrowded perennials in early spring. This rejuvenates plants and prevents disease. You'll see stronger stems and more abundant blooms after division—it's like giving your plants a fresh start.
Tips & tricks for perfect year-round flower beds
These practical strategies will help you create a lush, low-maintenance garden that stays stunning through every season.
Soil Prep Secret: When loosening that top 6 inches of soil in Step 1, work in smaller sections to avoid compacting the areas you've already aerated. I've learned this the hard way—skipping this step leads to shallow root systems that struggle in winter. For clay-heavy soil, mix in a handful of coarse sand with your compost to improve drainage without altering the 2-3 inches of organic matter called for.
Planting Precision: The instructions mention planting in clusters of 3-5, but here's what nobody tells you—space your clusters 12-18 inches apart to allow for mature growth. This prevents overcrowding that leads to fungal issues. For the 1-inch depth placement, use a level tool to ensure consistency across your entire bed—uneven planting creates water pooling that can drown roots.
Mulch Layering Technique: That 2-3 inch mulch layer in Step 3 works best when applied in two stages: spread 1-1.5 inches immediately after planting, then add the remaining 0.5-1.5 inches once plants are established. This gradual approach prevents temperature shock to young roots while maintaining the proper 2-3 inch total. For winter protection, use pine straw instead of coarse sand in colder climates—it provides better insulation without compacting.
Watering Wisdom: The 2-3 times per week guideline assumes average rainfall. In hotter months, increase to daily watering in the early morning to prevent evaporation. I use soaker hoses buried 1 inch below the mulch surface—they deliver water directly to roots while keeping foliage dry, reducing disease risk. Always water until you see moisture 6 inches deep, which may require more than the suggested 1 inch per week during peak summer.
Pro Tips for Mulch And Flowers
- These practical strategies will help you create a lush, low-maintenance garden that stays stunning through every season.
- Soil Prep Secret: When loosening that top 6 inches of soil in Step 1, work in smaller sections to avoid compacting the areas you've already aerated.
- Planting Precision: The instructions mention planting in clusters of 3-5, but here's what nobody tells you—space your clusters 12-18 inches apart to allow for mature growth.
Frequently asked questions
Got questions about mulching your flowers? You’re not alone!
Here are some of the most common concerns—and practical answers—to help you create a stunning, low-maintenance garden that blooms all year.
What’s the best type of mulch for flowers?
Organic mulches like shredded bark, straw, or wood chips are ideal—they improve soil as they break down, retain moisture, and suppress weeds. Inorganic options (e.g., gravel or rubber) work well in hot, dry climates but don’t enrich the soil. Match your mulch to your climate and flower type!
When is the best time to mulch flowers?
Spring and fall are the golden windows! Apply mulch after the soil warms in spring (to avoid smothering roots) and before the first frost in fall (to protect roots over winter). Avoid piling mulch against flower stems—keep it 2–3 inches deep and 2–3 inches away from plant bases to prevent rot.
Can I use fresh grass clippings as mulch for flowers?
Not ideal! Fresh grass clippings mat down into a dense layer, cutting off airflow and trapping heat—both can harm tender flower roots. If you must use them, let them dry or compost first, or mix them with other mulch materials (like straw) to dilute their effects.
Will mulch attract pests to my flowers?
Mulch itself doesn’t attract pests, but moisture buildup can. To prevent issues, choose well-draining mulch, avoid over-mulching, and ensure your garden has good airflow. If slugs or snails become a problem, opt for gravel or coarse bark—they dislike crawling over it!
How often should I replenish mulch around flowers?
Check mulch depth once a year in spring. Organic mulch breaks down and may need a 1–2 inch top-up annually. Inorganic mulch (like stones) lasts longer but may shift—fluff it gently to restore coverage. Over-mulching can suffocate roots, so less is often more!
Pro Tip:
For year-round color, pair mulch with seasonal flowers! Plant spring bulbs (like tulips) under mulch, then layer with summer bloomers (e.g., marigolds) and fall favorites (e.g., mums). The mulch keeps roots cozy while the flowers steal the show!
Wrapping up and next steps
Transforming your garden with mulch and flowers isn’t just about aesthetics—it’s a game-changer for year-round beauty, soil health, and low-maintenance growth. 🌸 By layering the right materials and blooms, you create a vibrant, resilient space that thrives with minimal effort.
Whether you’re a seasoned gardener or just starting, this approach makes landscaping both rewarding and sustainable.
Ready to take the next step? Start small: Pick one flower bed or section of your yard, gather your mulch, and dive in! Watch as your garden flourishes—one stunning layer at a time. 🌱