Container Gardens
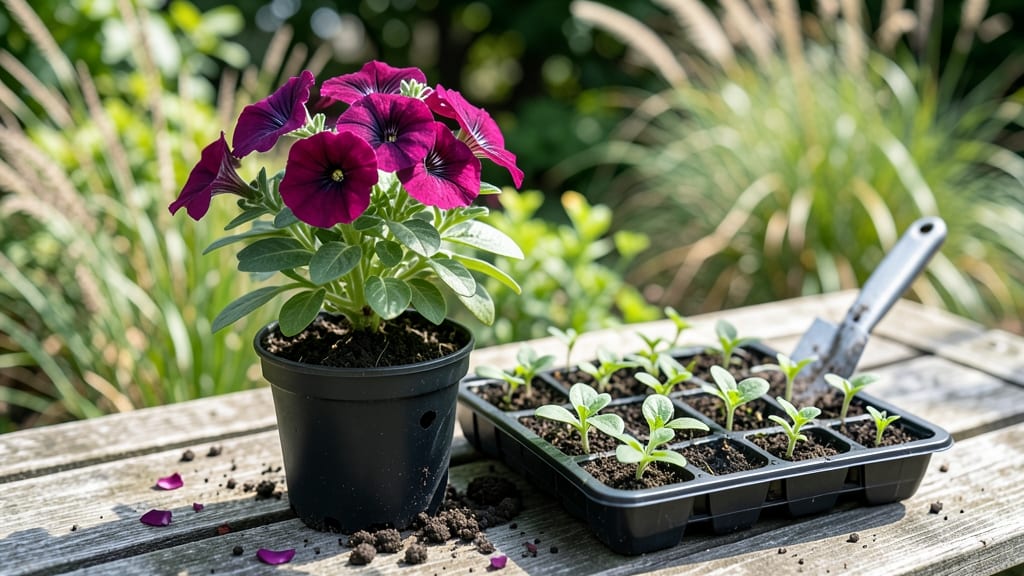
Planting flower pots in the ground turns temporary containers into permanent garden stars—just when you thought your patio plants couldn’t get any better. 🌱 I’ve buried dozens of pots over the years, and the difference in root growth, bloom size, and plant longevity is night-and-day.
The secret isn’t complicated: it’s about timing, soil prep, and giving roots the space to stretch out like they’re at a yoga retreat.
You’ll need a sunny spot with well-draining soil, a few basic tools (trowel, gloves, maybe a wheelbarrow for heavy pots), and plants that thrive in your climate zone.
The best time to do this is in early spring or fall when temperatures are mild—roots establish faster when they’re not fighting heat stress.
Start with containers that have drainage holes (or drill some if they don’t) to prevent soggy soil, and choose plants that handle transplanting well, like petunias, geraniums, or ornamental grasses.
Once planted, you’ll see thicker stems, deeper green leaves, and blooms that last all season—not to mention plants that outgrow their container roots and stop looking cramped. The key is to water deeply after planting and mulch around the base to keep moisture in.
Within 4-6 weeks, you’ll forget they ever lived in pots, and your neighbors will ask how you pulled off such lush, permanent-looking beds.
This works for everything from annuals to small shrubs, and it’s especially great for renters or gardeners with limited space. The only rule? Don’t bury pots deeper than they were in containers—roots need room to breathe. Ready to give your plants the upgrade they deserve?
📚 In This Guide
- What you need
- Instructions
- Tips and common mistakes
- Wrapping up and next steps
What you need
- ● Flower pots: 1–5+ (depending on quantity), with drainage holes (4–6" diameter recommended for small flowers, 10–12" for shrubs/perennials).
- ● Garden trowel or hand shovel: 1 (for digging and precision).
- ● Gloves (gardening or work gloves): 1 pair (to protect your hands from soil and thorns).
- ● Pruning shears: 1 (for trimming roots or plants if needed).
- ● Watering can or hose with spray nozzle: 1 (for gentle hydration).
- ● Potting soil or garden soil mix: 1–2 bags (moisture-retentive, well-draining blend like miracle-gro potting mix).
- ● Organic compost or fertilizer: 1 small bag (e.g., fish emulsion or slow-release granules for nutrients).
- ● Mulch (pine bark or shredded leaves): 1–2 bags (to retain moisture and suppress weeds).
- ● Plant supports (stakes or cages): 1–2 (for tall flowers like sunflowers or delphiniums).
- ● Soil moisture meter: 1 (to check hydration levels).
- ● Knee pad or cushion: 1 (for comfort during planting).
- ● Plant markers (labels): 1 set (to track varieties if testing different flowers).
How to plant flower pots directly in the ground for long-lasting growth
Here’s my foolproof method for transitioning potted flowers to the garden bed.
🪴 Step 1: Prepare the Garden Spot for Easy Transition
Choose a location with 6+ hours of sunlight daily—most flowering plants need this for vibrant blooms. Clear the area of weeds or grass, then loosen the soil with a garden fork to a depth of 12 inches. This helps roots spread without resistance. I like to mix in 2 inches of compost into the top 6 inches of soil to give plants a nutrient boost right away.
Dig a hole slightly larger than the pot’s diameter—about 2-3 inches wider all around. The depth should match the pot’s height, but never bury the plant deeper than it was in the pot. You’ll see the original soil line on the pot; this is your guide for proper placement.
🌱 Step 2: Gently Remove Plants and Inspect Roots
Water the potted plants thoroughly the day before transplanting. This keeps roots flexible and reduces shock. Turn the pot on its side and tap the rim gently to loosen the root ball. Slide the plant out carefully—roots should stay intact, but if they’re circling tightly, use your fingers to tease them apart. This prevents girdling as they grow.
Check for any damaged or mushy roots and trim those with clean scissors. Healthy roots should be white or light tan. If the root ball is dry or crumbly, soak it in a bucket of water for 10-15 minutes before planting. This ensures a smooth transition into the garden soil.
☀️ Step 3: Plant and Water for Immediate Stability
Place the plant in the hole so the top of the root ball sits ½ inch below ground level. This prevents water from pooling around the stem and causing rot. Fill the hole with soil, pressing gently around the edges to remove air pockets. A light patting with your hands works best—don’t compact too firmly.
Water deeply right after planting to settle the soil and eliminate gaps. Use 1 gallon of water per plant and let it soak in completely. You’ll see the soil sink slightly as it absorbs moisture. Mulch the base with 1-2 inches of organic mulch (like shredded bark) to retain moisture and regulate soil temperature. Keep mulch 2 inches away from the stem to avoid rot.
🌿 Step 4: Monitor and Support New Growth
Water the plants every 2-3 days for the first 2 weeks, or whenever the top inch of soil feels dry. Avoid overhead watering—it can spread disease. Instead, water at the base with a gentle stream. You’ll notice new leaves emerging within 7-10 days if the plant is thriving.
Stake tall or top-heavy plants immediately to prevent wind damage. Use soft ties or fabric strips to secure stems without cutting into them. If flowers start to wilt after a few days, it’s normal—just keep watering consistently. Most plants adjust within 2-3 weeks, and you’ll see full, healthy growth soon after.
Tips & tricks for planting flower pots in ground
Between us, these little details make the difference between plants that thrive and ones that struggle. I've seen gardeners skip these and wonder why their flowers never quite take off.
Soil Prep Secret: In Step 1, when you're loosening that 12-inch depth, don't just scratch the surface—really work that garden fork deep. The goal is to break up any compacted layers so roots can spread easily. I like to add a handful of perlite to the compost mix for extra drainage, especially if your soil tends to stay soggy. This helps prevent root rot later.
Root Ball Rescue: That 10-15 minute soak in Step 2 is your safety net for dry root balls. I've seen gardeners skip this and end up with plants that wilt dramatically after transplanting. Pro tip: If your roots are really tangled, don't force them apart—just make a couple of vertical cuts around the root ball with a clean knife to encourage outward growth. This prevents girdling without damaging the plant.
Watering Wisdom: When you're giving that 1 gallon of water in Step 3, let it soak in completely before adding more. I test this by sticking my finger in the soil—if it's still damp 2 inches down, you're good. The key is to water deeply but infrequently after the initial planting. This encourages roots to grow deeper rather than staying shallow.
Mulch Matters: That 1-2 inch layer of organic mulch isn't just decoration—it's your plant's blanket. I like to use shredded bark because it breaks down slowly and adds nutrients as it decomposes. Just remember to keep it 2 inches away from stems to prevent rot. A bonus tip: Sprinkle a little slow-release fertilizer under the mulch at planting time for an extra boost.
Pro Tips for Planting Flower Pots In Ground
- Between us, these little details make the difference between plants that thrive and ones that struggle.
- Soil Prep Secret: In Step 1, when you're loosening that 12-inch depth, don't just scratch the surface—really work that garden fork deep.
- Root Ball Rescue: That 10-15 minute soak in Step 2 is your safety net for dry root balls.
Frequently asked questions
Got questions about planting flower pots in the ground? You’re not alone—this DIY project can raise a few curiosities! Here are some of the most common concerns, answered in plain terms to help you get it right the first time.
When is the best time to plant pots in the ground?
The ideal window is early spring or early fall when temperatures are mild (50–75°F). Avoid extreme heat or frost—roots need time to establish without stress. If you’re in a warm climate, plant in late winter to beat summer drought.
Can I reuse old pots that are already planted?
Yes! If the pots are intact and free of cracks, you can transplant them directly into the ground. Just water them thoroughly 1–2 days before planting to reduce shock. Remove any weeds or dead foliage first for a cleaner start.
What if my flowers wilt after planting?
Wilting is normal for a few days—roots adjust to their new environment. Water deeply but gently (avoid soaking the soil) and mulch around the base to retain moisture. If wilting persists after a week, check for overwatering, poor drainage, or root damage during transplant.
Do I need to amend the soil before planting?
It depends! If your soil is clay-heavy or sandy, mix in 2–3 inches of compost or aged manure to improve texture and fertility. For nutrient-poor soil, a balanced fertilizer (like 10-10-10) at planting time gives roots a boost.
What’s the best way to hide the pot edges?
For a seamless look, bury the pot entirely (if it’s plastic or lightweight) or use landscape fabric around the edges to blend it into the garden. Top with mulch or decorative stones—just leave a small gap for airflow if the pot has drainage holes.
Will freezing temperatures hurt my transplanted flowers?
Most perennials and cold-hardy annuals (like pansies or snapdragons) handle light frost fine. Mulch heavily (3–4 inches) before winter to insulate roots. Tender plants (e.g., geraniums) may need winter protection, like moving pots to a sheltered spot or wrapping them in burlap.
Wrapping up and next steps
Planting flower pots in the ground is a game-changer—it breathes new life into your garden while giving your plants the space to thrive! 🌱 Whether you're reviving wilted blooms or extending the life of seasonal favorites, this simple technique unlocks long-term beauty with minimal effort.
Now that you’re equipped with the how-to and answers to common questions, there’s no better time to grab those pots and get growing!
Ready to transform your garden? Start by selecting your next favorite container plants, then review the essentials one last time. The earth is waiting—your green thumb is next! 🌸