Landscaping
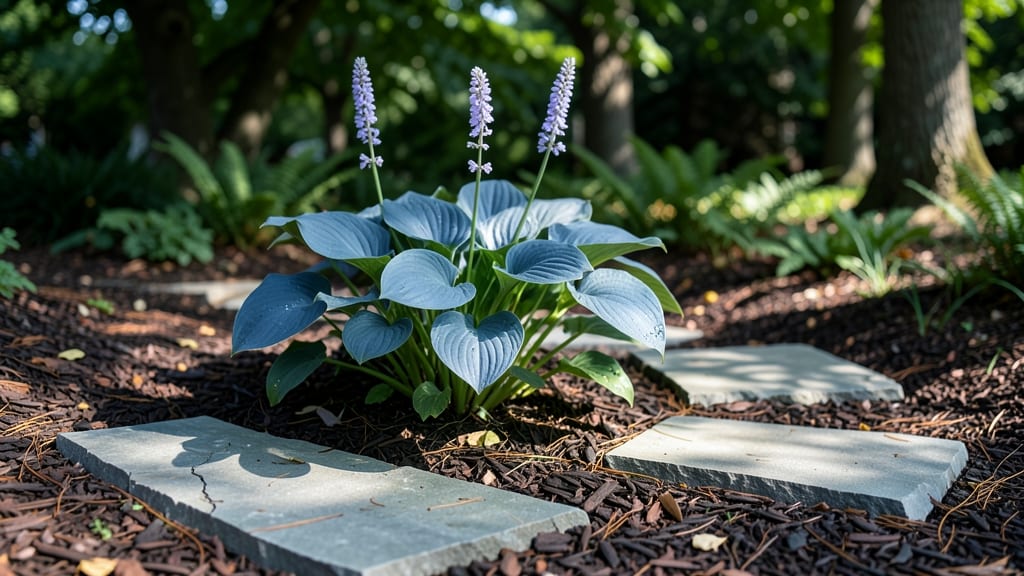
Stepping stones in flower beds transform chaotic garden spaces into deliberate, walkable art—and they’re easier to install than you’d think. I’ve used them to turn my overgrown perennial border into a polished, functional retreat, where every step feels intentional.
The key? Choosing stones that harmonize with your plants while creating a path that guides visitors through your garden like a curated gallery.
You don’t need fancy materials—slate, concrete, or even repurposed bricks work beautifully—just a level surface and a little planning. Spacing them 12–18 inches apart keeps weeds at bay while allowing plants to spill between them naturally.
My favorite design? A winding path that meanders through drifts of lavender and ornamental grasses, making the garden feel like a secret escape.
The payoff is instant: cleaner lines, easier maintenance, and a sense of movement that draws the eye deeper into your space. Plus, you’ll spend less time battling muddy boots and more time enjoying the view.
Whether your style leans rustic or refined, stepping stones let you blend function with beauty without sacrificing either.
Ready to try? Start small—even a 6-foot path makes a difference—and let your plants dictate the rhythm. The stones will hold up for years, but the ever-changing colors of your flowers will keep the look fresh season after season.
📚 In This Guide
- What you need
- Instructions
- Tips and common mistakes
- Wrapping up and next steps
What you need
- ● Stepping stones: Natural stone (slate, flagstone, or bluestone) – 6–12 stones per 4’x4’ bed (adjust based on spacing).
- ● OR pre-cast concrete stepping stones (varied shapes/sizes for texture).
- ● Base layer: Crushed gravel (¾” minus) – 2–3” depth (for drainage and stability).
- ● Landscape fabric – 1 roll (10’x25’) (to prevent weed growth).
- ● Edging: Flexible metal or plastic edging – 10–20’ length (to define pathways).
- ● OR bricks or pavers (for a built-in look).
- ● Adhesive/sealant: Concrete bonding adhesive (for securing stones if needed).
- ● Wheelbarrow (for hauling gravel).
- ● Shovel and rake (for leveling and spreading base materials).
- ● Measuring tape and string line (to mark pathways).
- ● Rubber mallet (for settling stones into place).
- ● Safety gloves and knee pads (because comfort matters!).
- ○ Optional: Stakes and hammer (for securing edging).
- ● ✅ Clear the area: Remove weeds, rocks, or debris from the flower bed.
- ● ✅ Plan your layout: Sketch a design (straight, curved, or winding) and mark pathways with spray paint or string.
- ● 💡 Pro tip: Space stones 12–18 inches apart for easy walking and drainage.
- ● 🌡️ Weather note: Work on a dry day—wet soil can shift stones!
How to design rustic stepping stones for functional flower bed pathways
Here’s how to create pathways that blend seamlessly with your garden while keeping maintenance simple and stylish.
Plan the Layout and Spacing
Start by sketching your flower bed layout on paper, marking where stepping stones will guide foot traffic. I like to space stones 12-18 inches apart—close enough to prevent ankle twists but far enough to let grass or mulch fill gaps naturally. For a 4-foot-wide pathway, three stones per row work perfectly, creating a natural, rustic rhythm.
Walk the path while holding a 2-foot measuring tape to ensure even spacing. Adjust placement to avoid disturbing plant roots or disrupting the natural flow of your garden. If your flower bed has curves, use a flexible garden hose to outline the path first—it’s easier to adjust than digging in soil.
Choose and Prepare the Materials
Select stones that match your garden’s aesthetic—whether it’s sandstone for a natural look, slate for a modern feel, or concrete pavers painted to blend with foliage. For a 4-foot pathway, you’ll need about 12-15 stones, depending on size. I prefer flat, irregularly shaped stones because they mimic nature and reduce the risk of tripping.
Clean each stone thoroughly with a wire brush and mild soap to remove dirt or algae. If using natural stone, soak them in water for 10-15 minutes before placing—this prevents them from absorbing moisture from the soil and cracking over time. For concrete or pavers, skip the soaking but ensure they’re completely dry to avoid shifting.
Dig and Level the Base
Mark the stone placement with spray paint or a garden hose, then dig down 2-3 inches along each line to create a shallow trench. The depth should accommodate the stone’s thickness plus 1 inch of compacted gravel underneath for drainage. Use a hand tamper or plate compactor to firm the soil before adding gravel.
Spread a 1-inch layer of coarse gravel (like crushed stone) into the trench and level it with a 2x4 board or straightedge. This layer prevents weeds and ensures water drains away from the stones. Tap the board gently to settle the gravel evenly—uneven bases lead to wobbly stones that trip you later.
Install and Secure the Stones
Place each stone into the trench, pressing down firmly until it sits flush with the surrounding soil. For extra stability, especially in high-traffic areas, use a rubber mallet to tap the stones into place without cracking them. Leave ¼-inch gaps between stones to allow for slight expansion and contraction with temperature changes.
Fill the gaps with polished sand or fine gravel, then sweep it into the spaces with a broom. This locks the stones in place and prevents weeds from sprouting between them. For a finished look, sweep sand over the entire pathway to blend the edges. Avoid using mulch in the gaps—it decomposes and creates uneven surfaces.
Finish and Maintain for Longevity
After installation, water the pathway lightly to settle the sand and check for any uneven stones. Adjust as needed before the sand dries completely. For a polished finish, sweep the stones with a soft-bristle broom to remove excess sand and reveal clean lines. This step also helps identify any stones that need re-leveling.
To keep your pathway looking fresh, sweep the stones every few weeks to remove debris and prevent moss or algae buildup. If weeds poke through the gaps, pull them by hand or apply a vinegar-water solution (1 part vinegar to 3 parts water) to kill them without harming nearby plants. With proper care, your stepping stones will last for years while keeping your flower beds accessible and beautiful.
Tips & tricks for perfect rustic flower bed pathways
Here's what nobody tells you about creating pathways that last—and look stunning—without the headaches.
Layout Precision: When sketching your layout in Step 1, consider the "rule of thirds" for visual balance. Place your first stone about 12 inches from the pathway's starting point, then measure subsequent stones at 18-inch intervals. This creates a more organic rhythm than equal spacing. For curved pathways, use a garden hose to bend it into your desired shape before marking—it's easier to adjust than digging in soil later.
Material Selection Tip: In Step 2, if you're using natural stone like sandstone or slate, look for pieces with slight texture variations—they'll blend better with organic gardens. For concrete pavers, choose ones with a slightly rough finish rather than smooth; they'll provide better traction and look more natural over time. The 10-15 minute soaking time for natural stone is crucial—it prevents moisture absorption from the soil that could cause cracking over time.
Base Preparation: For Step 3, don't skimp on the gravel layer. That 1-inch depth of compacted crushed stone is what prevents weeds and ensures proper drainage. I've seen too many pathways fail because homeowners tried to cut corners here. Use a 2x4 board to level the gravel—tap it gently but firmly to eliminate any dips that could cause stones to sink unevenly over time.
Installation Stability: When placing stones in Step 4, here's a pro trick: after pressing each stone into place, give it a gentle twist clockwise and counterclockwise. This helps the stone settle into the gravel base more securely. The ¼-inch gaps between stones might seem small, but they're essential for allowing seasonal expansion. Use a thin metal spacer if needed to maintain consistent gaps—it's worth the small investment for long-term stability.
Pro Tips for Stepping Stones In Flower Beds
- Here's what nobody tells you about creating pathways that last—and look stunning—without the headaches.
- Layout Precision: When sketching your layout in Step 1, consider the "rule of thirds" for visual balance.
- Material Selection Tip: In Step 2, if you're using natural stone like sandstone or slate, look for pieces with slight texture variations—they'll blend better with organic gardens.
Frequently asked questions
Got questions about stepping stones in your flower beds? You’re not alone! Here are answers to the most common queries to help you create the perfect rustic pathway.
What are the best materials for stepping stones in flower beds?
Natural materials like flagstone, slate, or bluestone are popular for their durability and aesthetic appeal. For a rustic look, consider recycled bricks, concrete pavers, or even large river rocks. Each material has pros—flagstone blends seamlessly with gardens, while concrete offers budget-friendly versatility.
When is the best time to install stepping stones?
The ideal time is spring or early fall when soil is workable but not frozen. Avoid installing during extreme heat or heavy rain, as wet ground can shift stones or delay proper settling. Spring also allows time for plants to recover if roots are disturbed.
Can I use stepping stones in small or narrow flower beds?
For narrow beds, opt for smaller stones (6–12 inches wide) or even stepping stone "runners" (long, narrow pavers). Arrange them in a staggered pattern to create a natural, winding path. Just ensure spacing allows for plant growth between stones.
How do I fix sinking or uneven stepping stones?
If stones sink over time, lift them gently and add a layer of gravel or sand beneath for better drainage and support. For uneven surfaces, adjust the base material or use a rubber mallet to tap stones into place. Recheck after rain to prevent long-term shifting.
Will stepping stones harm my plants or soil?
Not if installed properly! Use landscape fabric under stones to prevent weeds and allow water to penetrate. Avoid compacting soil too heavily around plants—leave gaps for roots to breathe. If concerned, choose permeable pavers to reduce runoff.
Wrapping up and next steps
Transforming your flower beds with stepping stones isn’t just about function—it’s about artistry. Whether you’re drawn to natural stone, concrete, or recycled materials, these rustic pathways add charm, structure, and personality to your garden. The key? Start small, plan boldly, and let your creativity guide you!
Ready to take the next step? Sketch your design, gather your materials, and begin laying the foundation for a garden that feels like a dream. Your outdoor sanctuary is waiting—go make it extraordinary! 🌿✨