Flowers
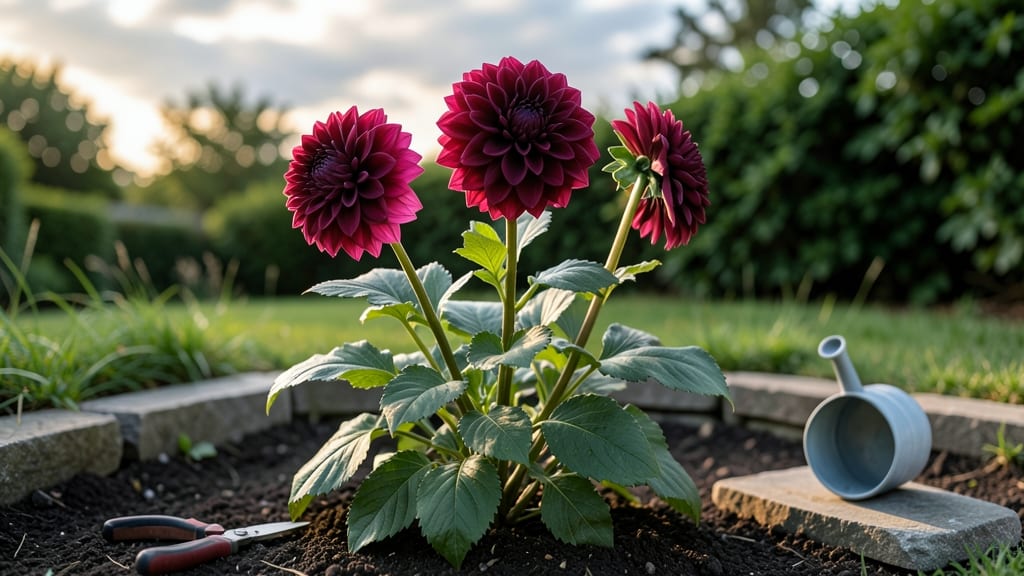
Nothing says summer like a dahlia flower in full bloom—those velvety petals in every shade from deep burgundy to sunshine yellow.
I’ve used them to transform my garden from a patch of green into a year-round canvas, blending seasonal color schemes with bold, lush textures that catch every passerby’s eye.
The secret isn’t just planting them—it’s placing them right. Dahlias thrive in borders, where their towering blooms frame pathways, or in containers where they spill over edges like living waterfalls.
Pair them with sun-loving companions like zinnias or salvias for a nonstop show, or tuck shorter varieties near entryways to welcome guests with a burst of color. Their height makes them perfect for cutting too, so you’ll have bouquets that last.
Imagine your garden in late summer: dahlias at their peak, their petals glowing in the afternoon light while nearby grasses sway and perennials hum with bees.
The key is mixing heights—tall dahlias in the back, mid-size ones in the middle, and dwarf varieties up front—to create layers that feel like a living painting. Even in winter, their dried stems add rustic charm to arrangements.
Whether you’re designing a cottage garden, a modern minimalist space, or a wildflower meadow, dahlias adapt. Start with a few varieties in complementary colors—think crimson, coral, and cream—and watch how they elevate every corner of your outdoor space. Let’s make your garden the talk of the neighborhood!
📚 In This Guide
- What you need
- Instructions
- Tips and common mistakes
- Wrapping up and next steps
What you need
- ● Dahlia tubers: Choose healthy, disease-free tubers (1-2 per plant, depending on variety). Opt for varied colors (e.g., red, pink, purple, or bi-color) for a vibrant display.
- ● Well-draining potting mix: A blend of 50% garden soil, 30% compost, and 20% perlite or sand (10-15 gallons per container or 1 cubic yard for in-ground planting).
- ○ Containers (optional but recommended): Large pots (12-18 inches in diameter) with drainage holes for 1-2 tubers per container.
- ● Fabric grow bags (15-20 gallons) for 3-5 tubers per bag (great for heavy feeders!).
- ● Slow-release fertilizer: A balanced 10-10-10 or 14-14-14 formula (1-2 cups per plant or per 5-gallon container).
- ● Organic mulch: Straw or shredded leaves (2-3 inches thick) to retain moisture and regulate soil temperature.
- ● Hand trowel or small shovel for planting tubers.
- ○ Garden gloves (optional but recommended to protect hands from thorns and soil).
- ● Watering can or hose with a gentle spray nozzle (dahlias hate soggy roots!).
- ● Pruning shears (for deadheading and shaping plants later in the season).
- ● Stakes or tomato cages (6-8 feet tall) to support tall varieties (e.g., ‘Café au Lait’ or ‘Arabian Night’).
- ● Sunlight: 6+ hours of full sun daily (partial shade in hot climates).
- ○ pH test kit (optional): Ideal soil pH for dahlias is 6.0–7.0.
- ● Epsom salt (1 tablespoon per gallon of water) for magnesium boosts during flowering.
- ● Fish emulsion or compost tea (every 2-3 weeks) for extra nutrients.
- ● Dahlia-specific food (like Miracle-Gro Shake ‘n Feed) for a quick nutrient kick.
- ● Thermometer (for cold climates) to monitor soil temps—tubers need 60°F+ to sprout.
How to cultivate stunning dahlias for season-long blooms
Here's the straightforward approach I've used to grow dahlias that bloom from early summer until frost—with minimal fuss.
Choose Tubers and Prepare Planting Site
Select dahlia tubers with multiple "eyes" (buds) for vigorous growth. I like to soak them in lukewarm water for 24 hours before planting—this jumpstarts root development and ensures faster emergence. Choose a location with full sun (6+ hours daily) and well-draining soil, as dahlias despise soggy roots.
Loosen the soil to a depth of 12 inches with a garden fork, breaking up any compacted layers. Work in 2-3 inches of compost to enrich the soil naturally. If your soil drains poorly, mix in sand or perlite to improve aeration. Dahlias thrive in fertile, loose soil that lets roots spread freely.
Plant Tubers at the Right Depth and Spacing
Plant tubers with the eyes facing upward, about 4-6 inches deep in the soil. The depth depends on your climate—plant shallower (4 inches) in cooler regions and deeper (6 inches) in hotter areas to protect tubers from temperature swings. Space plants 18-24 inches apart to allow for their large, bushy growth habit.
I like to mound soil around the tubers to create a small hill, which helps prevent water from pooling around the base. After planting, water deeply to settle the soil and encourage root contact. Avoid watering again until you see new shoots emerging—typically within 2-3 weeks. Overwatering at this stage can rot tubers before they sprout.
Provide Support and Fertilize for Strong Growth
Dahlias need sturdy support to handle their heavy blooms. Install cages, stakes, or trellises as soon as you plant the tubers—waiting until later can damage developing roots. I use 5-foot bamboo stakes for single stems or heavy-duty tomato cages for bushier varieties. Secure the support firmly so it doesn’t topple when the plant matures.
Once shoots reach 6 inches tall, apply a balanced, slow-release fertilizer (like 10-10-10) to encourage lush foliage and strong stems. I like to side-dress with compost tea every 4-6 weeks for an organic boost. Dahlias are heavy feeders, so consistent nutrition keeps them blooming prolifically. Watch for yellowing leaves—this signals a need for more nitrogen, while small, sparse blooms mean they need phosphorus.
Prune and Deadhead for Continuous Blooms
Pinch back the top set of leaves when the plant reaches 12 inches tall to encourage bushier growth. This step is crucial—skipping it results in tall, leggy stems that flop over. After pinching, the plant will send out multiple side shoots, each capable of producing flowers. Remove any weak or crossing stems to improve airflow and reduce disease risk.
Deadhead spent blooms immediately by cutting the stem back to the nearest set of leaves. This redirects the plant’s energy into producing new flowers rather than seeding. I also trim back overly long stems to maintain a compact shape and prevent breakage. With consistent deadheading, dahlias will keep blooming until the first frost, often producing more flowers in fall than in summer.
Overwinter Tubers for Next Year’s Blooms
Before the first frost, cut back the foliage to ground level and carefully dig up the tubers. Shake off excess soil and let them dry in a shady, well-ventilated area for 2-3 days. This prevents rot during storage. I store tubers in a cool, dark place (40-50°F) in a box of dry peat moss or vermiculite—this mimics their natural dormancy conditions.
Check tubers monthly for signs of rot or mold. Discard any that feel mushy or smell off. In early spring, re-soak the tubers before replanting to kickstart growth. With proper storage, dahlias can live for years, producing even more dramatic blooms each season. The key is patience—rushing the process leads to weak tubers that struggle to regrow.
Tips & tricks for perfect dahlia cultivation
Real talk: Dahlias reward patience with spectacular blooms—but only if you nail these key details. Here's what nobody tells you about growing them like a pro.
Soaking Secret: That 24-hour lukewarm water soak isn't just optional—it's the difference between tubers that sprout in 2 weeks versus 3. Use room temperature water (not hot) and change it after 12 hours to prevent bacterial growth. I add a drop of hydrogen peroxide to the water for extra protection against rot. The goal is to hydrate the tubers while keeping them safe from pathogens that could derail your entire garden.
Climate Adjustment: The 4-6 inch planting depth range is your friend, but here's the catch: In Zone 5 or cooler climates, stick to the shallower end (4 inches) to prevent frost damage to deeper tubers. In hotter zones (7-9), go deeper (5-6 inches) to protect against temperature swings. I've learned this the hard way—tubers planted too deep in cold areas often fail to sprout, while shallow planting in hot climates leads to weak stems that can't support blooms.
Support Strategy: Installing support immediately (as Step 3 requires) is crucial, but here's the pro move: Bury the stakes or cages at least 6 inches deep before planting. This creates a stable base that won't shift when the plant matures. For windy areas, I double up with both stakes and cages—one for stability, one for bloom support. The key is preventing any movement that could snap stems during storms or when heavy blooms develop.
Fertilizer Timing: Those 4-6 week intervals for compost tea are perfect, but watch for these signs: If your plants look lush but produce tiny blooms, they need more phosphorus (try a 5-10-5 fertilizer). For yellowing leaves, nitrogen is the issue—switch to a 10-5-5 formula. I've found that dahlias actually respond better to slightly less frequent feeding (every 6 weeks) once they're established, as overfeeding can lead to excessive foliage at the expense of flowers.
Pro Tips for The Dahlia Flower
- Real talk: Dahlias reward patience with spectacular blooms—but only if you nail these key details.
- Soaking Secret: That 24-hour lukewarm water soak isn't just optional—it's the difference between tubers that sprout in 2 weeks versus 3.
- Climate Adjustment: The 4-6 inch planting depth range is your friend, but here's the catch: In Zone 5 or cooler climates, stick to the shallower end (4 inches) to prevent frost damage to deeper tubers.
Frequently asked questions
Got questions about growing and caring for dahlias? You’re not alone! Here are some of the most common queries—plus quick, practical answers to keep your dahlias thriving all season long.
When is the best time to plant dahlias?
Dahlias love warmth, so plant them after the last frost when soil temperatures hit at least 60°F (15°C). For most U.S. zones, this means late spring (May–June). If you start tubers indoors 4–6 weeks earlier, you’ll get a head start! Pro tip: Use mulch to protect roots from sudden temperature drops.
How long do dahlias take to bloom?
With proper care, dahlias can bloom 8–12 weeks after planting—often starting in early summer and lasting until frost. For continuous blooms, deadhead spent flowers (snip just above a leaf node) and fertilize monthly with a balanced bloom booster. Fun fact: Some varieties, like ‘Café au Lait,’ bloom nonstop with minimal effort!
What pests or diseases should I watch for?
Dahlias are tough but can fall prey to slugs, aphids, and powdery mildew. Prevent pests with neem oil or diatomaceous earth, and ensure airflow between plants to avoid mildew. If you spot chewed leaves or sticky residue, act fast—slug bait or insecticidal soap works wonders. Rotate crops yearly to prevent soil-borne issues.
Can I grow dahlias in containers?
Choose a 12–15-inch pot with drainage holes and use a well-draining potting mix. Dwarf varieties like ‘Bishop’ or ‘Tom Thumb’ thrive in containers, while larger types may need staking. Place pots in full sun (6+ hours/day) and water consistently—containers dry out faster than garden beds.
How do I overwinter dahlias?
Before frost, dig up tubers, trim foliage, and let them dry in a cool, dark place for 2 weeks. Store in sphagnum moss or peat in a 35–40°F (2–4°C) space (like a garage). Check monthly for rot—discard any mushy tubers. Label varieties to replant with confidence next spring!
Are there low-maintenance dahlia alternatives?
If dahlias seem high-maintenance, try rudbeckias, black-eyed Susans, or coneflowers—they’re drought-tolerant, pest-resistant, and bloom for months with minimal fuss. For a similar tropical vibe, heleniums or gaillardias offer bold colors with less upkeep.
Wrapping up and next steps
The dahlia flower isn’t just a seasonal beauty—it’s a year-round statement that brings bold color, texture, and joy to any garden or space.
Whether you’re drawn to its dramatic petals for cut arrangements, its resilience as a perennial, or its ability to thrive in containers, dahlias prove that greatness comes in many colors—and sizes! 🌸
Ready to make dahlias your garden’s star? Start small: plant a single variety this season and let its magic inspire you. Before you know it, you’ll be experimenting with hybrids, sharing cuttings, or even designing your own floral masterpiece. Your green thumb is closer than you think—dig in!