Flowers
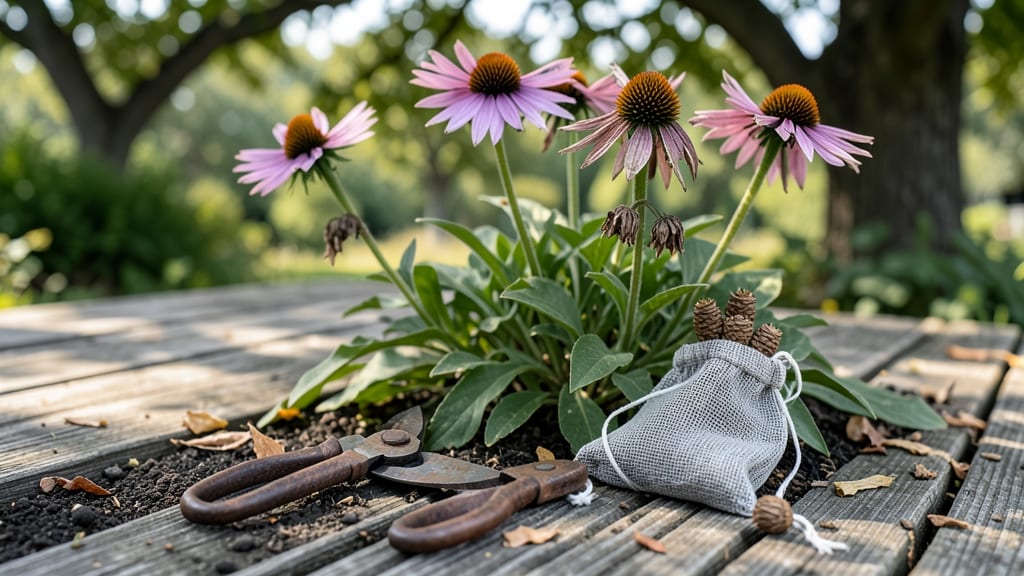
Wondering what to do with wildflowers at the end of season?
That golden, seed-laden beauty doesn’t have to disappear—it can become dried arrangements, saved seeds, or even a late-season treat for wildlife. 🌼 The key is knowing when to act: too early, and you’ll waste potential; too late, and you’ll lose the magic.
Start by assessing each plant—some, like black-eyed Susans, beg to be dried for winter bouquets, while others, like milkweed, should stay standing for monarchs. A sharp pair of pruners and a brown paper bag are all you need to collect seeds before they scatter.
Leave a few stalks upright for birds, but cut the rest at the base before frost sets in.
What you end up with is a stash of dried blooms that smell like summer in January, packets of seeds ready for next year’s garden, and a garden that wakes up healthier in spring. The best part? You’re giving back to pollinators even after the growing season ends.
This works for any wildflower mix—native prairie blends, cottage garden strays, or roadside volunteers. Just time it right, and you’ll turn autumn’s brown into next year’s green. Let’s make the most of it before the first frost!
📚 In This Guide
- What you need
- Instructions
- Tips and common mistakes
- Wrapping up and next steps
What you need
- ● Wildflowers: Freshly cut stems (harvest in the morning for best results). Aim for 10–20 stems per arrangement, depending on size.
- ● Pruning shears or sharp scissors: 1 pair (clean and sterilized to avoid disease).
- ● Buckets or vases: 2–3 containers (one for water, one for drying method of choice).
- ● Newspaper or paper towels: Enough to line a flat surface or cover stems during drying.
- ● Rubber bands or twine: 1 roll (for bundling stems).
- ● Drying methods (pick one): Air-drying: A dry, dark, well-ventilated space (e.g., closet or attic).
- ● Silica gel: 1–2 lbs (for fast, professional results).
- ● Oven or microwave: For quick-drying (see safety notes below!).
- ● Seed-saving supplies (if applicable): Paper bags or envelopes: 5–10 (labeled with flower type and date).
- ● Permanent marker: 1 (for labeling).
- ○ Small mesh bags or breathable fabric: Optional (for long-term seed storage).
- ● Floral preservative: 1 bottle (extends vase life for fresh or dried flowers).
- ● Wire or floral tape: 1 roll (for securing stems in arrangements).
- ○ Dried filler materials: Optional (e.g., baby’s breath, eucalyptus, or wheat stalks for texture).
- ● Spray adhesive or glue dots: 1 small container (for attaching flowers to cards or crafts).
- ○ Digital scale: Optional (for precise seed measurements).
- ● 💡 For oven/microwave drying: Use low heat (200°F or less) and monitor closely to avoid fire hazards. Microwave on high for 1–2 minutes in short bursts.
- ● 🌡️ Silica gel safety: Wear gloves—it’s abrasive and can irritate skin.
- ● 🎯 Label seeds immediately: Note the date harvested and flower type to avoid mix-ups!
Step-by-Step guide for preserving wildflowers at season's end
Extend your wildflower magic beyond summer with these simple preservation techniques.
🌿 Step 1: Harvest Flowers at Peak Drying Stage
Pick flowers when they're fully open but before petals begin to fade or drop. Early morning harvests yield the best results—stems are turgid with moisture and less likely to wilt. Use clean, sharp pruners or scissors to cut stems at a 45-degree angle about 2-3 inches below the flower head. This angled cut increases surface area for water uptake during drying.
Here's the thing—wildflowers dry best when they're still slightly damp. Avoid harvesting after rain or heavy dew, as excess moisture can cause mold during the drying process. Gather stems in small bunches of 5-7 stems each and secure them with rubber bands or twine. I like to hang them upside down immediately to prevent water from pooling at the base.
💧 Step 2: Choose and Set Up Drying Methods
Wildflowers can be dried using three reliable methods: air-drying, silica gel, or microwave. For most wildflowers, air-drying is simplest. Bundle stems and hang them in a dark, dry, well-ventilated space with 50-60% humidity and 70-75°F temperature. A closet with a small fan circulating air works perfectly—just avoid direct sunlight, which can bleach petals.
If you're short on time, silica gel is fastest. Place individual flowers (not stems) in a container of dried silica crystals, ensuring complete coverage. Remove after 2-4 hours when petals feel crisp to the touch. For microwave drying, wrap stems in a damp paper towel and microwave on high for 1-2 minutes—check frequently to avoid overheating. This method works best for small batches of delicate blooms.
✂️ Step 3: Process and Store Dried Flowers
Once flowers are completely dry (usually 1-3 weeks for air-drying), remove them from stems and store in an airtight container lined with acid-free tissue paper. Keep containers in a cool, dark place to preserve color and texture. I like to label each container with the flower type and drying date—some varieties, like black-eyed Susans, retain their color for years, while others fade within months.
For seed saving, allow some flower heads to remain on the stems until they turn brown and papery. Harvest seeds when they're fully mature but before they scatter naturally. Spread seeds on a clean, dry surface to dry completely (another 1-2 weeks in a warm, dry area), then store in labeled envelopes in a cool, dark place. Viability lasts 1-3 years depending on the species.
🪴 Step 4: Create Long-Lasting Dried Arrangements
Dried wildflowers make stunning arrangements that last for years. Start with a 2-3 inch deep container or vase and layer stems in an odd-numbered pattern for natural balance. Use floral wire or fishing line to secure stems in place—this prevents them from shifting over time. I often mix dried wildflowers with everlasting flowers like strawflowers or statice for added texture and longevity.
Here's where it gets fun—experiment with unexpected combinations. Delicate baby's breath pairs beautifully with bold coneflowers, while feathery grasses add movement to arrangements. Once complete, display your creation in indirect light to prevent fading. With proper care, dried wildflower arrangements can remain vibrant for 5-10 years, making them a meaningful keepsake.
Tips & tricks for preserving wildflowers at season's end
Common pitfalls—and how to sidestep every one when preserving wildflowers.
Harvest Timing is Everything: In Step 1, that 45-degree angle cut isn't just for looks—it's about maximizing water uptake during drying. I learned this the hard way after losing entire batches to mold. Cut stems just as the flowers reach peak bloom (when petals are fully open but not yet fading), and always harvest in the morning. This ensures stems are properly hydrated for the drying process, and you'll avoid the dreaded wilted stems that make drying impossible. The 5-7 stem bundles also create perfect airflow during drying.
Drying Environment Secrets: For Step 2's air-drying method, that 70-75°F temperature range is non-negotiable. Too hot, and delicate petals will crisp too quickly; too cool, and mold becomes a risk. I've found that placing a small fan near the hanging bundles creates gentle airflow without disturbing the flowers. For silica gel drying, those 2-4 hours can vary—watch for petals to feel crisp to the touch rather than relying solely on time. And for microwave drying, that 1-2 minute range is tight—check every 20 seconds to avoid overheating, which can turn flowers brittle.
Storage Wisdom: In Step 3, acid-free tissue paper isn't just a suggestion—it's essential for preserving color. Regular tissue can yellow over time and damage delicate petals. I like to add a small silica gel packet to each storage container to maintain low humidity. For seed saving, that 1-2 week additional drying time is crucial—seeds need to be completely dry to prevent mold during storage. Labeling containers with both flower type and drying date helps track which varieties retain color best over time.
Arrangement Pro Tips: When creating dried arrangements in Step 4, that 2-3 inch depth recommendation isn't arbitrary. Deeper containers provide better support for stems and prevent shifting. For extra stability, I like to use a small amount of floral adhesive at the base of each stem before inserting into the container. This creates a secure anchor without being visible. And remember—dried arrangements can handle more dramatic color combinations than fresh flowers, so don't be afraid to mix bold hues with delicate pastels.
Pro Tips for What To Do With Wildflowers At End Of Season
- Common pitfalls—and how to sidestep every one when preserving wildflowers.
- Harvest Timing is Everything: In Step 1, that 45-degree angle cut isn't just for looks—it's about maximizing water uptake during drying.
- Drying Environment Secrets: For Step 2's air-drying method, that 70-75°F temperature range is non-negotiable.
Frequently asked questions
When is the best time to harvest wildflowers for drying?
Harvest wildflowers in the early morning when dew is present but the blooms are fully open. Aim for peak bloom—usually mid-morning to early afternoon—when moisture content is ideal. Avoid harvesting after rain or late in the day, as excess moisture can lead to mold or uneven drying. Pro tip: Cut stems at an angle for better water absorption during drying!
How long does it take for wildflowers to dry completely?
Drying time varies by flower type and method, but most wildflowers take 1–3 weeks to dry thoroughly. Air-drying (hanging upside down in a dark, dry space) is the slowest but most natural, while silica gel or microwave methods can speed it up to 24–48 hours. Check stems for crispness—if they snap easily, your flowers are ready!
Can I save seeds from wildflowers, and how do I store them?
Yes! Once flower heads turn brown and dry, gently rub them to release seeds or use a paper bag to collect them. Store seeds in a cool, dry place (like a sealed envelope or jar) for up to 2 years. Label them with the flower type and harvest date to track viability. Fun fact: Some wildflowers, like milkweed, self-seed prolifically—just leave a few pods behind for next year!
What should I do if my dried wildflowers attract pests like moths or spiders?
Pests are drawn to dried flowers because they seek shelter or food (like pollen). To deter them, store flowers in airtight containers or freeze them for a few days before arranging. If you spot pests, freeze the flowers for 24 hours or use a mild insecticide spray (like neem oil) on stems before drying. Quick fix: Place a bay leaf or cedar block in storage to repel insects naturally!
Are there wildflowers I should not dry or preserve?
Some wildflowers aren’t ideal for drying due to their delicate structures or toxicity. Avoid preserving poisonous plants (like foxglove or hemlock) or those with fragile petals (e.g., poppies), as they may crumble or lose color. Stick to hardy varieties like yarrow, black-eyed Susan, or lavender, which dry beautifully. When in doubt, research the species first!
Wrapping up and next steps
As the growing season winds down, your wildflowers don’t have to fade into the past—they can become lasting treasures! Whether you’re crafting dried arrangements, saving seeds for next year, or composting with care, each step keeps their beauty alive in new ways.
Embrace the joy of sustainability and creativity—your efforts will inspire future blooms and thoughtful traditions.
Ready to take the next step? Start small:
- Pick one method (drying, seed saving, or composting) to try this weekend.
- Share your creations with friends or family—turning wildflowers into gifts or decor!