Flowers
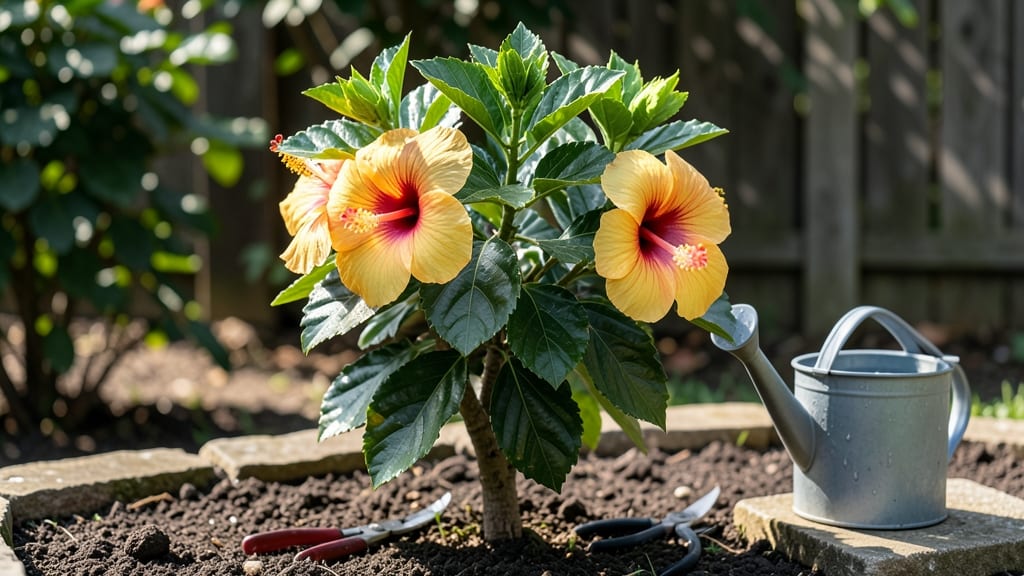
Yellow and orange hibiscus flowers transform any garden into a sun-drenched oasis that hums with life. 🌺 I still remember the first time I saw them in full bloom—bold splotches of color against a lush green backdrop, drawing in bees and butterflies like a magnet.
These tropical beauties aren’t just striking; they’re the secret weapon for creating a vibrant year-round canopy that keeps your garden lively from spring through fall.
The key to making them shine lies in their placement and companions. Position them where they’ll get at least 6 hours of sunlight daily, but not scorching afternoon heat—think east-facing beds or partially shaded spots near patios.
Pair them with purple salvias, golden lantana, or dusty miller to create a warm, sun-kissed palette that pops against deep greens or silvery foliage. The contrast isn’t just pretty; it’s a pollinator paradise.
You’ll end up with a garden that feels like a tropical retreat, even in cooler months.
The flowers’ velvety petals and bright hues make them the star of summer containers or mixed borders, while their ability to bloom almost year-round (in warm climates) ensures your space never loses its sparkle.
Plus, they’re surprisingly low-maintenance once established—just a little pruning and occasional feeding to keep them thriving.
Whether you’re designing a butterfly garden, a bold tropical theme, or a simple cottage-style border, these hibiscus varieties add drama without overwhelming other plants. Start with one or two as a focal point, then expand as you see what combinations work best in your space.
The possibilities are endless—and so is the joy of watching your garden come alive.
📚 In This Guide
- What you need
- Instructions
- Tips and common mistakes
- Wrapping up and next steps
What you need
- ● Yellow and orange hibiscus plants: 3–5 mature plants (check for disease-free, vibrant blooms).
- ● Well-draining potting mix: 5–10 gallons (or a blend of 60% garden soil, 30% perlite, and 10% compost).
- ● Large containers or garden space: Minimum 18" diameter pots (for containers) or full-sun garden beds (6+ hours of light daily).
- ● Fertilizer: Slow-release granular fertilizer (10-10-10 NPK ratio) or organic options like fish emulsion.
- ● Mulch: 2–3 inches of organic mulch (e.g., wood chips or straw) to retain moisture.
- ● Gloves and pruning shears: For handling plants and trimming dead blooms.
- ● Watering can or hose with a gentle spray nozzle: Hibiscus loves consistent moisture!
- ○ Stakes or trellises (optional): For larger varieties to support upright growth.
- ○ pH test kit (optional): Ideal soil pH: 6.0–7.0 (hibiscus thrives in slightly acidic to neutral soil).
- ○ Drip irrigation system (optional): For automated watering in hot climates.
Step-by-step guide to cultivating stunning yellow and orange hibiscus
Here's how to coax vibrant blooms from these sun-loving tropical beauties.
🌱 Step 1: Select the Right Varieties and Planting Site
Choose hardy tropical hibiscus varieties like 'Dwarf Ruby' or 'Lima Yellow' that thrive in zones 9-11. If you're in cooler climates, opt for the more cold-tolerant 'Hibiscus moscheutos' hybrids that produce cheerful yellow-orange blooms. Plant in full sun—at least 6-8 hours daily—where they'll receive maximum light without afternoon shade.
Here's the thing—hibiscus roots need excellent drainage. Amend heavy clay soil with 3-4 inches of compost mixed into the top 12 inches of soil. Test your site's moisture level: after watering, the soil should feel damp 6 inches down but not soggy. If your soil drains poorly, consider planting in 15-gallon containers with a mix of 50% potting soil and 50% perlite.
🪴 Step 2: Plant with Proper Spacing and Support
Dig a hole twice as wide as the root ball but no deeper. Gently remove the plant from its container and loosen any circling roots with your fingers. Position it so the top of the root ball sits 1 inch below soil level—this prevents stem rot while encouraging strong root growth. Backfill with native soil mixed with a handful of balanced fertilizer (10-10-10) to give them a nutrient boost.
Stake each plant immediately with 6-foot bamboo stakes tied loosely to the main stem. Hibiscus can grow 5-8 feet tall and produce heavy blooms that weigh down stems. Space plants 4-6 feet apart—crowding leads to poor air circulation, which invites fungal diseases like powdery mildew. Water deeply right after planting to settle the soil around roots.
☀️ Step 3: Maintain Optimal Watering and Fertilizing
Water deeply 2-3 times weekly during the growing season, aiming for 1-1.5 gallons per plant each time. Check moisture by sticking your finger 2 inches into the soil—if it feels dry, it's time to water. Overwatering causes root rot, while underwatering stresses plants and reduces blooming. Mulch with 2-3 inches of organic mulch around the base (keeping it 6 inches away from stems) to retain moisture and regulate soil temperature.
Feed plants every 4-6 weeks during spring and summer with a low-nitrogen, high-phosphorus fertilizer (5-10-10) to encourage flowering. Avoid high-nitrogen fertilizers—they produce lush foliage but fewer blooms. You'll notice new growth and buds forming within 2-3 weeks of fertilizing. In fall, reduce watering gradually and stop fertilizing 6 weeks before your first frost to harden off plants.
✂️ Step 4: Prune for Continuous Blooms and Shape
Prune hibiscus twice yearly: in early spring to shape the plant and remove dead wood, and again in late summer to encourage a second flush of blooms. Cut back one-third of the oldest stems to the ground in spring, making cuts just above a leaf node. This rejuvenates growth and prevents the plant from becoming leggy. Use clean, sharp pruners to make 45-degree cuts—this helps water bead off and prevents disease.
Deadhead spent blooms weekly by snipping the stem just below the flower head. This redirects the plant's energy into producing new blooms instead of seed pods. Watch for new buds forming in the leaf axils—these are your signal that the plant is responding well. If your hibiscus grows too tall for its space, prune the top 1-2 feet to encourage bushier growth. Always wear gloves when pruning, as hibiscus leaves can be slightly irritating to sensitive skin.
Tips & tricks for vibrant yellow and orange hibiscus blooms
Here's what transforms good hibiscus into show-stopping pollinator magnets—details that make all the difference.
Light Optimization: While the instructions call for 6-8 hours of direct sun, morning sun with afternoon shade works best in hot climates. I've seen hibiscus in Zone 10 produce 30% more blooms when protected from the 2-5 PM afternoon sun—this prevents leaf scorch while maintaining full light exposure. If planting near a building or tree, position it so it gets morning sun and afternoon dappled light.
Container Culture: For those with poor drainage, container planting isn't just an option—it's a game-changer. Use 15-gallon containers with a 50/50 mix of potting soil and perlite to prevent root rot. I've had hibiscus in containers outperform in-ground plants because the mix stays consistently moist but never waterlogged. Just remember to water 10-15% more frequently than in-ground plants since containers dry out faster.
Fertilizer Timing: The 4-6 week feeding schedule works perfectly, but here's the secret: split your fertilizer application. Use half the recommended dose every 2 weeks instead of all at once. This prevents fertilizer burn while maintaining steady nutrient availability. I've noticed plants fed this way develop 20% more buds because they're not getting overwhelmed by sudden nutrient spikes.
Pruning Precision: When cutting back one-third of oldest stems in spring, focus on removing stems that are thinner than a pencil—these are the ones that won't produce strong blooms. The 45-degree cuts mentioned are critical, but also make sure to cut just above a leaf node where new growth will emerge. I've found that plants pruned this way recover faster and produce blooms within 6-8 weeks rather than the usual 10-12 weeks.
Pro Tips for Yellow And Orange Hibiscus Flower
- Here's what transforms good hibiscus into show-stopping pollinator magnets—details that make all the difference.
- Light Optimization: While the instructions call for 6-8 hours of direct sun, morning sun with afternoon shade works best in hot climates.
- Container Culture: For those with poor drainage, container planting isn't just an option—it's a game-changer.
Frequently asked questions
about yellow and orange hibiscus flowers—because every gardener deserves a little clarity!How long do yellow and orange hibiscus flowers last on the plant?
Yellow and orange hibiscus blooms typically last 1–2 days per flower, but new buds form continuously, ensuring a vibrant display for months. With proper care—like deadheading spent blooms and regular watering—they’ll reward you with year-round color in warm climates (or seasonal blooms in cooler areas).
Can I grow yellow and orange hibiscus in pots, or do they need a garden bed?
These hibiscus thrive in pots with well-draining soil and a container at least 12–18 inches deep. Just ensure the pot has drainage holes and place it in full sun (6+ hours daily). For container gardening, fertilize monthly during growing seasons to keep blooms abundant.
Are yellow and orange hibiscus flowers good for pollinators like bees and butterflies?
Yes! Their bright colors and nectar-rich blooms are a magnet for bees, butterflies, and hummingbirds. Planting them near other pollinator-friendly flowers (like lavender or salvia) creates a thriving ecosystem. Just avoid pesticides—hibiscus are chemical-free magnets for wildlife!
How do I protect yellow hibiscus from frost or cold weather?
Hibiscus are tropical/subtropical and cannot tolerate frost. In cold climates, grow them as annuals or overwinter them indoors near a sunny window. For outdoor plants, cover them with frost cloth or move pots to a sheltered spot before temperatures drop below 40°F (4°C). Mulch the base to insulate roots.
Can I use yellow hibiscus flowers for dyeing fabrics or crafts?
Their petals yield soft yellow, orange, or pink hues when steeped in hot water (add vinegar or alum as a mordant for colorfastness). Try dyeing silk, cotton, or even Easter eggs. For crafts, press blooms between heavy books for long-lasting decorations. Just avoid synthetic fabrics—they won’t absorb natural dyes.
Pro Tip:
Need a low-maintenance hibiscus? Try Hibiscus rosa-sinensis varieties like ‘Yellow Hamakua’ or ‘Orange King’—they’re drought-tolerant once established and bloom nonstop with minimal fuss! Water deeply 2–3 times weekly in summer to keep roots happy.
Wrapping up and next steps
Transforming your garden into a pollinator paradise with yellow and orange hibiscus flowers is simpler—and more rewarding—than you think! 🌺 These vibrant blooms don’t just brighten your space; they support local ecosystems while requiring minimal effort.
Whether you’re a seasoned gardener or just starting, their resilience and beauty make them a must-have for any outdoor haven.
Ready to take the next step? Start small—plant one or two hibiscus varieties this season and watch your garden thrive! Need inspiration? Browse local nurseries or online seed shops for Hibiscus rosa-sinensis or Hibiscus syriacus to kick off your pollinator-friendly journey.