Flowers
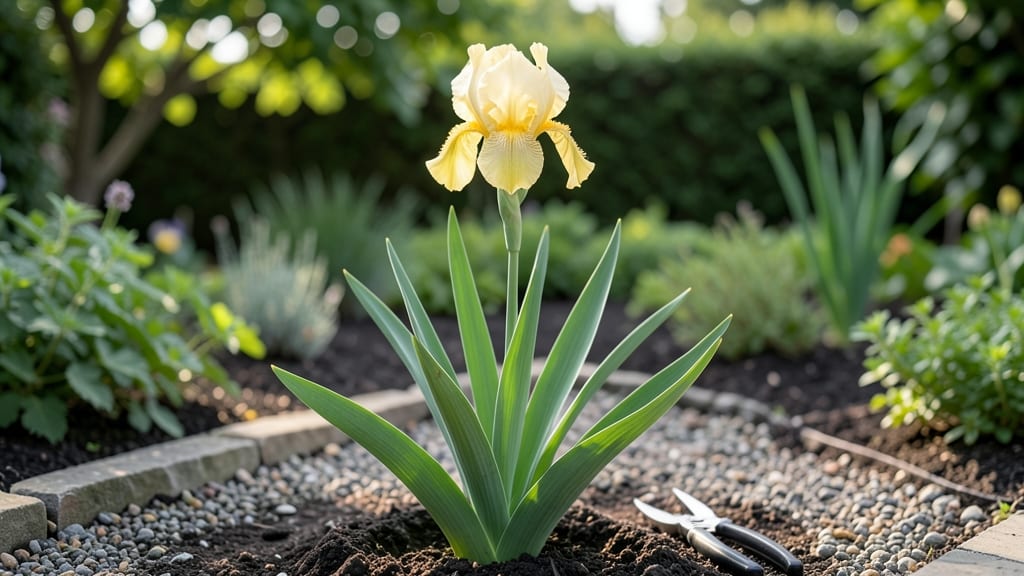
The yellow bearded iris flower isn’t just pretty—it’s the garden’s most reliable showstopper, returning bigger and bolder every year with almost no effort. I’ve grown them for over a decade, and the secret isn’t fancy soil or constant care—it’s understanding their stubborn charm and working with it.
The first time I saw a single rhizome turn into a clump of 12 plants in three years, I knew I’d found my low-maintenance star.
Here’s the thing about bearded iris: they thrive on neglect but reward precision. Plant them in full sun, give them well-draining soil, and water just enough to keep the roots from drying out. Forget about fertilizing like you would annuals—these rhizomes are self-sufficient once established.
The real magic happens when you divide them every 3-4 years, which turns one plant into three (or more) without any cost beyond your time.
📚 In This Guide
- What you need
- Instructions
- Tips and common mistakes
- Wrapping up and next steps
What you need
- ● Yellow Bearded Iris Rhizomes: 3–5 healthy, plump rhizomes (ensure they have at least one "fan" of leaves and a dormant root base).
- ● Well-Draining Soil: A mix of garden soil, compost, and sand or perlite (ratio: 2:1:1). Aim for a pH of 6.0–7.0.
- ● Sunlight Spot: A location with full sun (6+ hours/day) and good air circulation.
- ● Organic Mulch: 1–2 inches of straw, pine bark, or shredded leaves to retain moisture and suppress weeds.
- ● Garden Fork or Trowel: For digging and planting rhizomes (avoid disturbing roots).
- ● Pruning Shears: To trim dead foliage after blooming.
- ● Watering Can or Hose: With a gentle spray nozzle for hydration.
- ○ Gloves (Optional): To protect hands from soil and sharp rhizome edges.
- ● Slow-Release Fertilizer: Balanced (10-10-10) or iris-specific granules (sprinkle lightly at planting time).
- ● Plant Stakes: If your garden gets windy (iris blooms can be top-heavy!).
- ● Seed Tray & Grow Lights: If starting from seeds (requires patience—germination takes 20–60 days!).
- ● Disease Prevention Spray: Copper fungicide (if your area has iris borer risks).
How to plant and care for yellow bearded iris flowers
These striking blooms thrive with minimal fuss—just a few key steps for years of vibrant color.
🌱 Step 1: Choose the Perfect Planting Spot
Yellow bearded iris flowers demand full sun—at least 6-8 hours daily—for their best blooms. I always pick a spot where they’ll get morning sun and afternoon light, avoiding harsh midday glare in hot climates. The soil should drain quickly; irises hate soggy roots. If your yard has heavy clay, mix in 2-3 inches of coarse sand or grit to improve drainage.
Test your soil’s drainage by digging a 6-inch hole, filling it with water, and timing how long it takes to drain. If it takes longer than 2 hours, amend the soil before planting. Irises also prefer slightly alkaline soil with a pH between 6.5 and 7.5. You can test your soil with a simple kit from a garden center—it’s worth the peace of mind.
🪴 Step 2: Plant Rhizomes at the Right Depth
Handle iris rhizomes (those thick, fleshy stems) with care—they’re sensitive to damage. Plant them just below the soil surface, with the top 1/3 exposed to sunlight. I like to bury them 2-3 inches deep, but never cover the top completely. If you plant too deep, the rhizome may rot; if too shallow, it can dry out.
Space rhizomes 12-24 inches apart to give them room to spread. The fan-shaped roots should point downward, while the thick, pointed end (the growing tip) faces outward. Water lightly after planting to settle the soil, but avoid soaking the rhizome itself. Overwatering at this stage can cause rot, and you’ll know it’s right when the soil feels slightly damp but not wet.
☀️ Step 3: Water and Feed for Strong Blooms
Once planted, water deeply once a week during the first growing season, allowing the soil to dry out between waterings. Irises are drought-tolerant once established, but they need consistent moisture in their first year to develop strong roots. You’ll see new leaves emerge in 4-6 weeks—that’s your signal everything is working.
Feed iris plants in early spring with a balanced, slow-release fertilizer (like 10-10-10) to encourage blooms. I scatter ½ cup per plant around the base, then water it in. Avoid high-nitrogen fertilizers—they’ll produce lush foliage but fewer flowers. Mulch lightly with 2 inches of organic matter (like shredded bark) to retain moisture and suppress weeds, but keep it 6 inches away from the rhizomes to prevent rot.
✂️ Step 4: Prune and Divide for Long-Term Health
After the blooming season ends (usually in late summer or early fall), cut back the yellowing foliage to 4 inches tall. This cleans up the plant and redirects energy to next year’s growth. Never cut back all the way to the ground—irises store nutrients in their leaves for winter. You’ll notice new shoots emerging from the sides of the rhizome in early spring, signaling it’s time to prepare for another blooming cycle.
Every 3-5 years, dig up the rhizomes to divide them. This prevents overcrowding and rejuvenates the plant. Lift the rhizomes in early spring or fall, separate the fan-shaped roots, and replant the healthiest sections. Discard any rhizomes that look soft, mushy, or diseased. Dividing also gives you free plants to share with friends—irises multiply quickly!
Tips & tricks for perfect yellow bearded iris flowers
Here's what nobody tells you about making these bold blooms thrive for years without constant effort.
Sunlight Strategy: Those 6-8 hours of daily sun are non-negotiable for vibrant blooms. I've planted irises in partial shade and while they survive, the flowers become sparse and lack that bold purple color. If your yard has afternoon shade, position them to catch morning sun instead—it's less intense and still effective. For hot climates, a little afternoon shade can actually help prevent leaf scorch while still giving you plenty of blooms.
Soil Test Hack: The 2-hour drainage test is your best friend when preparing the planting spot. I've seen gardeners skip this and end up with soggy soil that rots rhizomes. Pro tip: If your soil drains too slowly, mix in 2-3 inches of perlite instead of just sand—it improves drainage while adding beneficial minerals. For the pH test, a simple kit from your local garden center costs just a few dollars and gives you precise results to avoid guesswork.
Planting Depth Visual: When planting those rhizomes just below the surface with the top third exposed, think of a pancake—flat side down, rounded side up. The thick, pointed end should face outward like an arrow pointing to where new growth will emerge. This orientation prevents rot while allowing sunlight to reach the growth point. I always mark my planting spots with small flags so I don't accidentally bury them too deep later.
Watering Wisdom: The once-weekly watering during the first year might seem like a lot, but it's crucial for root establishment. I've seen new iris plants wilt dramatically after just one week without water in hot weather. After the first year, you can reduce to watering only when the soil feels dry 2 inches below the surface. The key is consistent moisture without soggy soil—irises hate having wet feet year-round.
Pro Tips for Yellow Bearded Iris Flower
- Here's what nobody tells you about making these bold blooms thrive for years without constant effort.
- Sunlight Strategy: Those 6-8 hours of daily sun are non-negotiable for vibrant blooms. I've planted irises in partial...
- Soil Test Hack: The 2-hour drainage test is your best friend when preparing the planting spot. I've seen gardeners sk...
Frequently asked questions
Got questions about the stunning yellow bearded iris? You’re not alone! Here are some of the most common queries—plus straightforward answers to help you grow, care for, and enjoy these vibrant bloomers with confidence.
How do I tell if my yellow bearded iris is healthy?
A thriving yellow bearded iris has plump, firm rhizomes (not soft or mushy), straight, upright stems, and glossy, disease-free leaves. Yellowing leaves or hollow stems signal trouble—often fungal issues or rot. Pro tip: If rhizomes feel squishy, dig them up, trim the bad parts, and replant in well-draining soil.
When is the best time to plant or divide yellow bearded iris?
Plant or divide your iris in early fall (4–6 weeks before frost) or late winter/early spring (before new growth starts). Avoid summer heat—rhizomes can rot in soggy soil. If you must transplant in summer, do it early morning and keep rhizomes shaded until roots establish.
Why aren’t my yellow bearded iris blooms opening fully?
Overcrowded rhizomes, lack of sunlight, or excessive nitrogen (from fertilizer) can stunt blooms. Try these fixes:
If buds form but don’t open, snip them off—this redirects energy to next year’s flowers.
What pests or diseases should I watch for with yellow bearded iris?
Common threats include:
- Iris borers: Look for sawdust-like frass or chewed stems. Solution: Handpick larvae or apply neem oil in early summer.
- Fungal leaf spot: Brown spots on leaves? Solution: Remove infected leaves and space plants for airflow.
- Rats/squirrels: They love rhizomes! Solution: Cover beds with hardware cloth or plant near deterrents like daffodils.
Prevention is key—mulch lightly (no thick layers) and avoid overhead watering.
Can I grow yellow bearded iris in containers? Yes—but with tweaks!
Iris thrives in containers if you:
- Use a wide, shallow pot (rhizomes need room to spread).
- Plant in fast-draining mix (50% potting soil, 50% perlite/sand).
- Ensure full sun and winter protection (move indoors or insulate pots in cold climates).
Pro tip: Divide rhizomes annually to prevent overcrowding. Containers also let you rotate displays for year-round interest!
Wrapping up and next steps
The yellow bearded iris isn’t just a stunning addition to your garden—it’s a hardy, low-maintenance perennial that rewards patience with vibrant blooms year after year. Whether you’re drawn to its striking purple-pink petals, easy propagation, or resilience, this flower proves that beauty and simplicity go hand in hand. 🌸
Ready to dive in? Start by gathering your supplies, then plant with confidence—your garden will thank you! Which corner of your yard will you transform first?