How To
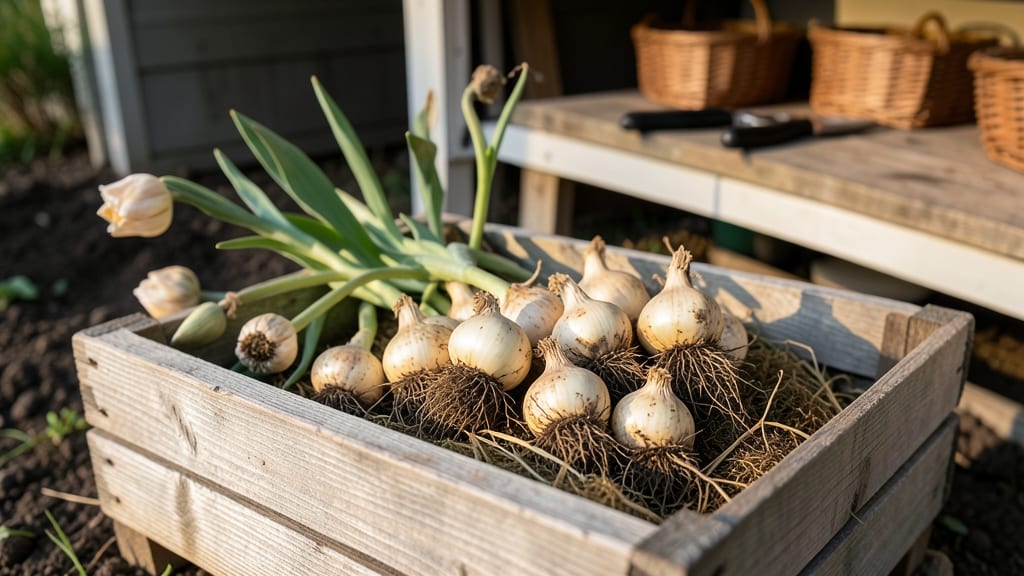
Storing tulip bulbs after flowering is the secret to next year’s boldest blooms—and the timing starts right after those petals fade. I’ve learned the hard way that leaving them in the ground too long or storing them too soon means fewer, smaller flowers (or worse, no flowers at all).
The key is patience: wait 6–8 weeks after blooming before lifting, when the foliage turns yellow and flops over naturally. This gives the bulbs time to recharge their energy for the next season.
You’ll need just a few simple supplies: a fork or trowel, a dry, well-ventilated spot (like a garage or basement), and some old newspaper or mesh bags to keep pests out.
In cooler climates (USDA Zones 3–7), you can even leave bulbs in the ground if you mulch heavily—just mark their location so you don’t accidentally dig them up later. The goal is to mimic their natural dormancy: cool, dry, and undisturbed until planting time in fall.
When you lift the bulbs, let them dry in a shady spot for a few days first—this prevents rot. Then store them in a container with good airflow, checking occasionally for soft spots or mold. A common mistake?
Storing bulbs in plastic bags or damp conditions, which turns them mushy by spring. Done right, you’ll see plump, firm bulbs ready to plant in autumn, promising a repeat performance of those showstopping blooms.
For gardeners in warmer zones (8–10), treat tulips like annuals—they’ll likely need replanting each year. But in colder regions, proper storage turns a one-time purchase into a multi-year investment.
The payoff? Bulbs that multiply, flower earlier, and put on a display that makes your neighbors green with envy. Let’s get those bulbs prepped for their winter nap.
📚 In This Guide
- What you need
- Instructions
- Tips and common mistakes
- Wrapping up and next steps
What you need
- ● Tulip bulbs: Dig up healthy, undamaged bulbs (avoid soft or moldy ones). Aim for 10–20 bulbs (adjust based on your garden size).
- ● Garden fork or trowel: A sturdy, 6–8-inch fork (for digging) or a sharp trowel (for precision).
- ● Garden gloves: A durable pair to protect hands from dirt and sharp bulb edges.
- ● Bucket or container: A 5–10 gallon bucket (with drainage holes) or a plastic crate to hold bulbs temporarily.
- ● Drying surface: A shady, well-ventilated area (like a garage or porch) or a screened tray to air-dry bulbs for 1–2 weeks.
- ● Storage container: Option 1: A mesh bag or cardboard box (with holes for airflow).
- ● Option 2: A plastic bin with a lid (if using a dry, cool method).
- ● Peat moss, perlite, or vermiculite: 1–2 inches of moisture-wicking material (for storage if using a damp method).
- ● Labeling tags: Waterproof labels to mark bulb varieties and storage dates.
- ● Fungicide spray: A light application (like neem oil) to prevent rot during storage.
- ● Hygrometer: To monitor humidity levels (40–60%) in your storage space.
- ● Thermometer: Ensures your storage area stays at 40–50°F (4–10°C).
- ● Disinfectant: A mild bleach solution (1:10 ratio) to clean tools before use.
- ● Burlap sacks: For long-term, breathable storage (great for bulk bulbs!).
Step-by-Step guide for storing tulip bulbs after flowering
Here’s how to keep your tulip bulbs thriving year after year—no guesswork involved.
Let Foliage Mature Fully Before Cutting Back
After tulips finish blooming, resist the urge to trim the stems or foliage. The leaves are hard at work converting sunlight into stored energy for next year’s flowers. Let them yellow naturally—this process, called senescence, can take 4-6 weeks depending on your climate.
Water regularly until the leaves turn completely brown and crispy. This ensures the bulb has absorbed all the nutrients it needs. If you cut back too soon, you’ll weaken the bulb, and it may produce fewer—or no—flowers next spring.
Dig Up Bulbs After Foliage Dies Back
Once the leaves are fully brown and brittle, it’s time to dig. Use a fork or trowel to carefully lift the bulbs from the soil, being gentle to avoid damaging the papery skins. Shake off excess dirt but don’t wash them—moisture can encourage rot.
Inspect each bulb for soft spots, mold, or signs of pests. Discard any that look diseased or shriveled. Healthy bulbs should feel firm and plump. Store them in a cool, dry place until you’re ready to replant in the fall.
Cure and Store Bulbs in Ideal Conditions
Spread the bulbs out in a single layer on a mesh screen or paper towels in a dry, shaded area for 2-3 weeks. This curing process helps toughen their skins and prevents rot during storage. Avoid direct sunlight, which can dry them out too quickly.
Once cured, place the bulbs in a paper bag, mesh sack, or cardboard box with a handful of dry peat moss or sand. Store them in a location with temperatures between 40-50°F and low humidity. A basement, garage, or even a refrigerator works well—just keep them away from freezing temperatures.
Replant Bulbs in Fall for Next Year’s Blooms
In early fall, about 6-8 weeks before your first frost, dig a hole 6-8 inches deep and place the bulbs 4-6 inches apart, pointed end up. Cover with soil and water lightly. Tulips thrive in full sun to partial shade and well-draining soil.
Mulch lightly after planting to protect the bulbs from winter temperature swings. With proper storage, your tulips should return stronger and more vibrant each year, rewarding your patience with stunning spring displays.
Tips & tricks for perfect tulip bulb storage
Real talk: Tulip bulbs are tougher to store than you'd think. These small details make all the difference between next year's blooms and wasted effort.
Patience Pays Off: Those 4-6 weeks of letting foliage yellow naturally in Step 1 are non-negotiable. I've seen gardeners cut back too soon and end up with weak, non-flowering bulbs the next spring. Mark your calendar when tulips bloom to track the 6-week timeline—this ensures bulbs get all the nutrients they need for next year.
Gentle Handling Matters: When digging in Step 2, treat those bulbs like fragile eggshells. The papery skins protect against rot, so avoid puncturing them. I use a fork instead of a shovel to lift bulbs—it's gentler and prevents damage. After shaking off dirt, let them air-dry completely before storage; even slight moisture can cause rot during the 2-3 week curing period in Step 3.
Storage Environment Secrets: The 40-50°F range mentioned in Step 3 is critical—too warm and they'll sprout prematurely, too cold and they may freeze. I store mine in a basement with a small fan for airflow. If using a refrigerator, place them on the crisper drawer shelf (not the veggie bin) where temps are most stable. The low humidity requirement means avoiding plastic containers—moisture is the enemy of long-term bulb health.
Pro Tips for Store Tulip Bulbs After Flowering
- Real talk: Tulip bulbs are tougher to store than you'd think.
- Patience Pays Off: Those 4-6 weeks of letting foliage yellow naturally in Step 1 are non-negotiable.
- Gentle Handling Matters: When digging in Step 2, treat those bulbs like fragile eggshells.
Frequently asked questions
Got questions about keeping your tulip bulbs happy after their big bloom? Here are answers to the most common ones—so you can prep like a pro!
When should I dig up tulip bulbs after flowering?
Wait 6–8 weeks after the blooms fade before digging. This gives the foliage time to photosynthesize and store energy back into the bulbs. If you dig too soon, you’ll weaken next year’s flowers!
Can I leave tulip bulbs in the ground over winter?
In USDA Zones 5–8, most tulips survive winter in the ground with mulch (2–3 inches). In colder zones (below 5) or wet climates, dig and store them to prevent rot or freezing damage. Hybrid tulips (like Darwin or species tulips) often handle overwintering better than fancy ones.
What’s the best way to store tulip bulbs at home?
Store bulbs in a cool (40–50°F), dry, dark place (like a garage or basement). Use a mesh bag or paper sack for airflow—never plastic! Check monthly for mold or soft spots, and discard any mushy bulbs to prevent spreading disease.
Will tulip bulbs flower again if I don’t store them properly?
Maybe! If stored too warm (above 60°F) or too moist, bulbs may sprout early or rot. Poor storage can also lead to smaller blooms or no flowers at all. Think of it like a hibernation—bulbs need the right conditions to recharge for their big comeback!
Can I force tulip bulbs indoors after storage?
Yes! Chill bulbs for 12–16 weeks at 35–45°F (like a fridge), then pot them in soil and place in a dark, cool spot (60–65°F). Once shoots appear, move to bright light (but no direct sun) for 4–6 weeks. Perfect for early spring table arrangements!
Wrapping up and next steps
Storing tulip bulbs after flowering is your secret weapon for next year’s vibrant blooms—and with the right care, you’ll turn last season’s showstoppers into even bigger stars! 🌷 By following these simple steps—trimming foliage, drying bulbs, and providing cool, dry storage—you’re giving your tulips the best chance to thrive.
Now that you’re armed with the know-how, take action: grab those bulbs, prep your storage spot, and watch your garden come alive again!
Ready to plant and repeat? Research your local climate, choose the perfect spot, and get digging—your future tulip masterpiece starts now! 🌱