Landscaping
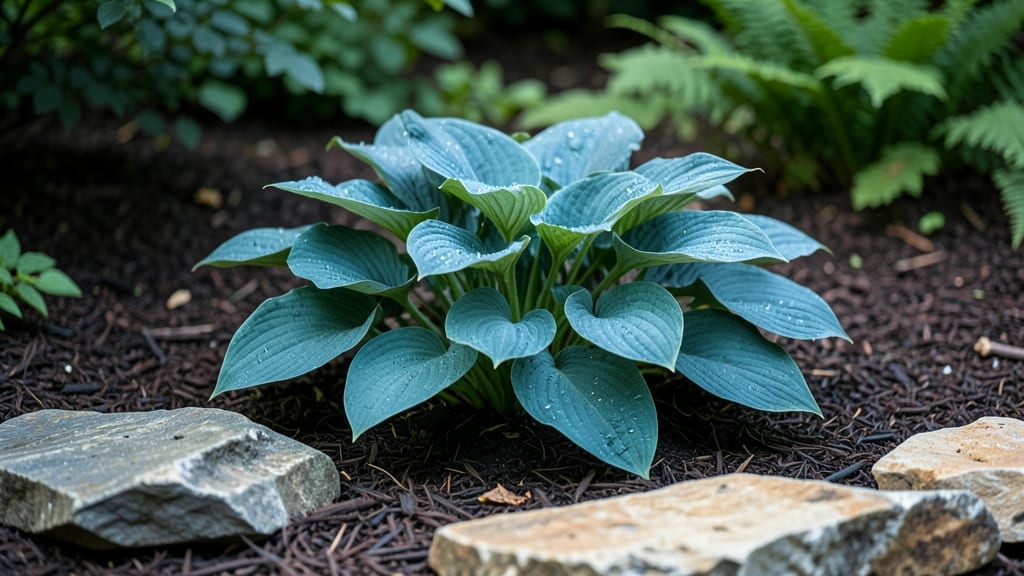
Landscaping stones for flower beds transform a simple planting area into a showstopping focal point—the kind that makes neighbors pause and ask, "How'd you do that?"
I learned the hard way that cheap, mismatched stones look like an afterthought, but the right stones and placement turn a basic bed into a designer statement that lasts for years.
The secret isn't just picking pretty rocks—it's understanding how they control weeds, prevent erosion, and frame your plants like a gallery display.
Start with stone types that match your garden's vibe: polished river rock for a modern look, rough flagstone for cottage charm, or sleek slate tiles for formal gardens.
A 3-inch-deep layer along the edges keeps soil in place while letting rain drain freely—no more soggy roots or muddy paths after storms. Pair lighter stones with dark mulch for contrast, or use earthy tones to blend into natural landscapes.
The key is consistency: stick to 2-3 stone varieties per bed to avoid visual clutter.
What you end up with is a flower bed that stays neat, weed-free, and visually striking all season long. The stones create clean lines that make plants pop, while their weight keeps beds from washing away in heavy rain.
Imagine your favorite perennials—like purple coneflowers or black-eyed Susans—standing out against a backdrop of smooth, sun-warmed stones. It's the little details like this that turn a garden from "nice" to "wow."
Works for any style, from wild meadows to structured knot gardens. The same principles apply whether you're outlining a small window box or a large perennial border—just scale the stone quantities. Here's how to get it right the first time, without the trial-and-error headaches.
📚 In This Guide
- What you need
- Instructions
- Tips and common mistakes
- Wrapping up and next steps
What you need
- ● Landscaping stones: 10–20 lbs (or more, depending on flower bed size) of flat, irregular, or stacked stones (e.g., flagstone, bluestone, or river rock).
- ○ Optional: Pre-cut pavers for a uniform look.
- ● Base materials: 2–3 inches of gravel or crushed stone (for drainage).
- ● 1–2 bags of landscape fabric (to prevent weed growth).
- ● Tools: Shovel or spade.
- ● Wheelbarrow (for hauling materials).
- ● Rubber mallet (to tap stones into place).
- ● Level (to ensure even edges).
- ● String line & stakes (for marking borders).
- ○ Optional: Edging tool (for clean lines).
- ● Measure your flower bed’s perimeter and depth (aim for 6–12 inches wide for a polished look).
- ● Clear weeds, debris, and existing plants from the work area.
- ● Check soil moisture—work on a dry day for easier digging.
- ● Pro tip: Sketch a design first! 🎯 Use stones in varying sizes for a natural, high-end vibe.
Step-by-step guide to installing landscaping stones for flower beds
Transforming a simple flower bed into a polished garden feature starts with strategic stone placement.
Measure and Mark Your Flower Bed Layout
Begin by measuring the perimeter of your flower bed with a tape measure. Use wooden stakes and a string line to outline the exact shape you want—this creates a clean reference for stone placement. I always mark the inside edge of the stones, not the centerline, since most landscape stones sit about 3-4 inches wide. For a 4-foot-wide bed, mark a line 3 inches inward from the outer edge to account for the stone width.
Walk around the marked line to visualize the finished look. Adjust the string line if needed—once the stones are down, moving them becomes a major project. If your bed has curves, use a flexible measuring tape or follow the natural curve of existing garden features for a cohesive look. Pro tip: Snap chalk lines along the string for a visible guide when digging.
Excavate a Narrow Trench for Stone Foundation
Dig a trench along your marked line that’s about 6-8 inches wide and 4-6 inches deep—just enough to bury the bottom third of your stones. Use a flat shovel or edging tool to create clean, straight sides. The trench should be slightly wider than your stones to allow for proper settling and a natural, secure fit. For rounded stones, the trench can be shallower (3-4 inches deep) since their weight helps anchor them.
Remove any grass, weeds, or debris from the trench bottom. Loosen the soil with a garden fork to prevent compaction when you backfill later. If you’re working with clay soil that drains poorly, mix in 1-2 inches of coarse sand or gravel at the bottom of the trench to improve drainage and prevent future shifting. This step is especially critical in areas with heavy rainfall or freeze-thaw cycles.
Lay the First Course of Stones
Start at one corner of the bed and begin placing stones along the trench, working your way around. For flat stones, lay them with the largest, most stable side down to create a solid base. If using irregular or rounded stones, arrange them with the flattest side against the soil to prevent tipping. Leave a small gap (about ¼ inch) between each stone—this allows for minor adjustments and prevents cracking from soil expansion.
As you place each stone, gently tap it into the trench with a rubber mallet until it sits flush with the marked line. Check frequently with a level to ensure the stones aren’t tilting forward or backward. If a stone feels unstable, dig slightly deeper beneath it or add a small amount of gravel for support. For a more natural look, stagger the stones so the seams don’t align in straight lines—this mimics organic stone formations.
Secure Stones and Backfill the Trench
Once all stones are in place, use a tamper or the back of a shovel to gently compact the soil behind them. This locks the stones into position and prevents shifting over time. For extra stability, especially in high-traffic areas, add a layer of landscape fabric behind the stones before backfilling. This keeps weeds from growing up between the stones and the soil.
Fill the trench with the excavated soil, tamping lightly as you go to eliminate air pockets. Avoid over-compacting—the stones need room to settle naturally. For a polished finish, sweep the area with a stiff broom to remove any loose soil or debris. If you notice gaps between stones after backfilling, use a small amount of polymeric sand (for flat stones) or additional soil (for rounded stones) to fill them in. This creates a seamless, professional look.
Tips & tricks for perfect landscaping stone installation
Here's what nobody tells you about creating clean, professional-looking stone edges that actually last.
Precision Marking Pays Off: The 3-inch inward mark from the outer edge (for a 4-foot-wide bed) is critical—it accounts for the typical 3-4 inch width of most landscape stones. I learned this the hard way after installing stones that looked uneven because I marked from the centerline. Use a flexible measuring tape for curves, and snap chalk lines along your string for a foolproof guide. This step alone prevents the "wonky" look that ruins an otherwise polished garden feature.
Soil Prep Prevents Future Problems: When working with clay soil, that 1-2 inches of coarse sand or gravel at the trench bottom isn't optional—it's insurance against shifting. I've seen stones pop up after heavy rains when this step was skipped. For rounded stones, the shallower 3-4 inch trench works because their weight naturally anchors them, but flat stones need the full 4-6 inches. Always loosen the soil with a garden fork before backfilling to prevent compaction that could cause settling issues later.
Staggering Creates Natural Beauty: The ¼-inch gap between stones might seem small, but it's what allows for minor adjustments and prevents cracking from soil expansion. More importantly, staggering the seams (so they don't align in straight lines) transforms your installation from "man-made" to "organic landscape feature." Think of it like bricklaying—every other stone should offset slightly to mimic how stones naturally settle in nature. This visual trick makes all the difference in achieving that high-end garden look.
Leveling is Non-Negotiable: Checking frequently with a level during Step 3 isn't just about aesthetics—it's about functionality. Stones that tilt forward or backward create tripping hazards and look unprofessional. I've seen installations where the stones were perfectly placed but slightly uneven, making the whole project look amateur. Use a 4-foot level for long sections and check at least every 2-3 feet. If a stone feels unstable, dig slightly deeper or add a small amount of gravel beneath it before tapping into place.
Pro Tips for Landscaping Stones For Flower Beds
- Here's what nobody tells you about creating clean, professional-looking stone edges that actually last.
- Precision Marking Pays Off: The 3-inch inward mark from the outer edge (for a 4-foot-wide bed) is critical—it accounts for the typical 3-4 inch width of most landscape stones.
- Soil Prep Prevents Future Problems: When working with clay soil, that 1-2 inches of coarse sand or gravel at the trench bottom isn't optional—it's insurance against shifting.
Frequently asked questions
Got questions about using landscaping stones in your flower beds? You’re not alone! Here are some of the most common queries—plus straightforward answers to help you create a stunning, low-maintenance garden edge.
What’s the best type of stone for flower bed edging?
Choose based on durability and aesthetics. Flagstone and slate are classic picks for their natural look and stability, while river rock or gravel offer a softer, more organic feel. For heavy-duty edges, granite or limestone won’t budge with seasonal soil shifts. Pro tip: Flat stones (like pavers) stack best for crisp lines, while rounded stones blend seamlessly into natural landscapes.
How deep should I bury the stones for a secure edge?
For stability, bury stones 2–3 inches deep along the top edge and 1–2 inches deep on the sides. This prevents shifting from rain or foot traffic. Use a shovel to create a shallow trench first—this keeps the stones level and anchored. For larger stones (like boulders), dig deeper (4+ inches) to avoid tipping.
Will landscaping stones hurt my plants?
Not if installed correctly! Stones don’t smother roots if placed at least 6–12 inches away from plant bases. Avoid compacting soil underneath—leave space for roots to breathe. Warning: Sharp-edged stones (like broken concrete) can damage tender stems. Opt for smooth, rounded stones near delicate flowers.
Can I reuse old bricks or pavers as edging?
Recycled bricks, pavers, or even broken concrete
work great for edging—just clean them first to remove dirt/moss. Arrange them in a staggered pattern for a rustic look or stack uniformly for a modern vibe. Seal porous materials (like bricks) to prevent weeds from sprouting between gaps.
How do I fix uneven or sinking stones over time?
Uneven stones? Dig around the problem area, add a layer of gravel or sand for drainage, then backfill with soil. Tamp it down gently to settle the base. For sinking stones, lift and re-level them, then secure with landscape adhesive or more backfill. Check annually—spring rains often trigger shifts!
Bonus Tip:
Need a quick fix? Landscape fabric under stones blocks weeds while allowing water drainage. Skip it for natural-looking beds where weeds aren’t a hassle!
Wrapping up and next steps
Transforming your flower beds with landscaping stones isn’t just about aesthetics—it’s about creating a functional, polished look that makes your garden shine. Whether you choose sleek pavers, rustic boulders, or elegant stepping stones, the right materials will elevate your outdoor space while keeping maintenance simple. 🌿✨
Now that you’re inspired, take the next step: sketch your design or visit a local nursery to compare stone options in person. Your dream garden is just a few stones—and a little creativity—away!