Flowers
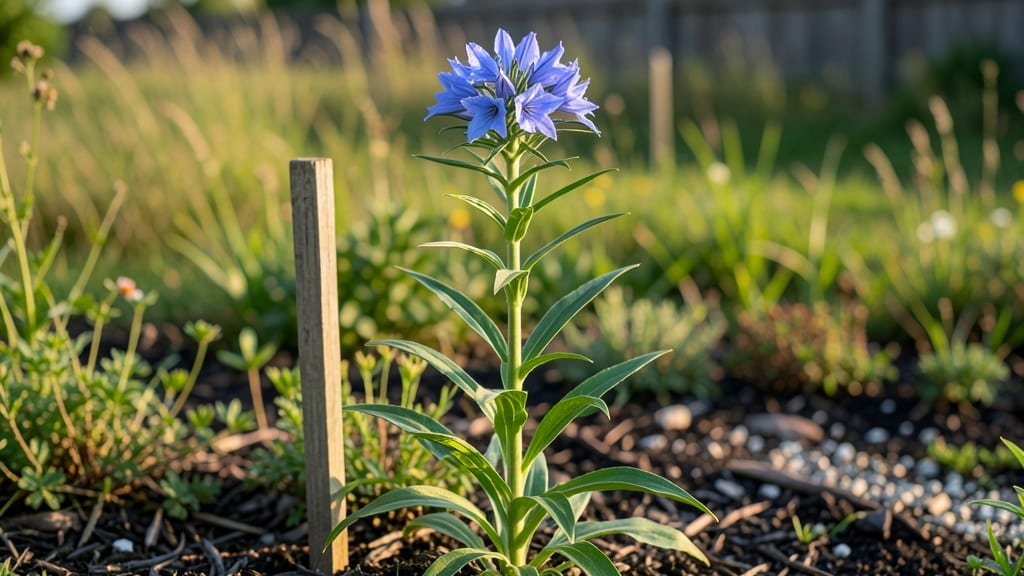
Growing larkspur for cut flowers means tall, dramatic spikes that steal every bouquet. ✨ I used to struggle with floppy stems and short-lived blooms until I discovered the exact spacing, support, and harvesting techniques that keep them standing proud in vases for weeks.
The secret starts with well-draining soil and sturdy stakes—larkspur needs both to reach its full 3-5 foot height without collapsing. Plant seeds early (6-8 weeks before last frost) in full sun, and water consistently but never soggy.
Once established, these plants reward patience with bold, jewel-toned blooms that last longer than store-bought flowers.
Harvest in the cool morning when buds are just opening, then strip lower leaves and recut stems underwater. A simple sugar-water solution in your vase extends their life by another week, giving you time to enjoy their elegant, almost whimsical charm.
The stems stay firm when handled right—no more sad, drooping bouquets.
Perfect for cottage gardens, wedding arrangements, or everyday vases, larkspur thrives in zones 3-9. Whether you're growing for cutting or just love their old-fashioned beauty, these tips will transform your stems from floppy to fabulous. Let's get those spikes standing tall!
📚 In This Guide
- What you need
- Instructions
- Tips and common mistakes
- Wrapping up and next steps
What you need
- ● Larkspur seeds or seedlings: Choose high-quality, disease-resistant varieties like Delphinium elatum (e.g., 'Pacific Giant' or 'Blue Bird'). Start with 5-10 seeds or 3-5 seedlings for a small bouquet.
- ● Well-draining potting mix: A blend of 50% garden soil, 30% perlite, and 20% compost (or a pre-mixed seed-starting mix). Avoid heavy clay soils.
- ● Containers or garden bed: For pots: 6-8" diameter containers with drainage holes (1 per plant).
- ● For garden beds: Full sun (6+ hours/day) and loose, fertile soil with a pH of 6.5-7.0.
- ● Pruning tools: Sharp bypass pruners (for cutting stems).
- ● Clean garden shears (for trimming foliage).
- ● Watering can or hose: With a gentle spray nozzle for even moisture.
- ● Fertilizer: Balanced 10-10-10 NPK or a slow-release granular fertilizer (follow package rates).
- ● Support stakes or cages: Tall larkspurs need 6-foot stakes or tomato cages to prevent flopping.
- ● Mulch: Organic mulch (e.g., straw or shredded bark) to retain moisture and suppress weeds.
- ● Flower preservative: Commercial flower food (e.g., Floralife) to extend vase life of cut blooms.
- ● Grow lights: If starting seeds indoors, use LED grow lights (12-16 hours/day).
- ● Gloves: For protection when handling thorny stems.
- ● Vase or bucket: A clean, deep vase (6-8" tall) for arranging cut flowers.
Step-by-Step instructions for cultivating larkspur cut flowers
Here's how to grow larkspur with the precision needed for long-lasting bouquets.
🌱 Step 1: Select and Prepare the Planting Site
Larkspur thrives in well-draining soil with a pH between 6.0 and 7.5. Choose a location with full sun exposure—at least 6-8 hours daily. I always amend the soil with 2-3 inches of compost before planting to ensure nutrients are available for the tall, nutrient-hungry stems.
If your soil is heavy clay, mix in sand or perlite to improve drainage. Larkspur roots are shallow but spread wide, so till the top 12 inches of soil to create a loose, airy environment. The goal is soil that feels like a damp sponge—not compacted or waterlogged. Test your soil's moisture by squeezing a handful; it should hold together but crumble easily when released.
🌿 Step 2: Plant Seeds at the Right Depth and Spacing
Sow larkspur seeds ¼ inch deep in early spring, 4-6 weeks before your last frost date. I plant seeds in rows spaced 12-18 inches apart to allow for air circulation, which prevents fungal diseases like powdery mildew. Larkspur seeds are tiny, so I use a seed starter mix and sprinkle them lightly over the surface before pressing them into the soil with my finger.
Water gently after planting to settle the seeds without displacing them. Keep the soil consistently moist until germination, which typically occurs in 10-21 days. Avoid overhead watering once seedlings emerge—water at the base to prevent damping-off. You'll know it's working when the first true leaves (not the initial cotyledons) appear and look deep green and sturdy.
☀️ Step 3: Provide Support and Encourage Strong Stem Growth
Larkspur stems grow 2-5 feet tall and require strong support to prevent flopping. Install 6-foot-tall stakes or cages at planting time, spacing them 18-24 inches apart. I use flexible garden stakes tied with soft twine to avoid damaging the stems as they grow. As the plants reach 6-8 inches tall, gently weave the stems through the support structure to encourage upright growth.
Fertilize lightly when plants reach 6 inches tall with a balanced, low-nitrogen fertilizer (like 10-10-10). Too much nitrogen promotes leafy growth at the expense of flowers. Water deeply once a week unless rainfall provides 1 inch of moisture. The key is consistency—larkspur responds poorly to drought stress or soggy soil. You'll see the best results when the soil feels damp but not waterlogged down to 2 inches deep.
✂️ Step 4: Prune for Long-Lasting Cut Flowers
Harvest larkspur stems when 10-15% of the buds have opened—this ensures the longest vase life. Use clean, sharp pruners and cut stems at a 45-degree angle just above a leaf node. Remove any lower leaves that would sit in water, as this prevents bacterial growth. I always harvest in the early morning when stems are fully hydrated and cut flowers last longer.
To encourage continuous blooming, deadhead spent flowers by snipping the stem just above the next set of buds. This redirects the plant's energy into new growth rather than seed production. Avoid over-pruning—larkspur is a one-season perennial in most climates, so focus on harvesting stems while they're at peak freshness. Store cut flowers in cool water with a flower food packet to extend their life by 5-7 days.
⏰ Step 5: Prepare for Overwintering or Seed Saving
In colder climates, larkspur dies back after flowering. Cut stems to 2 inches above the ground and remove any remaining foliage to reduce disease risk. The roots may persist for another season, but growth is minimal. In warmer regions, allow some plants to go to seed—collect seed pods when they turn brown and dry, then store them in a cool, dry place for next year's planting.
Here's the thing—larkspur self-seeds readily, so you may find volunteers popping up in subsequent years. If you want to control where they grow, pull any unwanted seedlings early in the season. The key to long-term success is soil preparation and proper support—once you've mastered those, larkspur becomes a low-maintenance cut flower powerhouse.
Tips & tricks for perfect larkspur cut flowers
These pro-level insights will help you cultivate larkspur that stands taller and lasts longer in your bouquets.
Soil Preparation Secret: The 2-3 inches of compost in Step 1 isn't just about nutrients—it's about creating the perfect moisture-retention sponge. I've found that adding a handful of worm castings to that compost mix gives seedlings an extra boost of beneficial microbes. This helps prevent the fungal issues that often plague larkspur in dense, poorly aerated soil. Test your soil's moisture by squeezing a handful; it should hold together but crumble easily when released—this is your target consistency throughout the growing season.
Germination Timing: Those 10-21 days for germination can feel like an eternity, but patience pays off. I've learned to mark my calendar 21 days after planting as my absolute deadline for germination. If nothing emerges by then, I'll gently scratch the soil surface with a rake to expose any seeds that might have been buried too deeply. Remember, larkspur seeds are tiny—think of them as delicate as dust, so handle them with care when checking for germination progress.
Support System Strategy: The 6-foot-tall stakes in Step 3 are non-negotiable for larkspur, but here's my game-changer: I install two stakes per plant when they reach 6-8 inches tall, rather than relying on one. This creates a more stable structure that prevents the stems from leaning or snapping in windy conditions. Use soft twine or plant ties to gently weave the stems through the support—never tie them tightly, as this can restrict growth and cause damage.
Harvesting Precision: When harvesting in Step 4, I always cut stems at the first set of leaves below the flower cluster—this ensures you're not removing too much foliage that could support future blooms. For the longest vase life, harvest in the early morning when stems are fully hydrated. Immediately place them in a bucket of cool water with a flower food packet—this simple step can extend their life by an additional 2-3 days beyond the 5-7 days mentioned in the instructions.
Pro Tips for Larkspur Cut Flower
- These pro-level insights will help you cultivate larkspur that stands taller and lasts longer in your bouquets.
- Soil Preparation Secret: The 2-3 inches of compost in Step 1 isn't just about nutrients—it's about creating the perfe...
- Germination Timing: Those 10-21 days for germination can feel like an eternity, but patience pays off. I've learned t...
Frequently asked questions
Got questions about growing and caring for larkspur cut flowers? You’re not alone! Here are some of the most common queries—plus straightforward answers to help you cultivate show-stopping blooms with ease.
How do I know when to harvest larkspur for cutting?
Harvest larkspur when 20-30% of the buds have just opened—this ensures a mix of fresh blooms and budding flowers that’ll open in the vase. Cut stems early in the morning (when moisture levels are highest) using clean, sharp shears. Avoid overharvesting; leave about ⅓ of the plant’s foliage to keep it thriving for future cuts!
How long do larkspur cut flowers last in a vase?
With proper care, larkspur cut flowers typically last 7–10 days in a vase. To extend their lifespan:
- Trim stems at an angled 45-degree cut every 2–3 days.
- Change the water every 2 days (add a splash of bleach or flower food for extra freshness).
- Keep stems cool (avoid direct sunlight or heat sources).
Why are my larkspur stems bending or drooping after cutting?
Drooping or bending stems usually signal low moisture or poor circulation. Try these fixes:
- Recut stems underwater to reopen clogged vessels.
- Add a drop of dish soap to the water to reduce bacterial growth.
- Place the vase in a cool, shaded spot (avoid drafts or direct heat).
Can I grow larkspur indoors, or is it strictly an outdoor plant?
Larkspur is a cool-weather annual that thrives outdoors in USDA zones 3–9, but you can try growing it indoors with limited success:
- Use a sunny windowsill (6+ hours of light daily).
- Plant in a large pot with well-draining soil.
- Keep temperatures between 60–70°F (avoid heaters or AC vents).
What’s a good alternative if larkspur is hard to grow in my climate?
If larkspur proves tricky, try these easy-to-grow cut flower alternatives with similar tall, dramatic blooms:
- Snapdragons – Hardy, long-lasting, and great for cutting.
- Delphiniums – Stunning spikes (like larkspur’s cousins) with easier care.
- Sweet peas – Fragrant, disease-resistant, and perfect for vases.
- Cosmos – Drought-tolerant and prolific bloomers.
Wrapping up and next steps
Growing larkspur cut flowers is a rewarding journey that brings vibrant color and elegance to your garden—and your bouquets! 🌸 With the right soil, spacing, and pruning techniques, you’ll enjoy tall, striking stems perfect for floral arrangements.
Remember, patience and consistency are key, especially when it comes to deadheading and supporting tall varieties.
Ready to elevate your garden? Start by planting a few seeds or seedlings this season, and soon you’ll be harvesting those dreamy, spiky blooms for stunning arrangements. Happy gardening!