Flowers
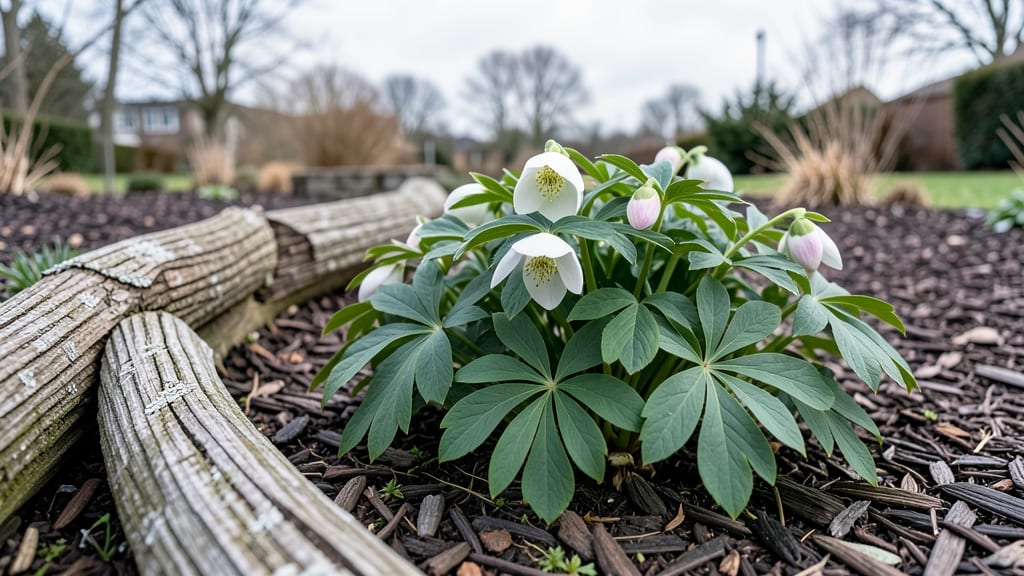
A log cabin flower bed transforms your yard into a rustic, ever-changing garden that needs almost no extra work. I built mine last spring after seeing how effortlessly logs created natural-looking layers for flowers—no expensive edging or perfect lines required.
The logs themselves become part of the design, blending into the landscape while keeping weeds at bay and soil moist for thirsty plants.
You’ll need untreated cedar or cypress logs (they resist rot best), a circular saw or handsaw, and a few hours on a weekend. My 4-foot-wide bed used six 6-foot logs, arranged in a staggered pattern like a real cabin wall.
Plant shade-loving perennials like hostas and astilbes in front, then add sun-tolerant annuals like impatiens or petunias behind them for instant pops of color.
Once built, this bed stays lush with almost no upkeep. The logs block weeds from creeping in, and the layered planting ensures something’s always blooming—from early spring bulbs to late-summer mums. Even in hot summers, the soil stays cooler between the logs, so moisture-loving plants thrive without extra watering.
Best part? It works in any yard size or style—modern, cottage, or woodland. Start small with a 3-foot diameter bed if you’re unsure, or go big for a dramatic focal point.
The logs last 10+ years if sealed properly, and you can always swap out plants each season for fresh looks without rebuilding.
📚 In This Guide
- What you need
- Instructions
- Tips and common mistakes
- Wrapping up and next steps
What you need
- ● Logs: 6–10 cylindrical logs (4–6 inches in diameter, 12–18 inches long). Choose weather-resistant wood like cedar, cypress, or treated pine.
- ● Landscape fabric: A roll (12–18 inches wider than your bed) to suppress weeds.
- ● Garden soil: 2–3 cubic feet of high-quality potting mix or native soil amended with compost.
- ● Mulch: 1–2 bags of shredded bark or pine straw for moisture retention.
- ● Flowering plants: 12–24 perennials or annuals (mix of sun/shade lovers, e.g., heuchera, hostas, impatiens, or petunias).
- ● Basic tools: Tape measure
- ● Shovel or spade
- ● Garden gloves
- ● Pruners (for trimming plants)
- ● Wheelbarrow or bucket (for soil/mulch)
- ● Decorative accents: Solar-powered lights, small stepping stones, or a rustic metal trough for a pop of charm.
- ● Slow-release fertilizer: Granular or spikes to boost plant health.
- ● Edging material: Flexible landscape edging or pavers to define the bed neatly.
- ● Rain gauge: To monitor moisture levels for fussy plants.
How to build a log cabin flower bed for season-long beauty
This design works like magic—layered colors that bloom from spring through frost.
Choose Your Logs and Layout
Start by selecting 4-6 logs per bed—each 4-6 feet long and 6-8 inches in diameter for stability. I like to use untreated cedar or pine logs because they resist rot and add natural charm. Arrange them in a square or rectangular pattern, spacing them 12-18 inches apart at the corners and 6-8 inches apart along the sides. This creates the classic "cabin" shape while leaving room for plants to peek through.
Here's the thing—your logs don't need to be perfect. If they're slightly uneven, it just adds character. Just make sure the ends meet cleanly at the corners. Use a measuring tape to mark where each log should go before cutting, if needed. A circular saw works best for clean cuts, but a handsaw will do in a pinch.
Prepare the Base and Secure the Logs
Clear the area of grass, weeds, or debris, then dig down 4-6 inches to create a level base. This prevents logs from sinking unevenly over time. Spread 2-3 inches of coarse sand or landscape fabric over the area to discourage weeds and improve drainage. I like to use sand because it compacts well and lets water drain through easily.
Place the first log in position and use galvanized screws or staples to secure it to the ground. Drive screws through the bottom of the log at 12-inch intervals into the soil. For extra stability, bury the ends of the logs 2-3 inches deep in the ground. This keeps them from shifting when you plant around them. Work your way around the square, checking that all corners meet snugly.
Fill the Center with Soil and Mulch
Fill the center of the log cabin with 3-4 inches of high-quality garden soil mixed with 1-2 inches of compost. This gives your plants a nutrient-rich foundation right from the start. Press the soil down lightly to remove air pockets, but don’t compact it too tightly—roots need room to spread. I like to add a handful of slow-release fertilizer to the soil mix for an extra boost.
Top the soil with 2-3 inches of mulch, like shredded bark or pine straw. This keeps moisture in, weeds out, and adds a finished look. Avoid thick layers of mulch—too much can suffocate plant roots. Water the bed deeply after filling it to settle everything in place. You’ll see the soil sink slightly, so add a little more if needed.
Plant for Year-Round Interest
Start with perennials along the inside of the logs—these return every year with minimal fuss. Try lavender, sedum, or ornamental grasses for height and texture. Fill the center with annuals like pansies, marigolds, or petunias for bursts of color. I like to plant in odd-numbered groups (3, 5, or 7 plants) for a natural, full look.
Water deeply after planting, then once a week for the first month to help roots establish. Once plants are settled, water every 10-14 days, depending on your climate. The logs create a microclimate that retains moisture, so you won’t need to water as often as with traditional beds. Watch for wilting leaves—that’s your cue to water more frequently.
Maintain for Long-Term Beauty
Remove spent blooms regularly to encourage more flowers and keep the bed looking tidy. Add 1-2 inches of fresh mulch each spring to replenish nutrients and suppress weeds. If any logs start to rot or shift, replace them—it’s easier than dealing with a collapsed bed later. I like to rotate a few plants each year to keep the color scheme fresh and prevent disease buildup.
This bed thrives on neglect, but a little care goes a long way. In fall, cut back dead foliage but leave seed heads for winter interest. The logs add structure, while the plants provide color—it’s a match made for easy gardening. You’ll have a showstopper that requires almost no effort after the initial setup.
Tips & tricks for perfect log cabin flower bed
Here's what nobody tells you about building a log cabin flower bed that actually thrives year-round.
Log Selection Wisdom: Cedar logs are my go-to because they resist rot and add that rustic charm, but if you can't find them, untreated pine works just as well. Look for logs that are straight but don't need to be perfect—just make sure they're at least 6 inches in diameter to stand up to seasonal weather. I've used logs up to 8 inches for extra stability in windy areas, especially if you're planting tall ornamental grasses along the sides.
Stability Secret: The 12-inch spacing at corners and 6-inch spacing along sides creates that classic cabin look while allowing room for plants to peek through. Here's the thing—if you're in a particularly windy area, reduce the corner spacing to 8-10 inches for extra stability. I learned this the hard way when a summer storm nearly tipped my first attempt! Also, burying the log ends 2-3 inches deep makes all the difference in preventing shifting over time.
Plant Placement Strategy: The odd-numbered groups (3, 5, or 7 plants) create that natural, full look we all want. For maximum impact, place your tallest plants—like ornamental grasses—along the inside of the logs where they'll be visible from all angles. The shorter perennials and annuals can fill the center, creating that layered effect. I like to stagger plant heights so there's always something blooming at eye level, no matter the season.
Watering Hack: The logs create a microclimate that retains moisture, which is why you can reduce watering to every 10-14 days after the initial establishment period. Here's my trick: water deeply in the morning so the soil has time to absorb moisture before the heat of the day. In extreme heat, I check the soil moisture by sticking my finger about 1 inch deep—if it feels dry, that's your cue to water. The wilting leaves mentioned in the instructions are your last warning sign before plants start to stress.
Pro Tips for Log Flower Bed
- Here's what nobody tells you about building a log cabin flower bed that actually thrives year-round.
- Log Selection Wisdom: Cedar logs are my go-to because they resist rot and add that rustic charm, but if you can't find them, untreated pine works just as well.
- Stability Secret: The 12-inch spacing at corners and 6-inch spacing along sides creates that classic cabin look while allowing room for plants to peek through.
Frequently asked questions
Got questions about creating a stunning log cabin-style flower bed?
You’re not alone! Here are some of the most common queries—plus quick, practical answers to help you nail that whimsical, low-maintenance charm without the headache.
What’s the best time of year to plant a log cabin flower bed?
For year-round color, start in early spring (after the last frost) or early fall (6–8 weeks before the first frost). Spring planting gives flowers time to establish roots before summer heat, while fall planting ensures blooms next spring. Pro tip: Mulch heavily in winter to protect tender plants!
How long does it take for a log cabin flower bed to look full and lush?
With proper care, you’ll see noticeable growth in 4–6 weeks, but full lushness takes 1–2 seasons. Fast-growing annuals (like petunias or zinnias) fill gaps quickly, while perennials (like coneflowers or black-eyed Susans) may take a year to bulk up. Patience pays off!
Is a log cabin flower bed more expensive than a traditional garden?
Not necessarily! While logs add upfront cost ($1–$3 per linear foot), they cut long-term expenses by reducing soil prep, mulch, and watering needs. Swap pricey logs for cedar scraps or salvaged wood, and opt for affordable perennials (like daylilies or coreopsis) to keep costs down.
How do I keep pests and diseases away from my log cabin flower bed?
Logs naturally deter slugs and snails (they hate crawling over rough surfaces!), but aphids or powdery mildew can still strike. Prevent issues with:
- Spaced plants (improves airflow)
- Neem oil for fungal spots
- Ladybugs or lacewings (natural pest control)
- Copper tape around logs to block slugs
Can I mix annuals and perennials in a log cabin flower bed?
Absolutely!
Annuals (like marigolds or impatiens) add bold pops of color and fill gaps, while perennials (like lavender or salvia) provide structure. Design tip: Place annuals in the front/middle tiers for quick impact, and perennials in the back or outer edges for height and longevity.
Wrapping up and next steps
Creating a log cabin flower bed is your ticket to a stunning, low-maintenance garden that bursts with color all year long! 🌸 With the right materials and a little creativity, you’ve got everything you need to transform your outdoor space into a charming, seasonal showstopper.
Whether you’re a gardening pro or just starting out, this design proves that beauty doesn’t have to mean hard work.
Now that you’re armed with tips and answers, roll up your sleeves and get planting! Start small if you’re unsure—pick a sunny spot, gather your supplies, and let your garden do the rest.
Before you know it, your log cabin flower bed will be the coziest, most inviting corner of your home. Happy gardening! 🌿✨