Flowers
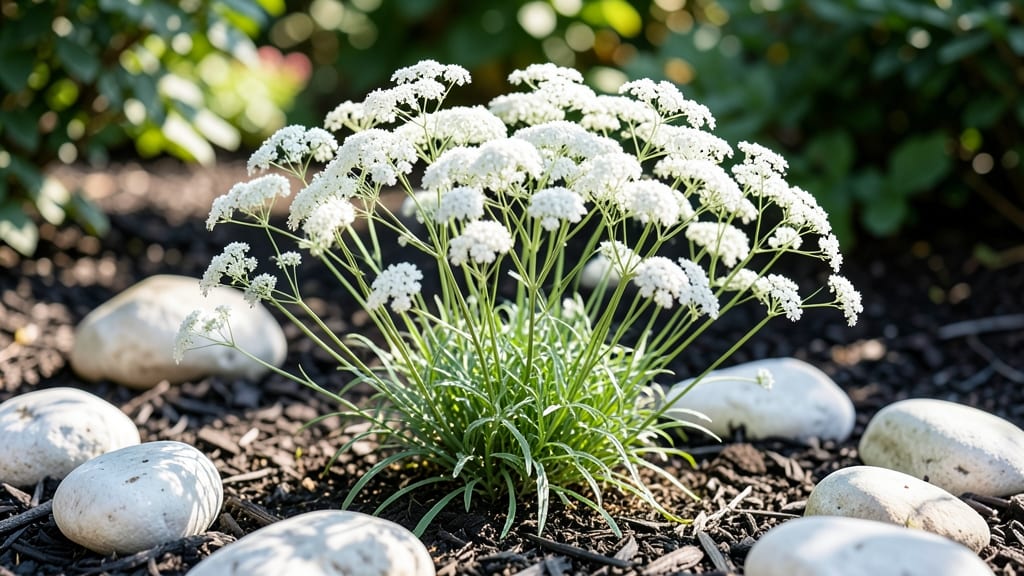
A white rock flower bed transforms your Pacific Northwest garden into a crisp, modern sanctuary that thrives through frost. The contrast of smooth river rocks against deep purple salvias or silvery lamb’s ears creates a striking visual that’s as easy to maintain as it is to admire.
I’ve designed mine to stay vibrant even after our heavy winter rains—no soggy soil or wilting blooms in sight.
The secret lies in pairing rocks with drought-tolerant perennials like catmint, blanket flower, and Russian sage—plants that love the well-draining conditions rocks create. Arrange larger rocks first as a base, then nestle smaller ones around plants to highlight their textures.
This method keeps weeds at bay while giving pollinators a welcoming stage all season long.
By summer, you’ll have a low-maintenance masterpiece where every bloom pops against the white backdrop. The rocks reflect light beautifully, making the garden feel brighter even on cloudy days. Plus, the design works year-round—frost-resistant plants stay green through winter, and the rocks prevent erosion from our rainy spells.
Whether you’re starting fresh or refreshing an existing bed, this approach adapts to any PNW yard. The key is balancing bold colors with the rocks’ clean lines—think hot pink penstemon or deep blue delphiniums to create drama without overwhelming the space. Let’s make your garden the talk of the neighborhood!
📚 In This Guide
- What you need
- Instructions
- Tips and common mistakes
- Wrapping up and next steps
What you need
- ● White rocks: 50–100 lbs (depending on bed size; 1–2" diameter for best texture)
- ● Native pollinator-friendly plants: Bee balm (Monarda spp.) – 3–5 plants
- ● Yarrow (Achillea millefolium) – 4–6 plants
- ● Lupine (Lupinus spp.) – 3–4 plants
- ● Sage (Salvia spp.) – 3 plants
- ● Soil amendments: Compost (2–3 bags, 40 lbs each)
- ● Organic mulch (cedar or pine, 1–2 bags)
- ● Tools: Garden shovel or spade
- ● Garden rake
- ● Wheelbarrow (for hauling rocks/soil)
- ● Gloves & knee pads
- ● Measuring tape (for layout)
- ● Edging materials: Flexible metal or plastic landscape edging (to define borders)
- ● Drip irrigation kit: For low-maintenance watering (especially in frost-prone zones)
- ● Decorative stakes or labels: To mark plant varieties
- ● Slow-release fertilizer: Organic option for nutrient boost (e.g., fish emulsion)
- ● Solar-powered lights: For evening ambiance
How to design a Pacific Northwest white rock flower bed for pollinators
Here's the straightforward approach I've used to create thriving, frost-hardy pollinator gardens in the PNW.
🪴 Step 1: Prepare the Base Layer with White Rocks
Start by laying down a 2-inch base layer of the white rocks across your designated flower bed area. This creates the signature look while improving drainage—critical in our wet winters. I like to use 1-2 inch diameter rocks for a clean, modern aesthetic that still allows plants to peek through.
Spread the rocks evenly, using about 12-15 rocks per square foot of bed space. Leave small gaps between rocks—these will become planting pockets later. For a natural look, arrange them in loose clusters rather than perfectly aligned rows. The white color reflects sunlight, keeping roots cooler during summer heatwaves.
Here's the thing—don't compact the rocks. You want them to stay loose so water can percolate through to the soil below. If you notice rocks settling too much after rain, add a few more to maintain that airy, open appearance.
🌱 Step 2: Create Planting Pockets and Choose Frost-Resistant Species
Dig small planting pockets between the rocks, about 4-6 inches deep and 6-8 inches wide. These pockets should reach down to the native soil level. I find a trowel works best for this—it gives you precise control without disturbing the rock arrangement too much.
For the Pacific Northwest climate, select plants that thrive in USDA zones 7-9 and tolerate 30-40°F nights. Good pollinator choices include Pacific coast iris, sword fern, salal, and western columbine. These plants will establish quickly and provide year-round interest while supporting bees and butterflies.
Real talk: Avoid delicate annuals that won't survive our winters. The plants you choose here will determine how low-maintenance your bed becomes—native species need far less water and care once established.
☀️ Step 3: Layer Soil and Mulch for Moisture Retention
Fill each planting pocket with a 50/50 mix of native soil and compost. This blend improves drainage while providing nutrients. I like to add a handful of slow-release organic fertilizer to each pocket to give plants a strong start. Press the soil gently around each plant's roots to eliminate air pockets.
After planting, spread a 1-inch layer of wood chips or bark mulch over the remaining exposed soil between rocks. This helps regulate soil temperature and reduces evaporation. The mulch should cover the soil surface completely but not touch plant stems. For a clean look, use a leaf rake to spread it evenly.
Don't skip this step—proper mulching is what makes PNW gardens thrive. Without it, your soil will dry out too quickly in summer and stay too cold in winter, stressing your plants unnecessarily.
💧 Step 4: Water Deeply and Establish a Maintenance Routine
Water each newly planted pocket deeply until water appears at the bottom of the pocket. This ensures roots establish properly in the new environment. I water once weekly for the first month, then taper to every 10-14 days once plants are established, depending on rainfall.
The key with white rock beds is deep but infrequent watering. Shallow watering encourages roots to stay near the surface, making plants more vulnerable to temperature fluctuations. After watering, check that excess water drains away from plant bases—poor drainage is the #1 killer of rock garden plants.
Once established, your white rock flower bed will require minimal maintenance. Remove spent blooms in late summer to encourage new growth, and replenish mulch annually. The rocks themselves will need occasional rearrangement if they shift with seasonal ground movement.
Tips & tricks for perfect white rock flower beds
Creating a stunning white rock flower bed that thrives in the Pacific Northwest takes a few key insights I've learned the hard way. Here's what makes all the difference between a pretty rock garden and one that truly supports pollinators year-round.
Rock Selection Matters: While any smooth white rocks will work, look for ones with slightly textured surfaces—they provide better grip for plant stems and reduce erosion from rain. I've found that 1.5-2 inch diameter rocks create the perfect balance between aesthetic appeal and drainage. For extra stability, choose rocks with some weight to them; lighter rocks shift more with seasonal ground movement and can smother plants over time.
Plant Placement Strategy: When creating those 4-6 inch deep planting pockets in Step 2, position them slightly off-center between rocks rather than directly below them. This creates natural pathways for water to flow during heavy rain while keeping roots cooler. For plants like Pacific coast iris that spread, leave extra space—up to 12 inches between pockets—to give them room to establish their rhizomes without competing with neighbors.
Soil Mix Secret: That 50/50 mix of native soil and compost in Step 3 should actually be 40% native soil, 40% compost, and 20% perlite or pumice for even better drainage. The extra perlite prevents compaction around roots, which is especially important in our wet climate. I also add a handful of worm castings to each pocket—they're packed with beneficial microbes that help plants establish faster in our cool, damp conditions.
Winter Protection Tip: For the first winter after planting, add an extra 2-3 inch layer of mulch around your plants in late fall. This creates an insulating blanket that protects roots from temperature swings between 30-40°F nights and daytime warmth. In particularly harsh winters, you can also drape lightweight frost cloth over the entire bed during extreme cold snaps—just make sure to remove it during the day to prevent overheating.
Pro Tips for White Rock Flower Bed
- Creating a stunning white rock flower bed that thrives in the Pacific Northwest takes a few key insights I've learned the hard way.
- Rock Selection Matters: While any smooth white rocks will work, look for ones with slightly textured surfaces—they provide better grip for plant stems and reduce erosion from rain.
- Plant Placement Strategy: When creating those 4-6 inch deep planting pockets in Step 2, position them slightly off-center between rocks rather than directly below them.
Frequently asked questions
Got questions about creating or maintaining a white rock flower bed in your Pacific Northwest garden? Here are some common ones—and their answers—to help you get started!
What’s the best time of year to plant a white rock flower bed?
Plant your frost-resistant flowers in early spring (March–April) or late summer (August–September) for optimal root establishment. Spring planting gives blooms time to thrive before winter, while late summer avoids heat stress. For perennials like Lavender or Yarrow, fall planting (September–October) is ideal—just ensure soil isn’t frozen.
How do I choose the right white rocks for my flower bed?
Opt for local, rounded river rocks or crushed granite (1–3 inches in diameter) to mimic the Pacific Northwest’s natural landscapes. Avoid sharp edges that could harm roots or deter pollinators. White quartz or limestone adds contrast, but ensure they’re frost-resistant (test by dropping a rock in water—if it fizzes, it’s limestone and may erode over time).
Which white-flowering plants attract pollinators but survive PNW winters?
Try these pollinator magnets:
- White Yarrow (Achillea millefolium) – Drought-tolerant, blooms June–September.
- Pacific Coast Iris (Iris tenax) – Thrives in wet winters, fragrant blooms.
- White Foxglove (Digitalis purpurea) – Biennial but self-seeds easily.
- Sea Thrift (Armeria maritima) – Salty-air tolerant, blooms spring–summer.
How do I protect my flower bed from heavy PNW rains?
Improve drainage with a 3–4 inch gravel base beneath rocks, and slope the bed slightly (1–2% grade) to funnel water away. Use mulch (cedar chips or straw) around plants to prevent soil erosion. For containerized plants, elevate pots on feet or bricks to avoid soggy roots. Drainage holes in pots are a must!
What can I do if my white rocks keep shifting or sinking into the soil?
Stabilize them with a landscape fabric layer (cut to fit under rocks) to block weeds while allowing drainage. For sinking issues, add a layer of hard-core gravel (¾ inch) beneath the fabric before placing rocks. Edging with bricks or metal (like landscape edging) keeps rocks in place long-term.
Pro Tip:
For a low-maintenance look, group 3–5 plants per square foot and leave gaps for rocks. This mimics wildflower meadows while keeping weeds at bay. Water deeply but infrequently—once a week in summer—to encourage deep root growth.
Wrapping up and next steps
Creating a white rock flower bed in your Pacific Northwest garden isn’t just about aesthetics—it’s a functional, low-maintenance haven for pollinators and frost-resistant blooms. 🌸 With the right plants, rocks, and design tips, you’ve got a stunning, resilient space that thrives year-round.
Whether you’re a seasoned gardener or just starting out, this project is achievable and rewarding.
Now that you’re armed with the materials, FAQs, and inspiration, it’s time to roll up your sleeves! Start small—pick a sunny or partially shaded spot—and let your creativity bloom. Happy gardening! 🌿